 Instead of problems with water getting in when it rains, now we have a problem with water leaking from the waste now one of the sinks is plumbed in. Of course the pipes were behind kitchen units that had already been installed so we had to pull lots out to sort it and find the crack. Looks like someone leaned on a pipe hard at some point during the pipes going in. A hacksaw and some new bits and it’s sorted.
Archive for the ‘General’ Category
Mar
15
2009
More water problems with the log house
Published by in General
Mar
12
2009
Path laying on the cedar log house
Published by in General
We went a bit overboard with our path laying. We dug a trench, put some “Teram” down, put a layer of crushed concrete, then topped this with fine crushed concrete, created a concrete bed, then layed mortar and the paving slabs on that.
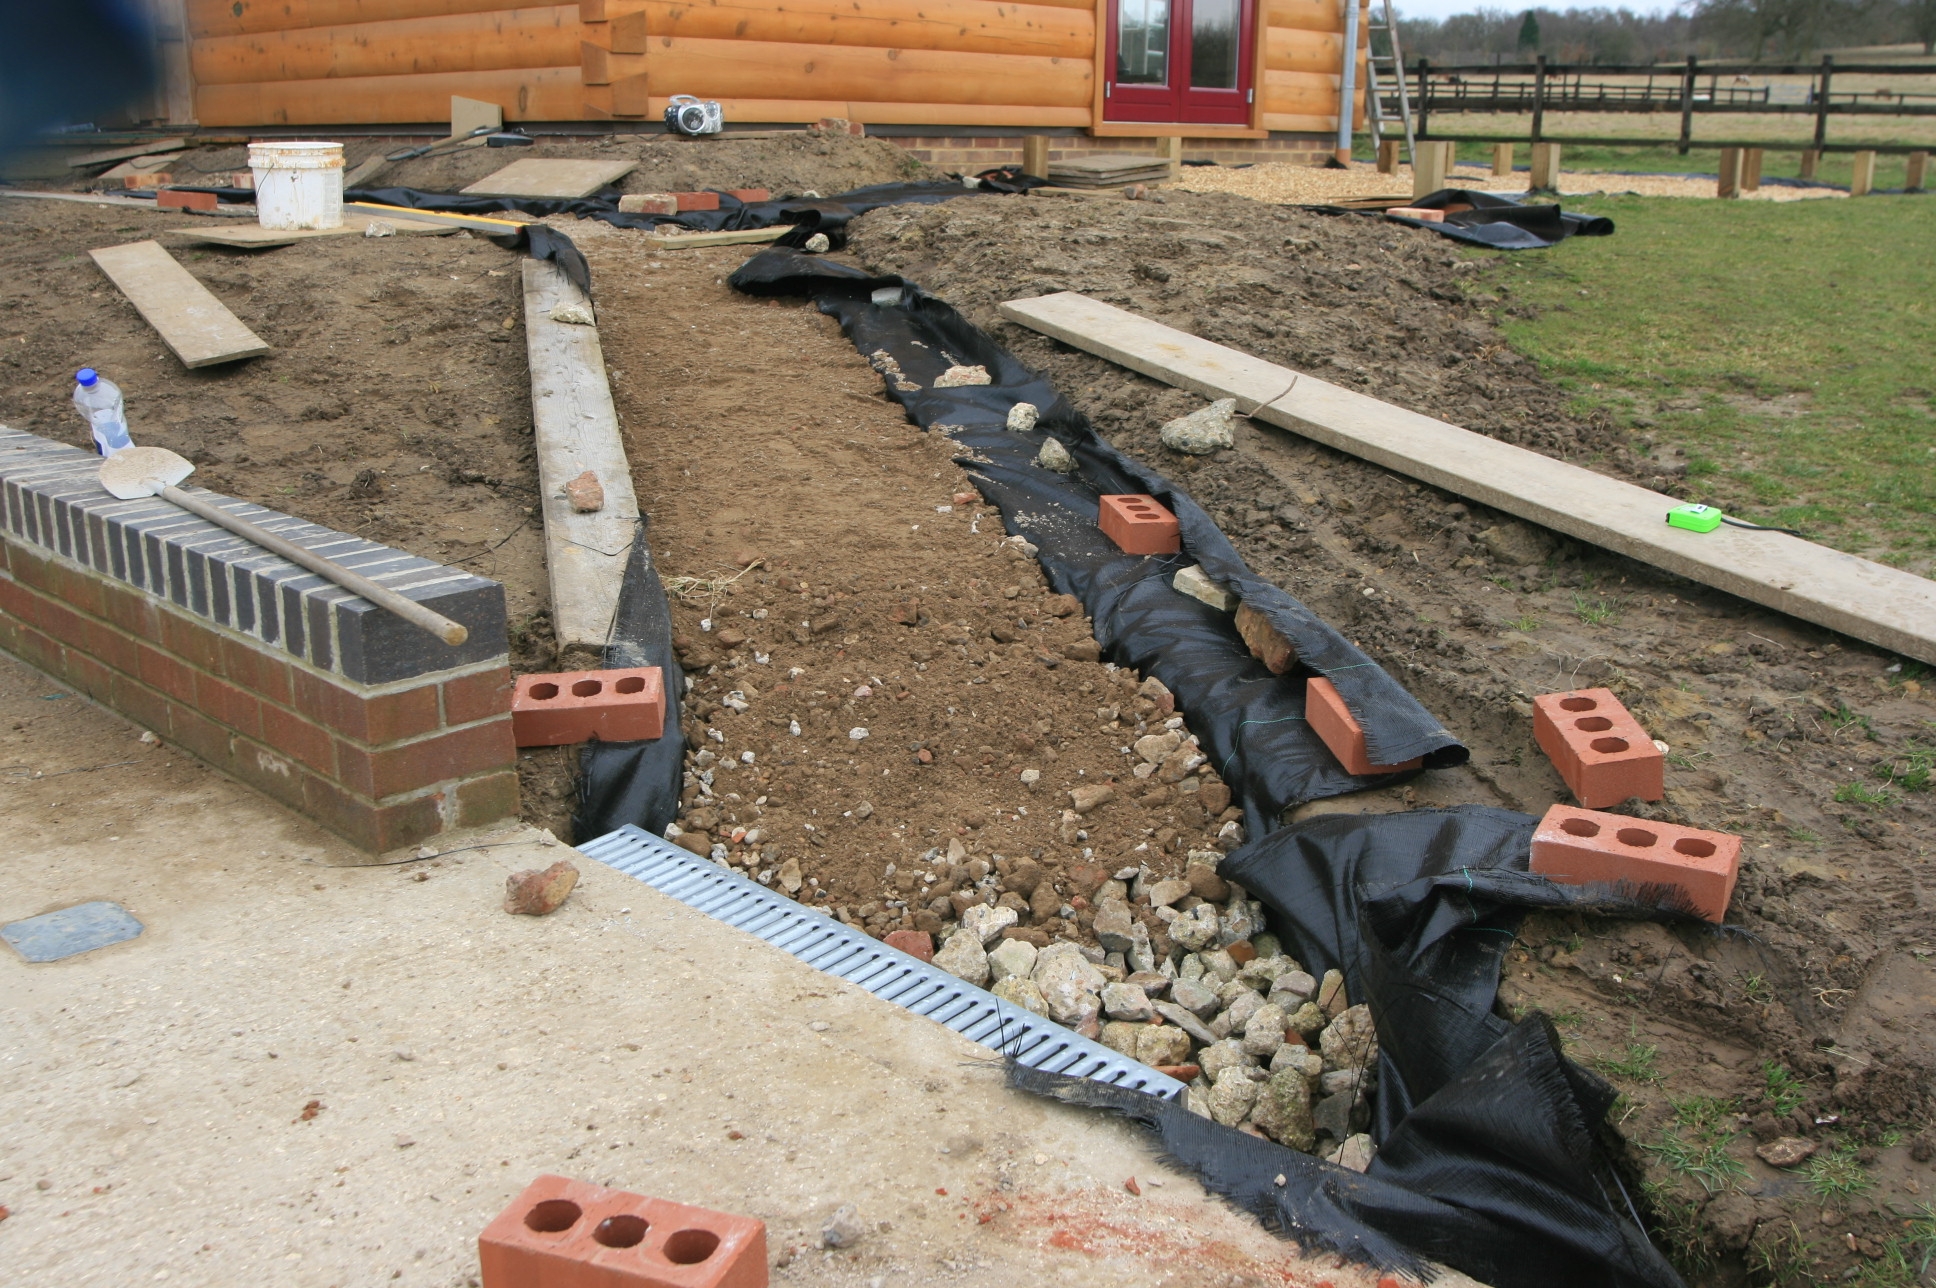 We also put some drainage channel at the ends of some of the paths.
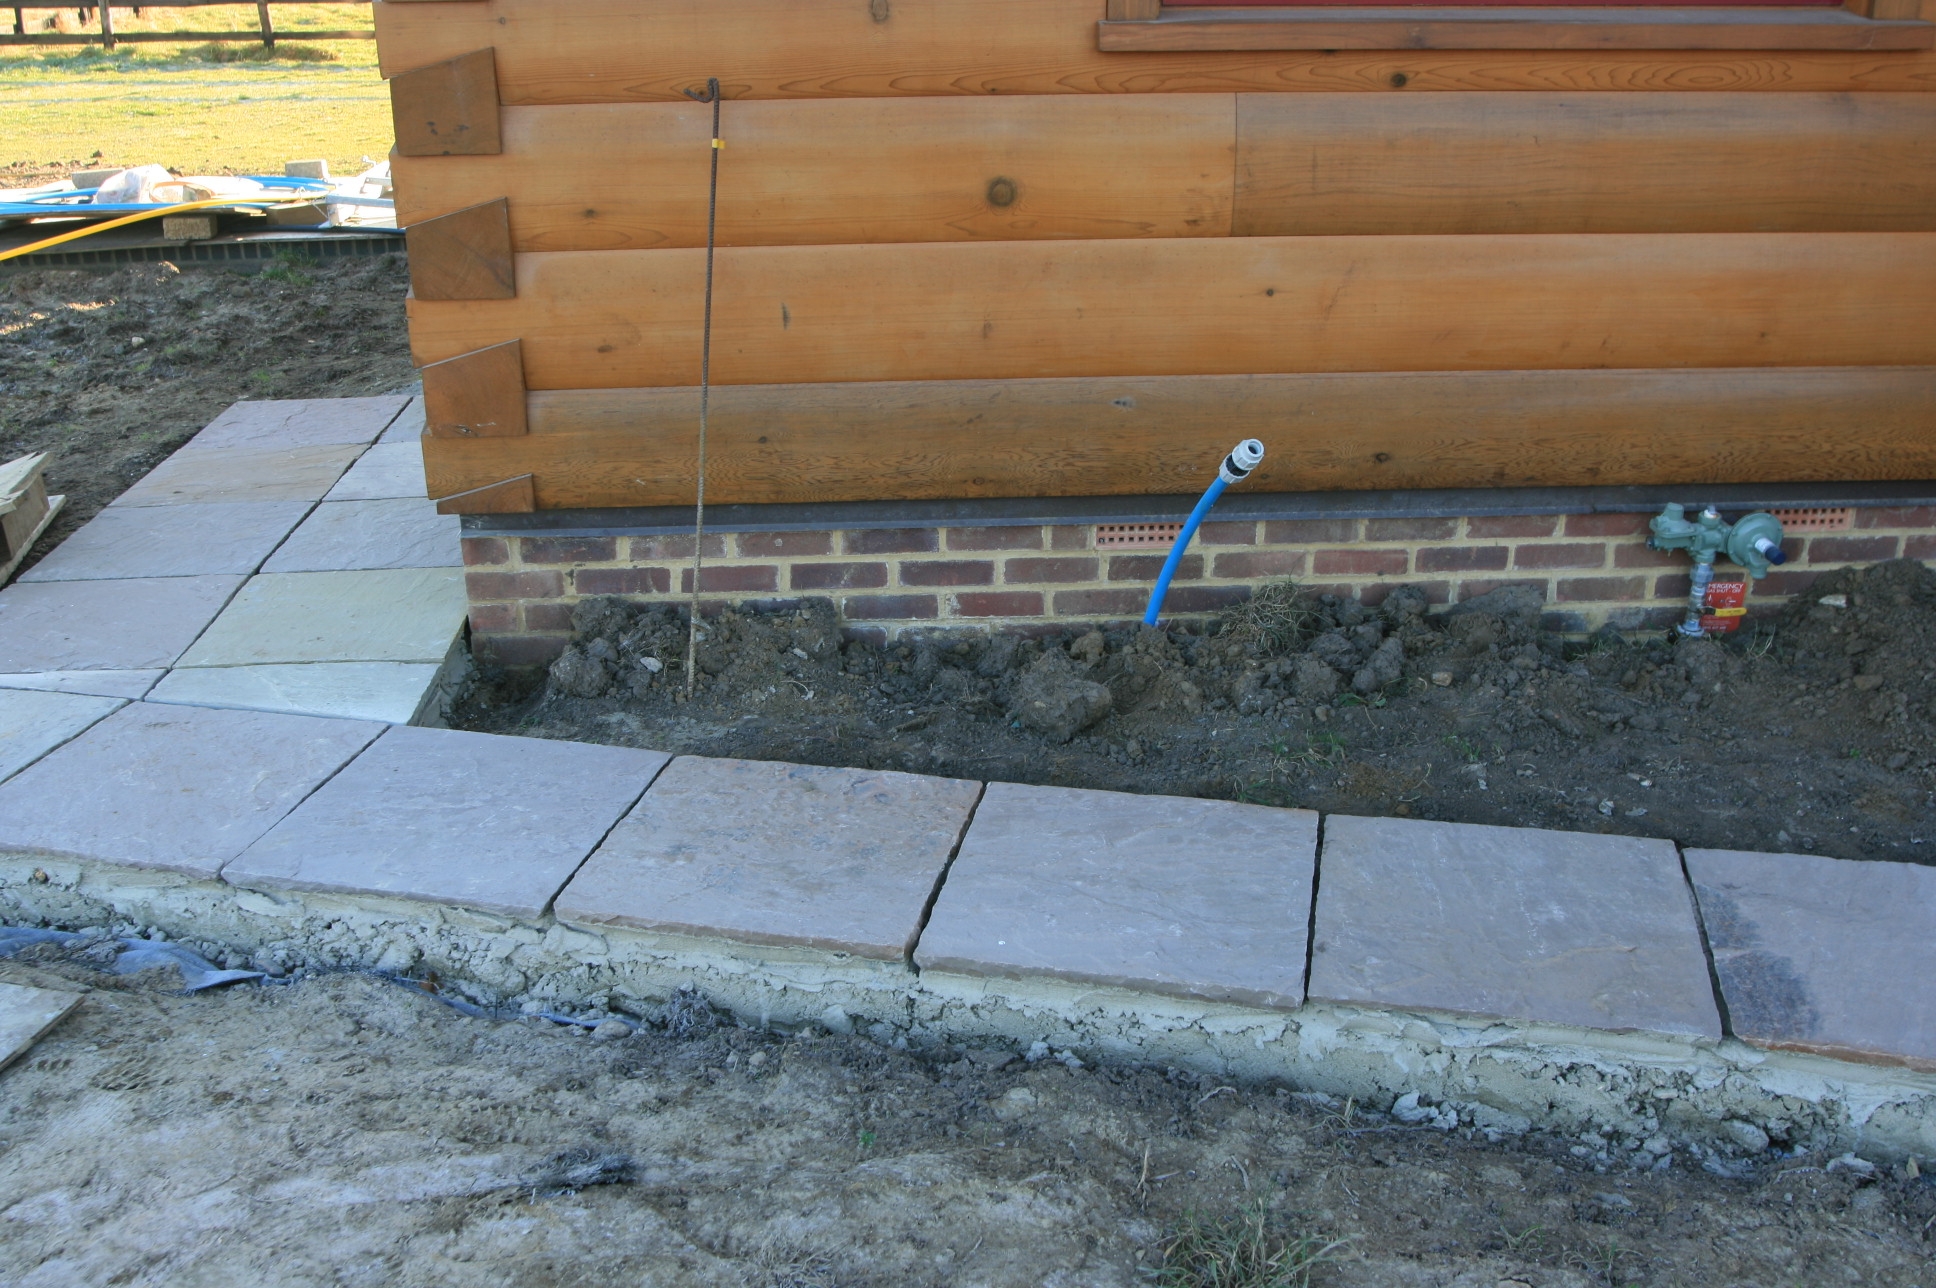 However the finished path (still got to grout it and make up the soil to the same level) looked pretty good. A labour intensive job, with not much material cost but worth the time.
Mar
10
2009
Electrical Fittings in the Log House
Published by in General
We are on the home run now, but there seems an ever increasing amount of detail to be done. Fortunately we got all our electrical fittings sorted and ordered some months back so they can all now be put in place.
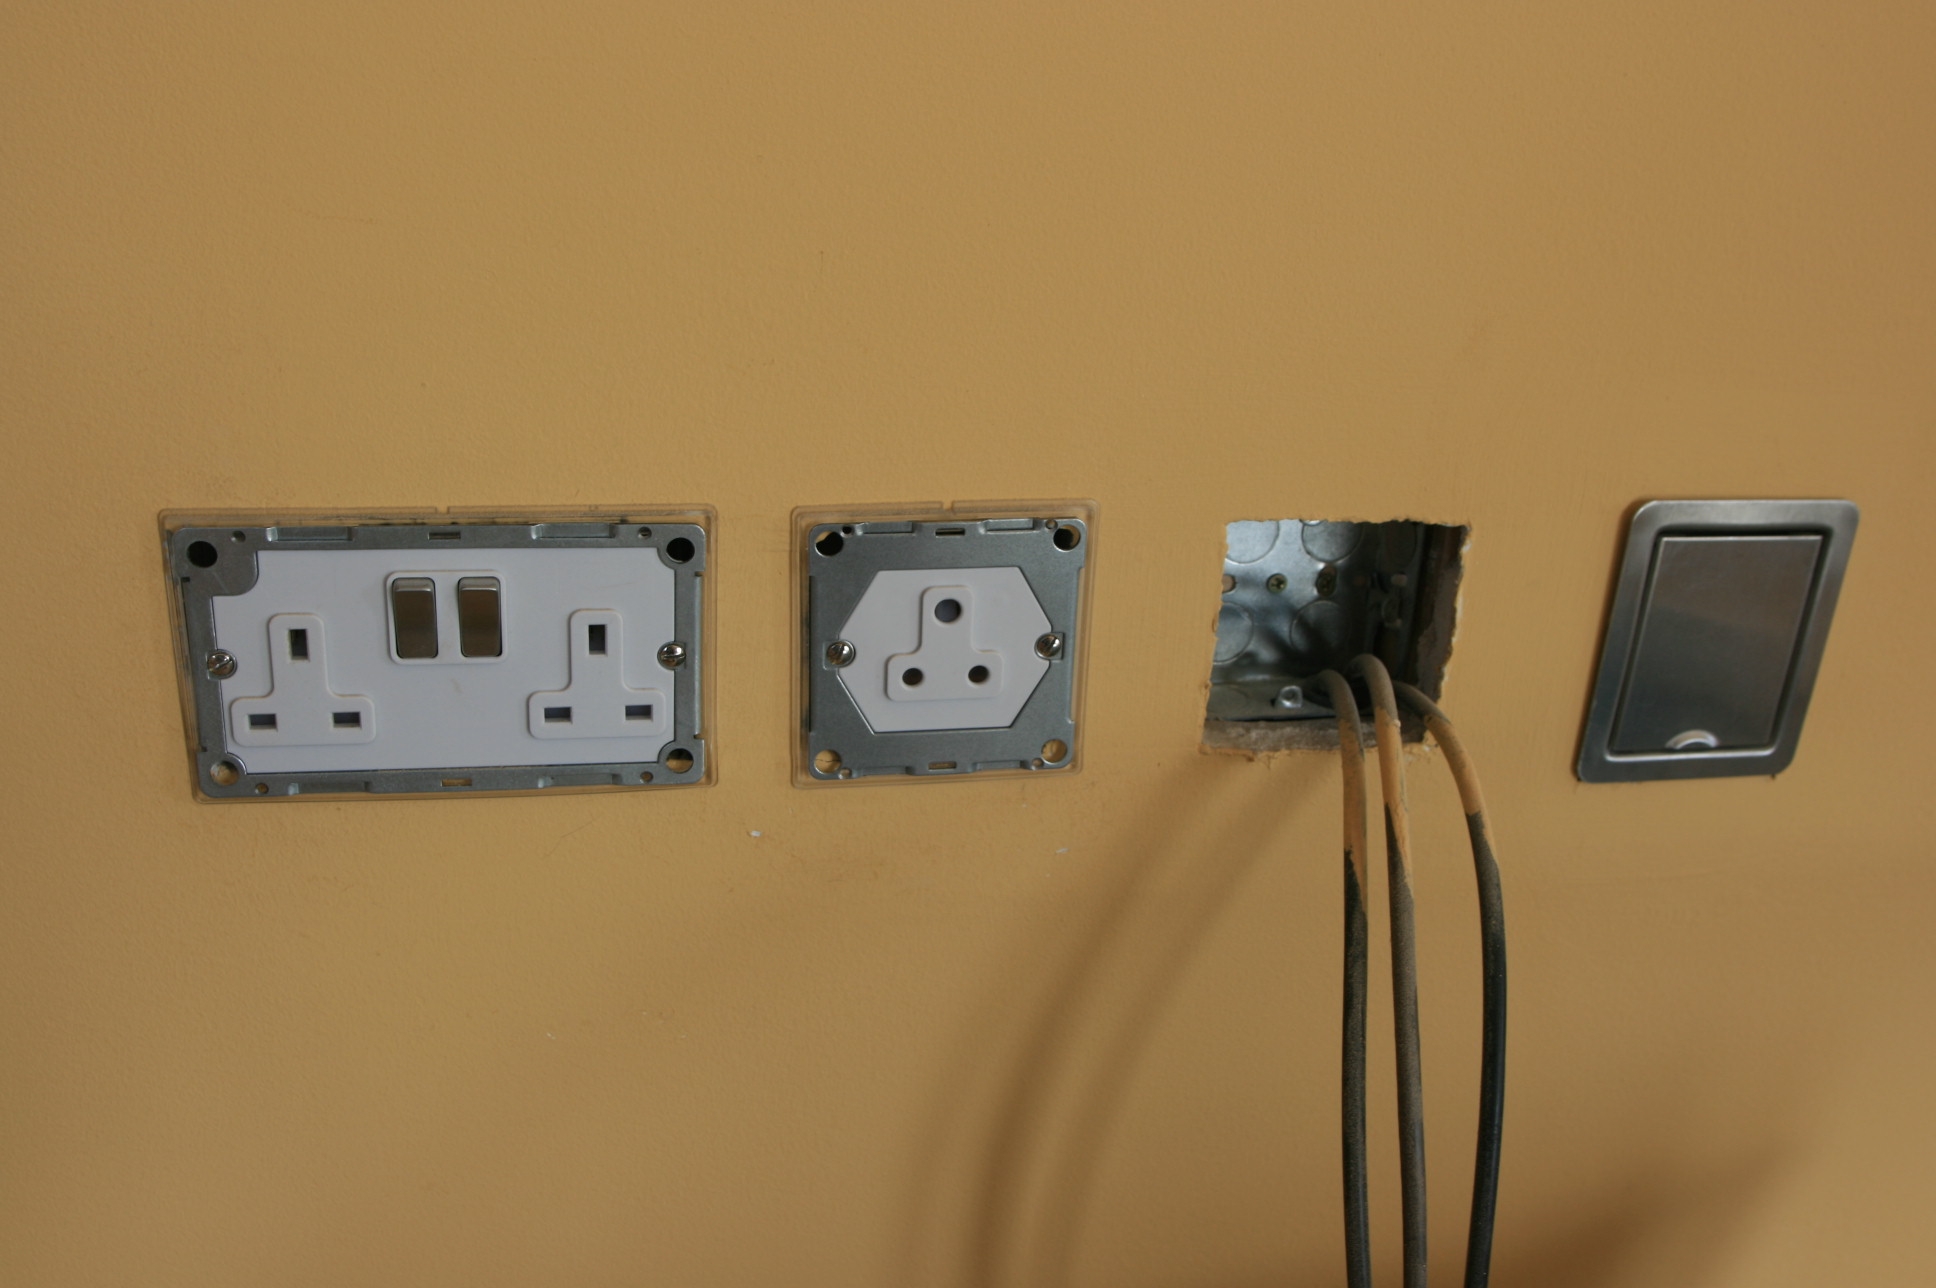 Here are some of our lovely Hamilton switches being set in place. We have a brushed chrome or stainless theme throughout the house and here are 13 amp sockets, TV and Cat 5.
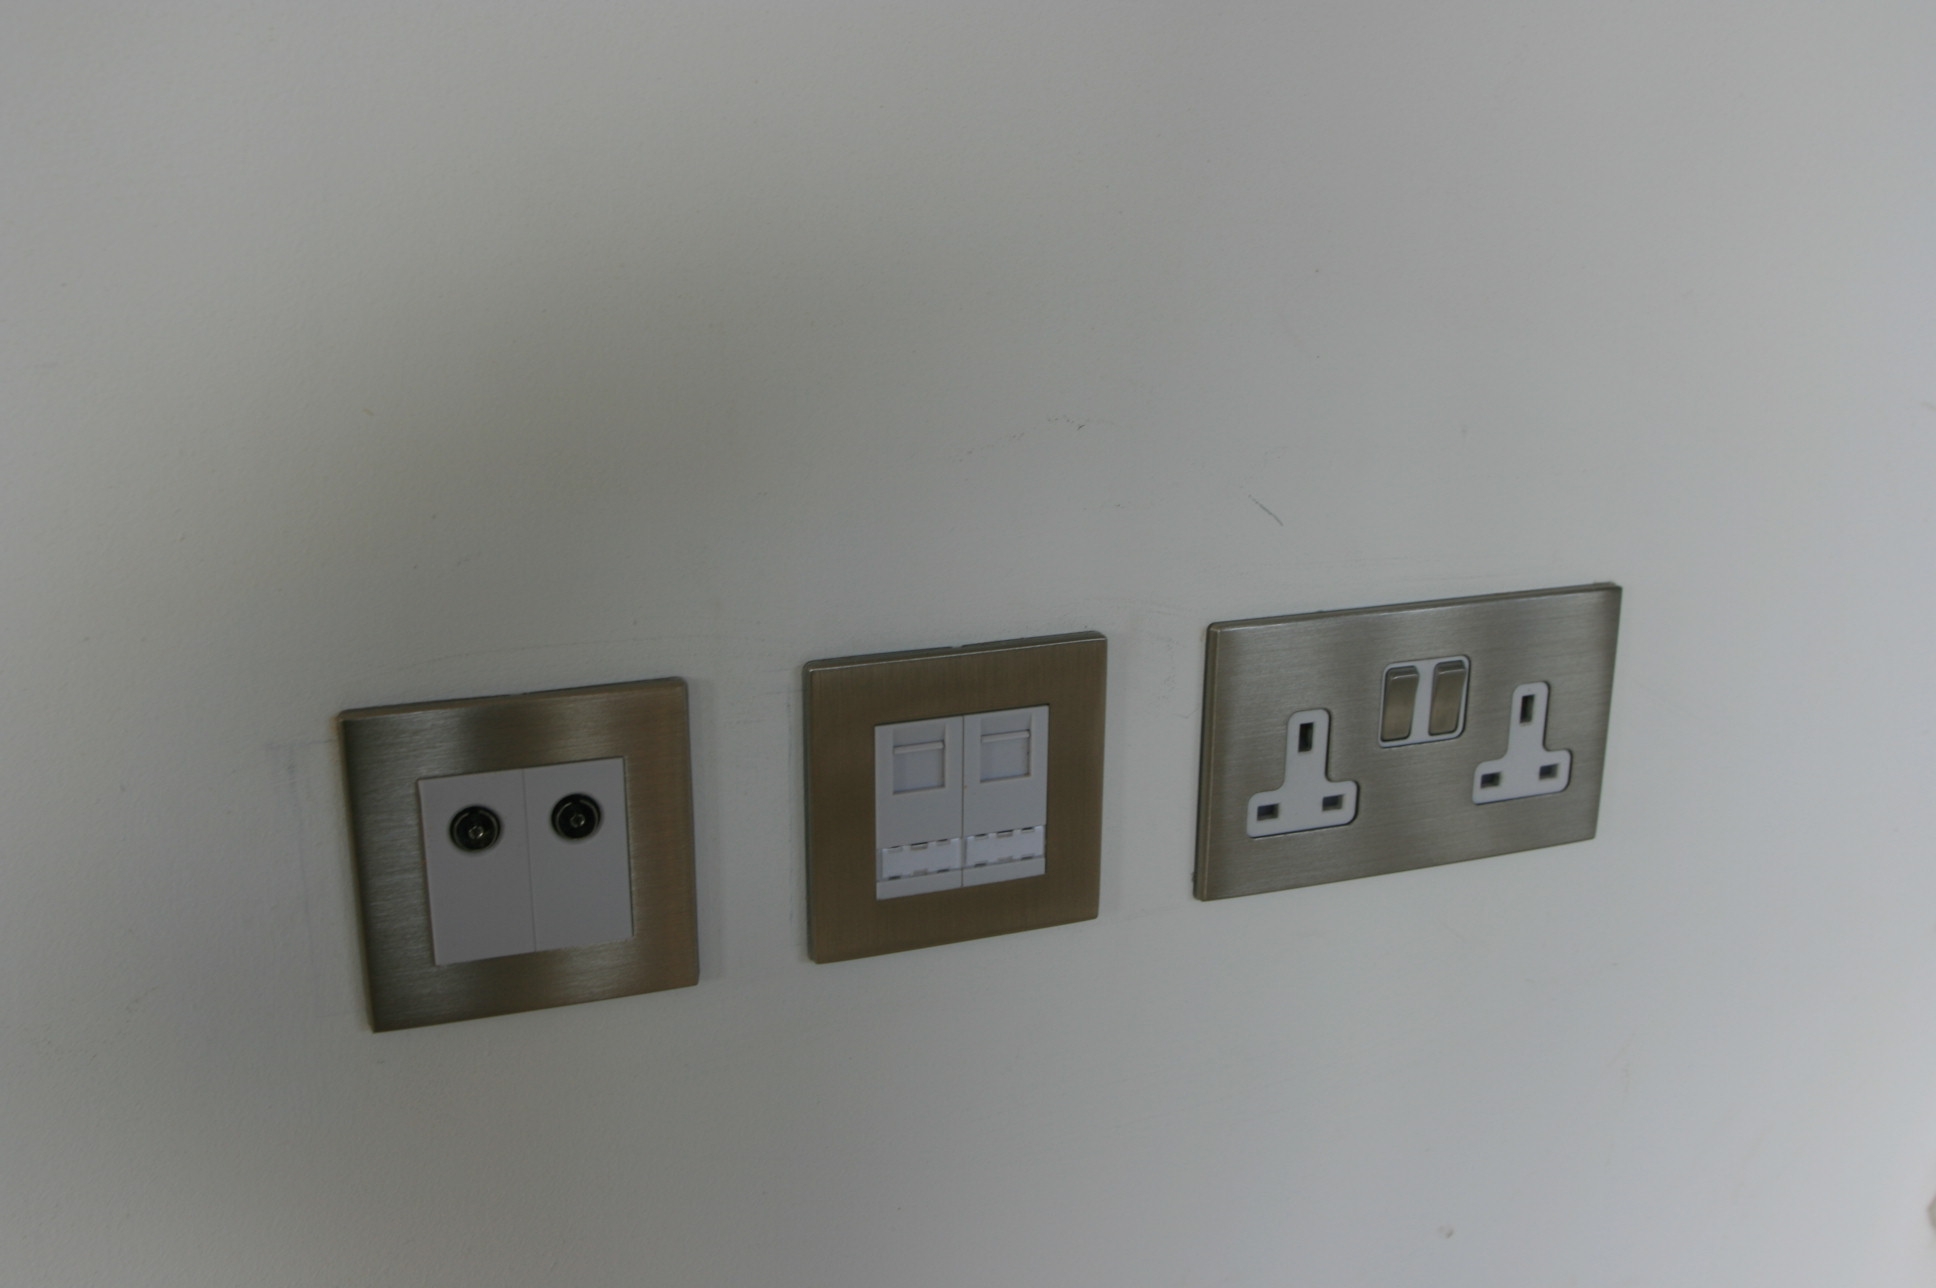 And here they are with their face plates on. We like the clean crisp styling.
![]() And in case you want to see, here is the back of a light switch as it goes in. This one is cut into the log face inside the house.
And in case you want to see, here is the back of a light switch as it goes in. This one is cut into the log face inside the house.
Feb
27
2009
Kitchen ahoy
Published by in General
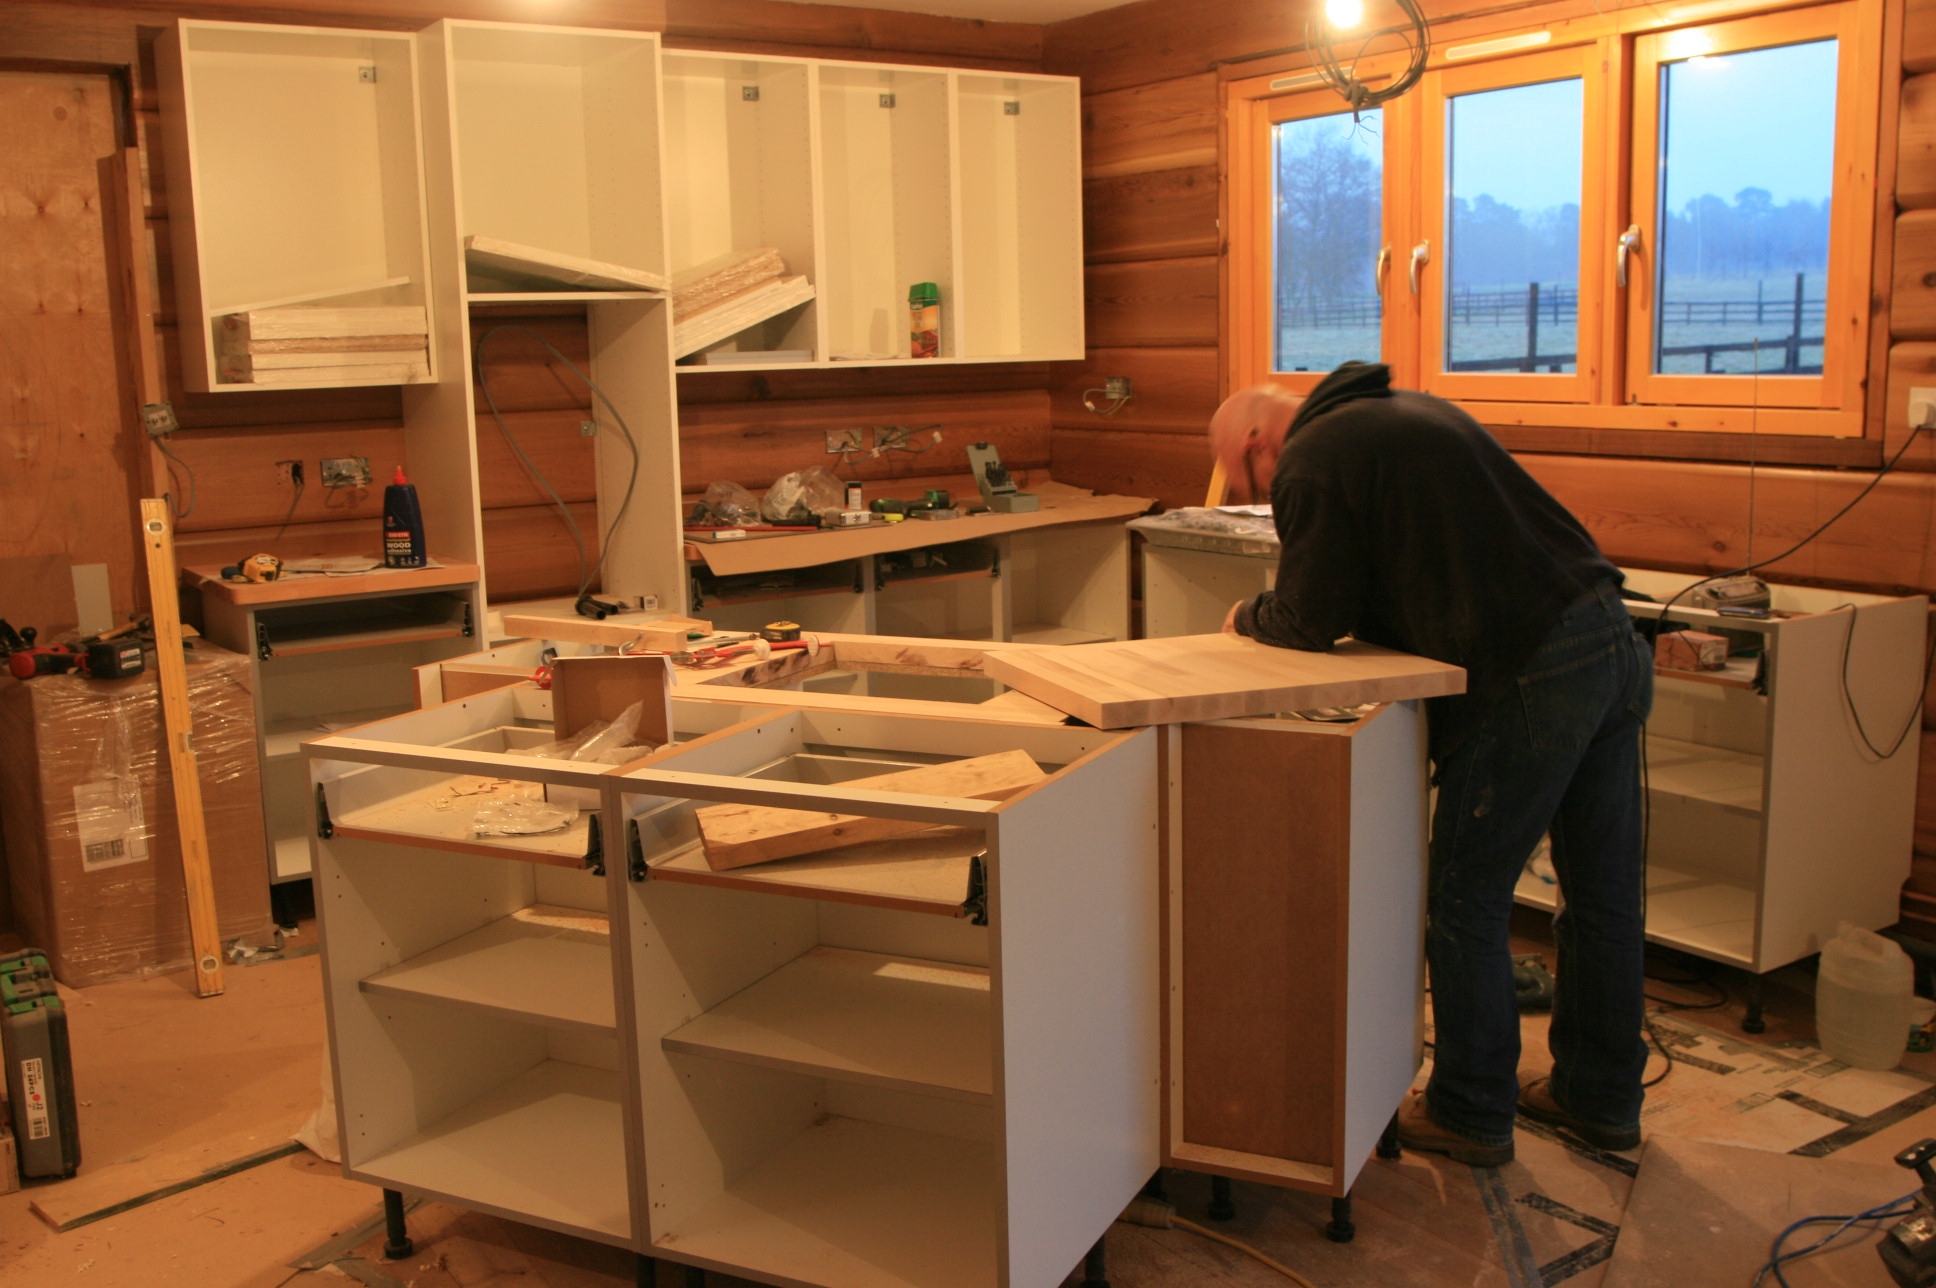 Another “milestone” event in the house construction is the commencement of work on the kitchen. We started on the utility room which has a number of conventional kitchen units in it, and then “progressed” to the kitchen. This has an island unit for the hob and we have varied the levels because the ergonomic rule book suggests that worktops, sinks and hobs should all be at different heights!
More pictures as the work progresses!
Feb
23
2009
A Larder in the log house
Published by in General
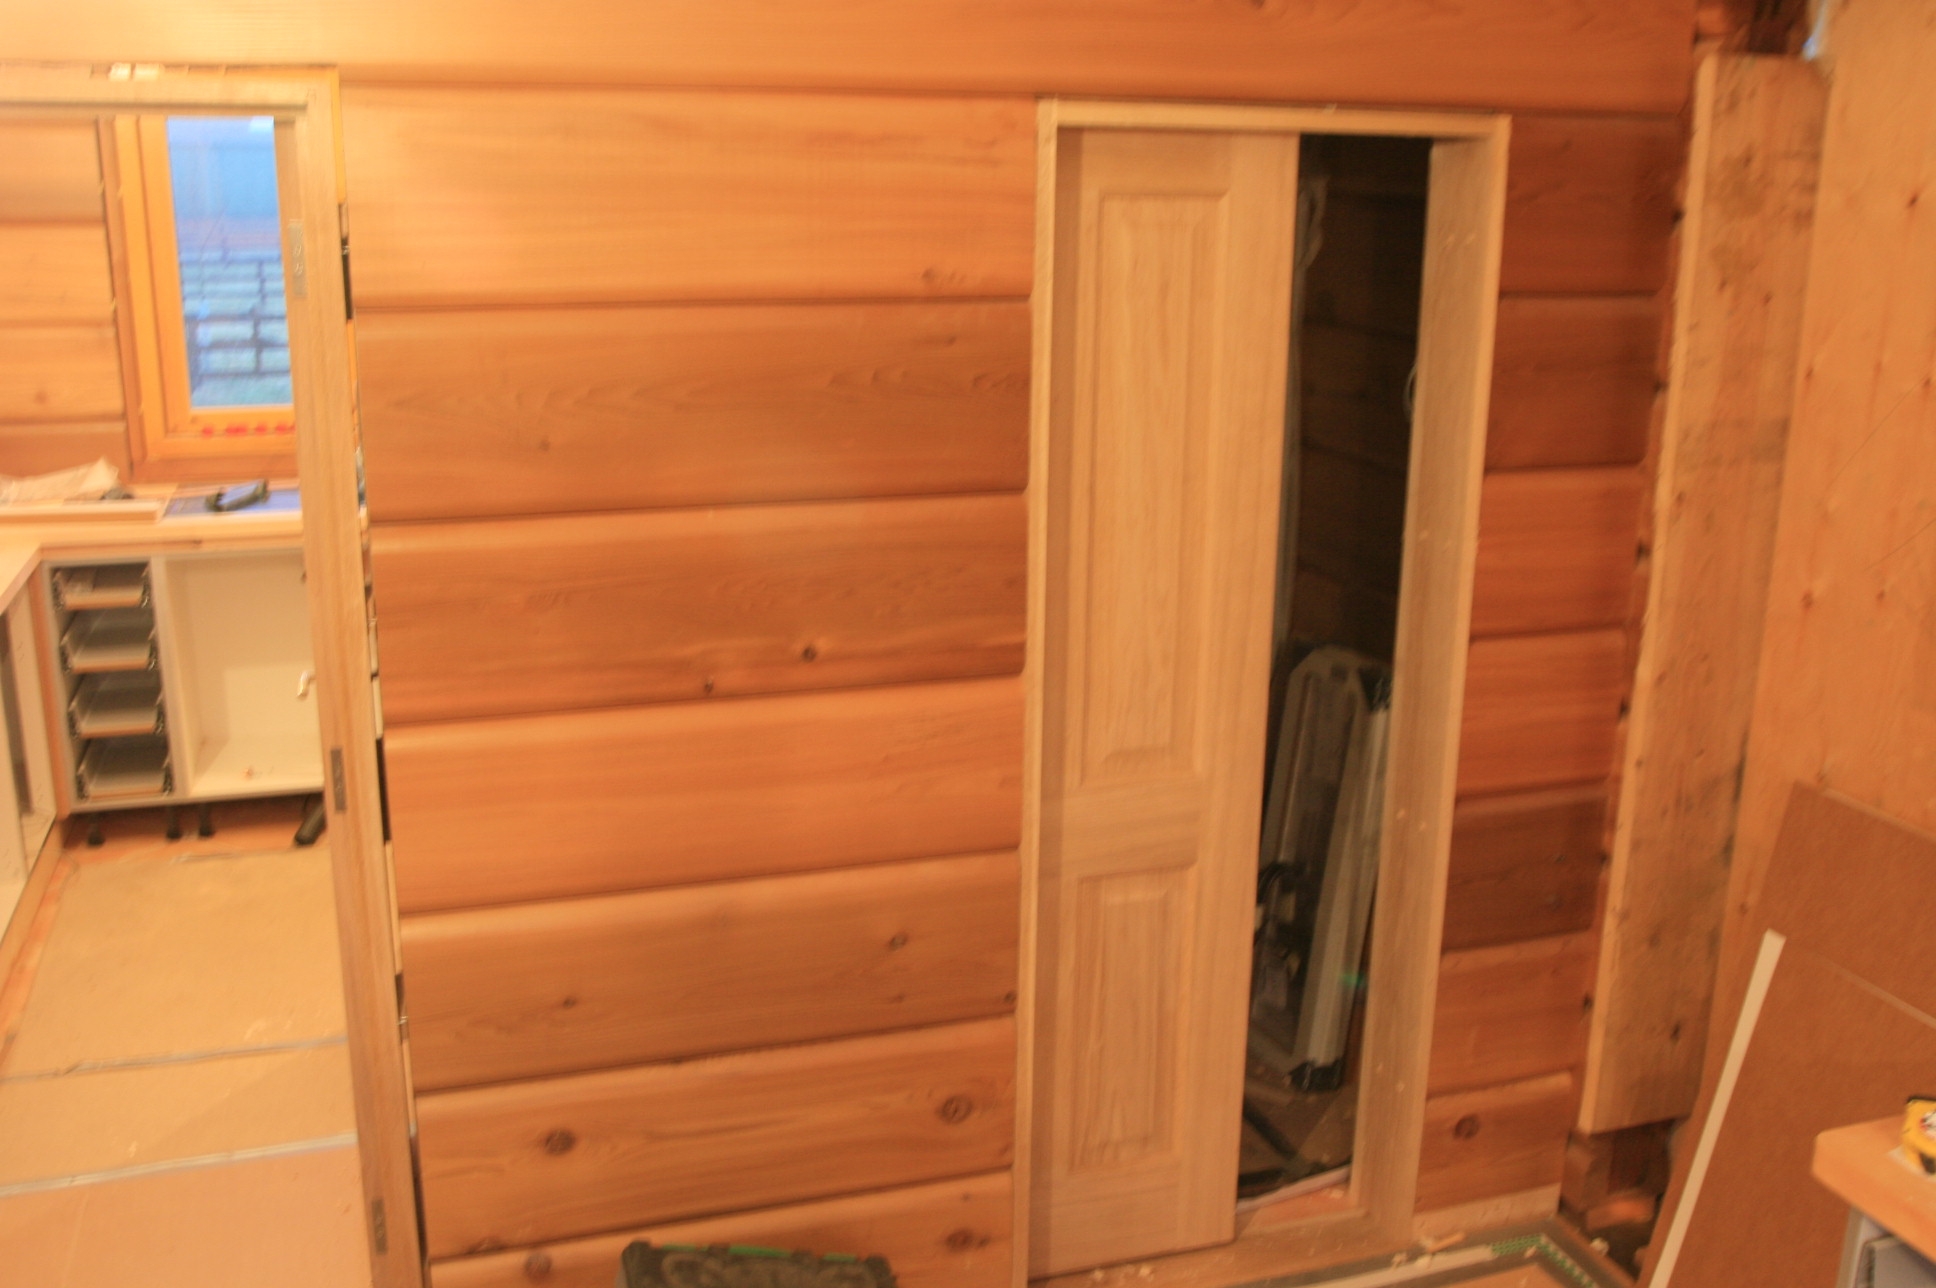
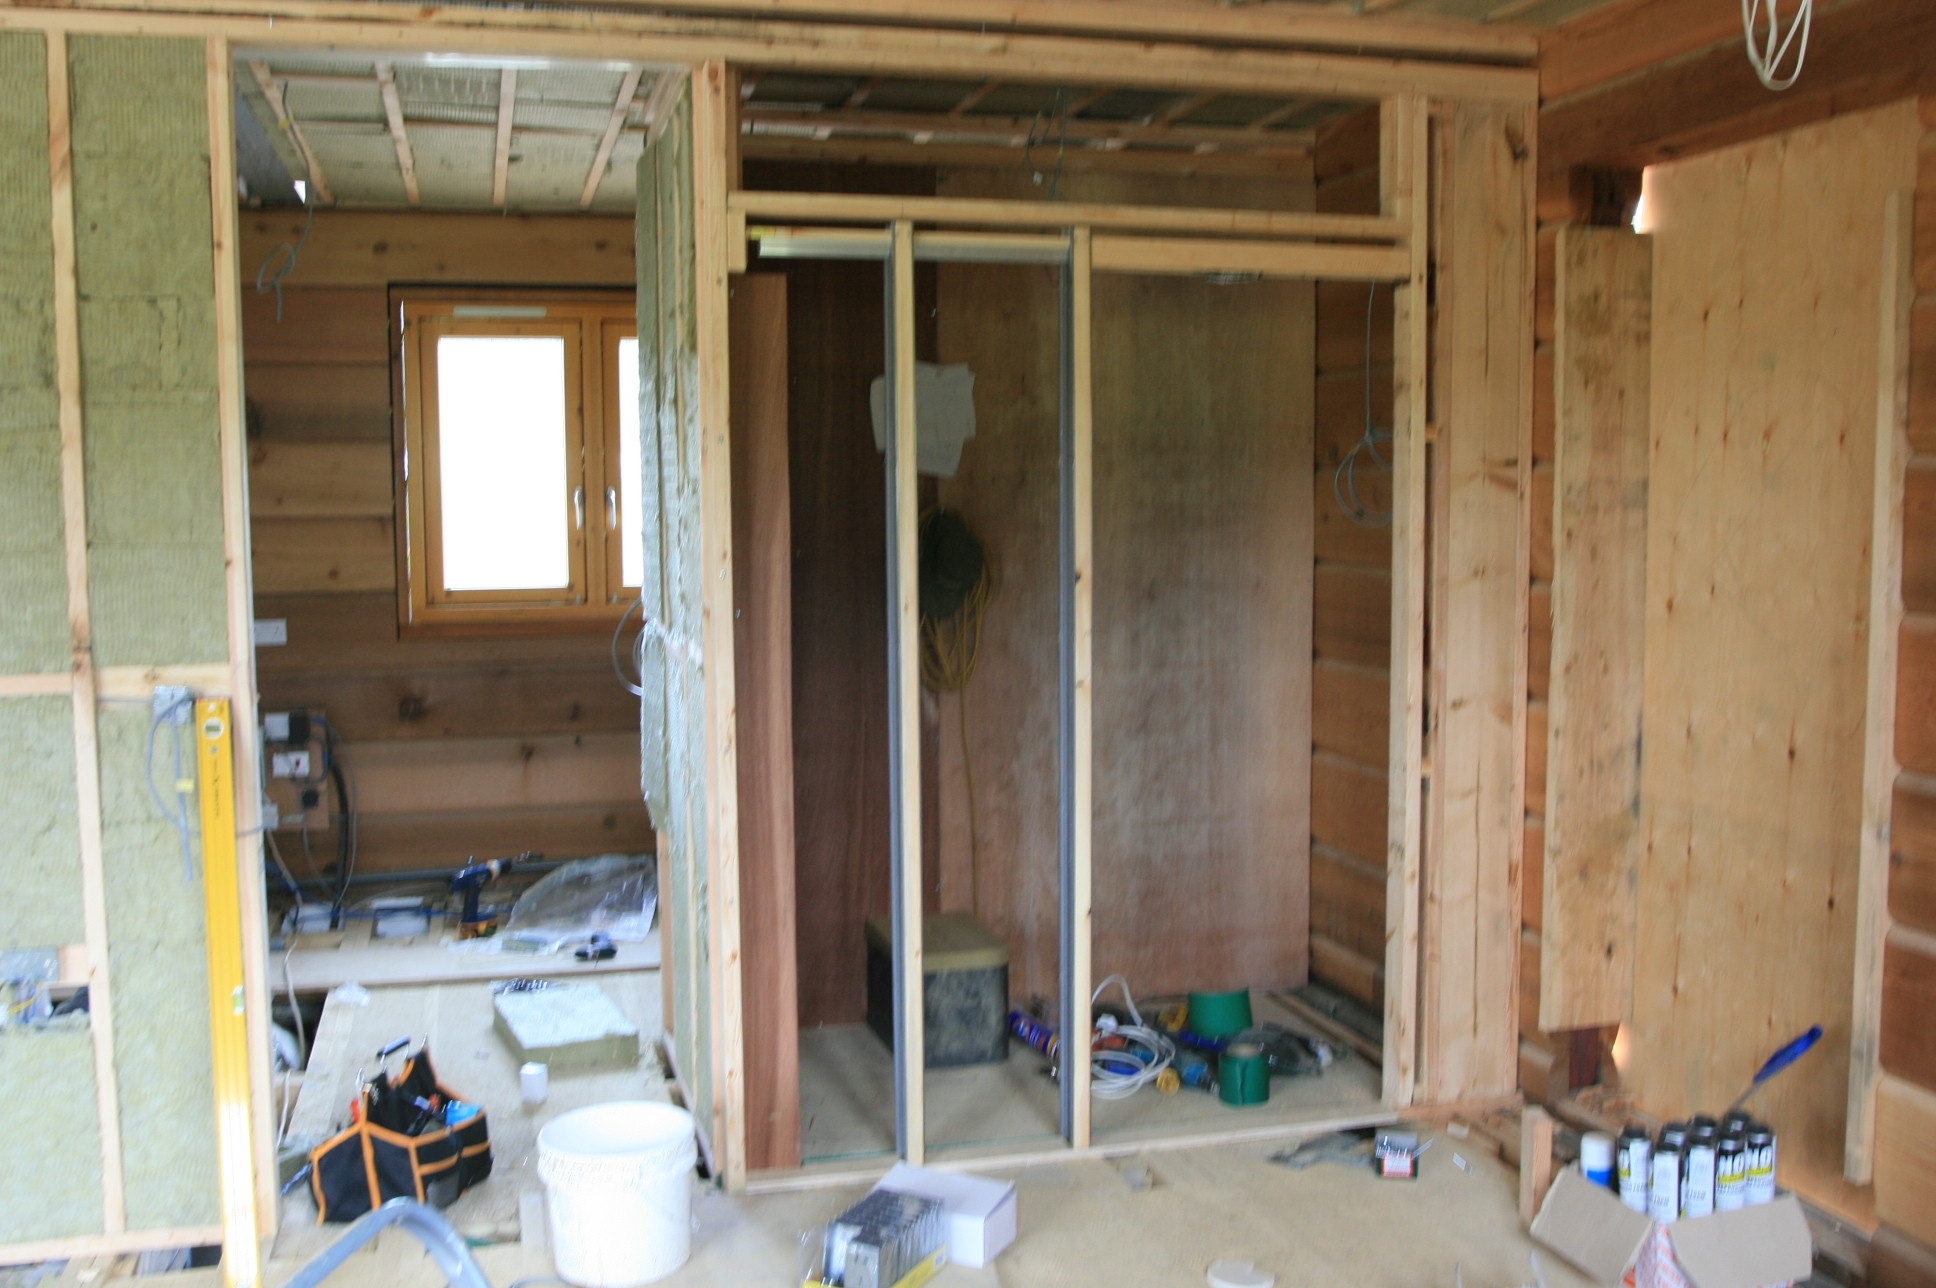 As our house was limited in the size it could be due to planning constrictions, we “invested” some space in a larder. To minimize it’s impact in the limited kitchen space a sliding door was designed.
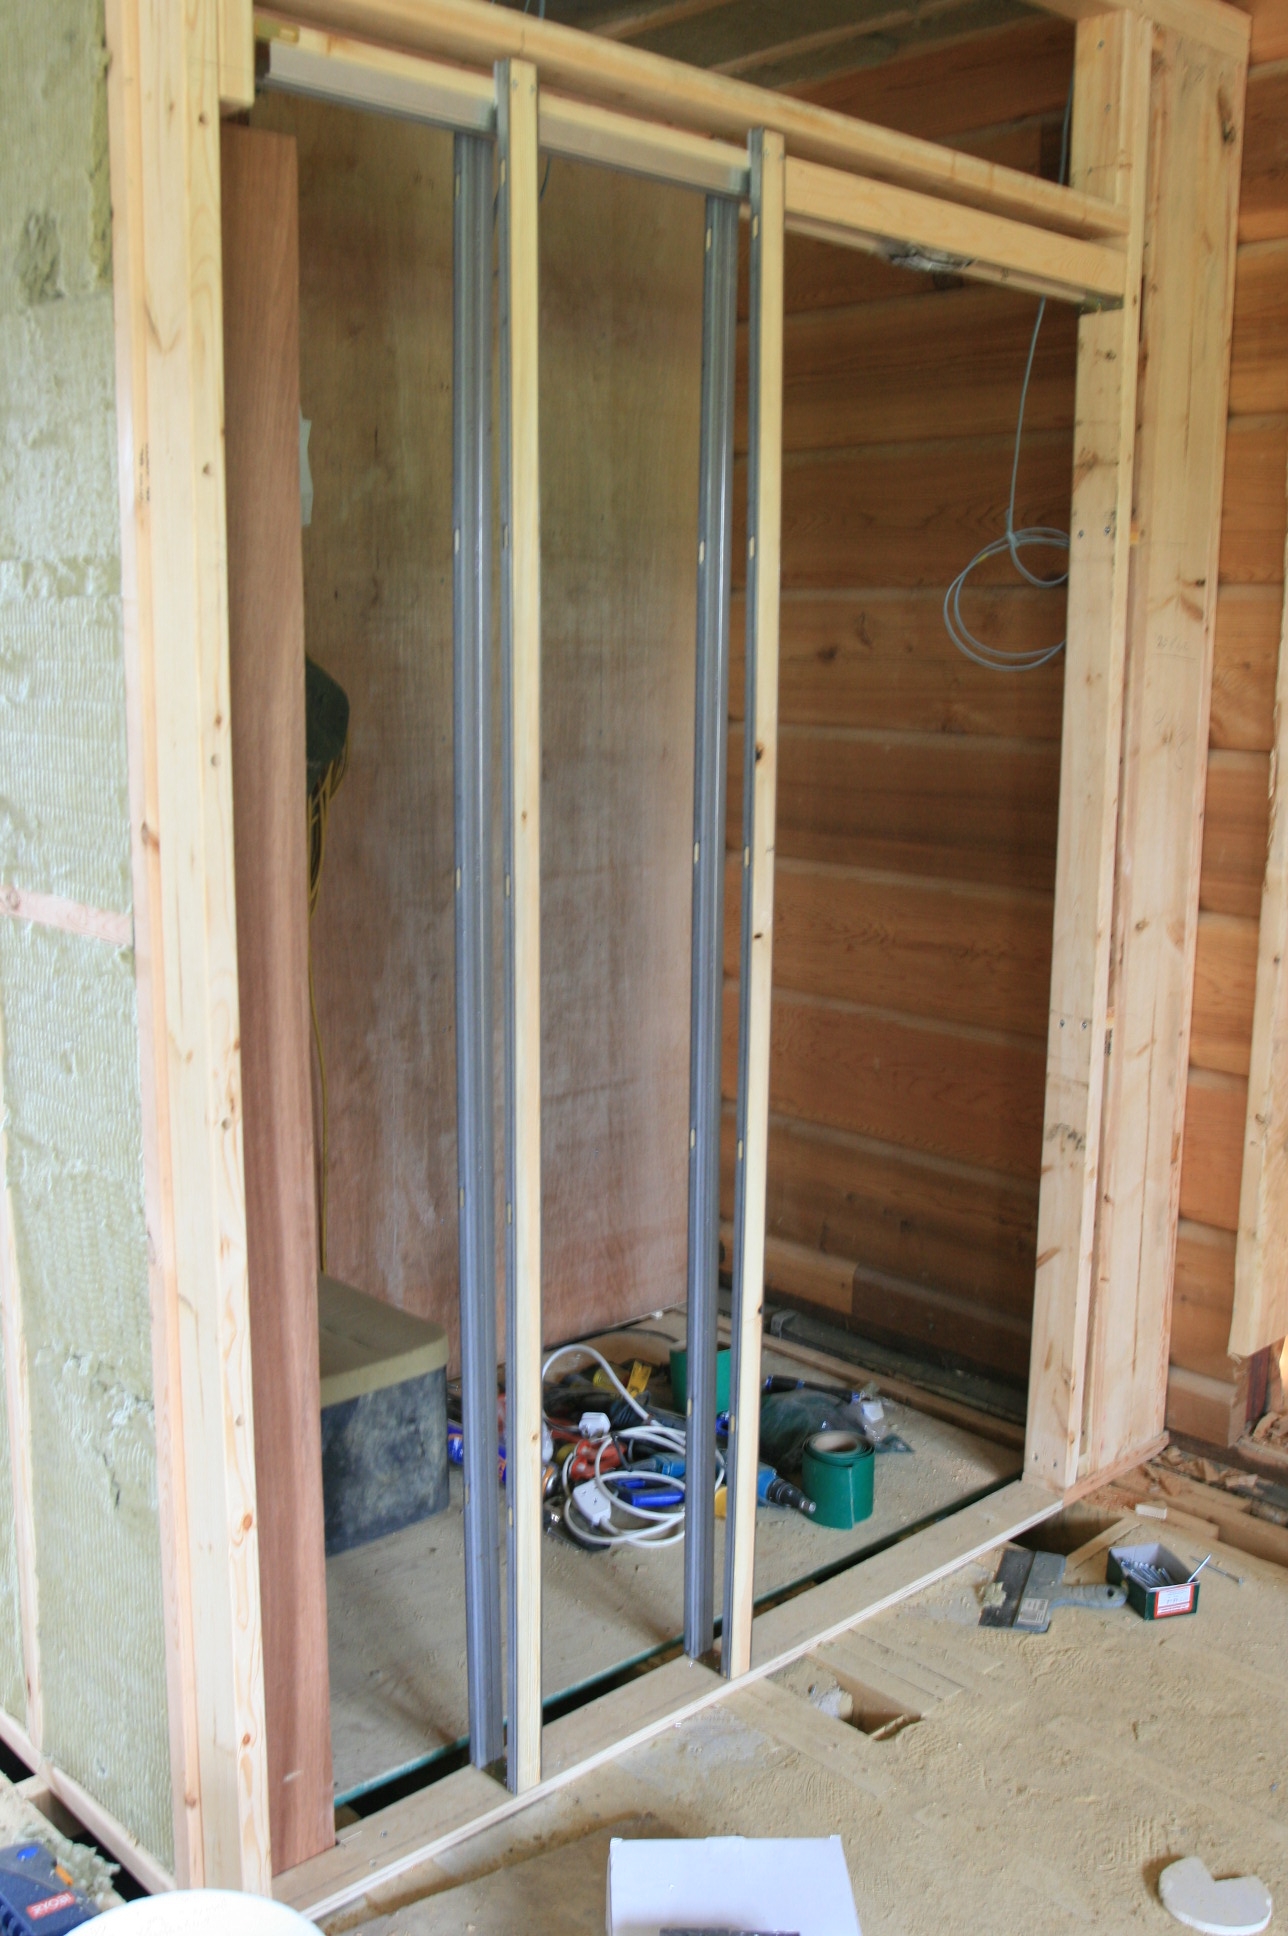 A simple “off the shelf” framework is supplied which is fitted to the stud wall to carry the sliding door. The log siding was fitted to the studwork on the outside, the sliding door fitted, and then the back of the stud wall finished off.
 For the larder we have finished the walls with plywood and white paint. Internal shelving is on spur shelving from the Screwfix catalogue, and we are making the shelves from some surplus joist material for a rustic wooden look.
Feb
23
2009
Eco Paint for the eco log house
Published by in General
We tried hard to find some more natural based eco friendly paints for the house and stumbled upon Auro. Their products had good reviews and we bought some white emulsion for the walls.
 The Auro 320 Emulsion wasn’t very good on a traditional plasterboard finish so we used the 321 which is thicker. To follow up an artisitic leaning we also tried some sponge colour washes with pigments and glaze on top of the white base coat. This is one behind the tubs.
Auro have a good web site with details of local stockists or you can buy direct from them at www.auro.co.uk
Feb
21
2009
More on the laundry chute
Published by in General
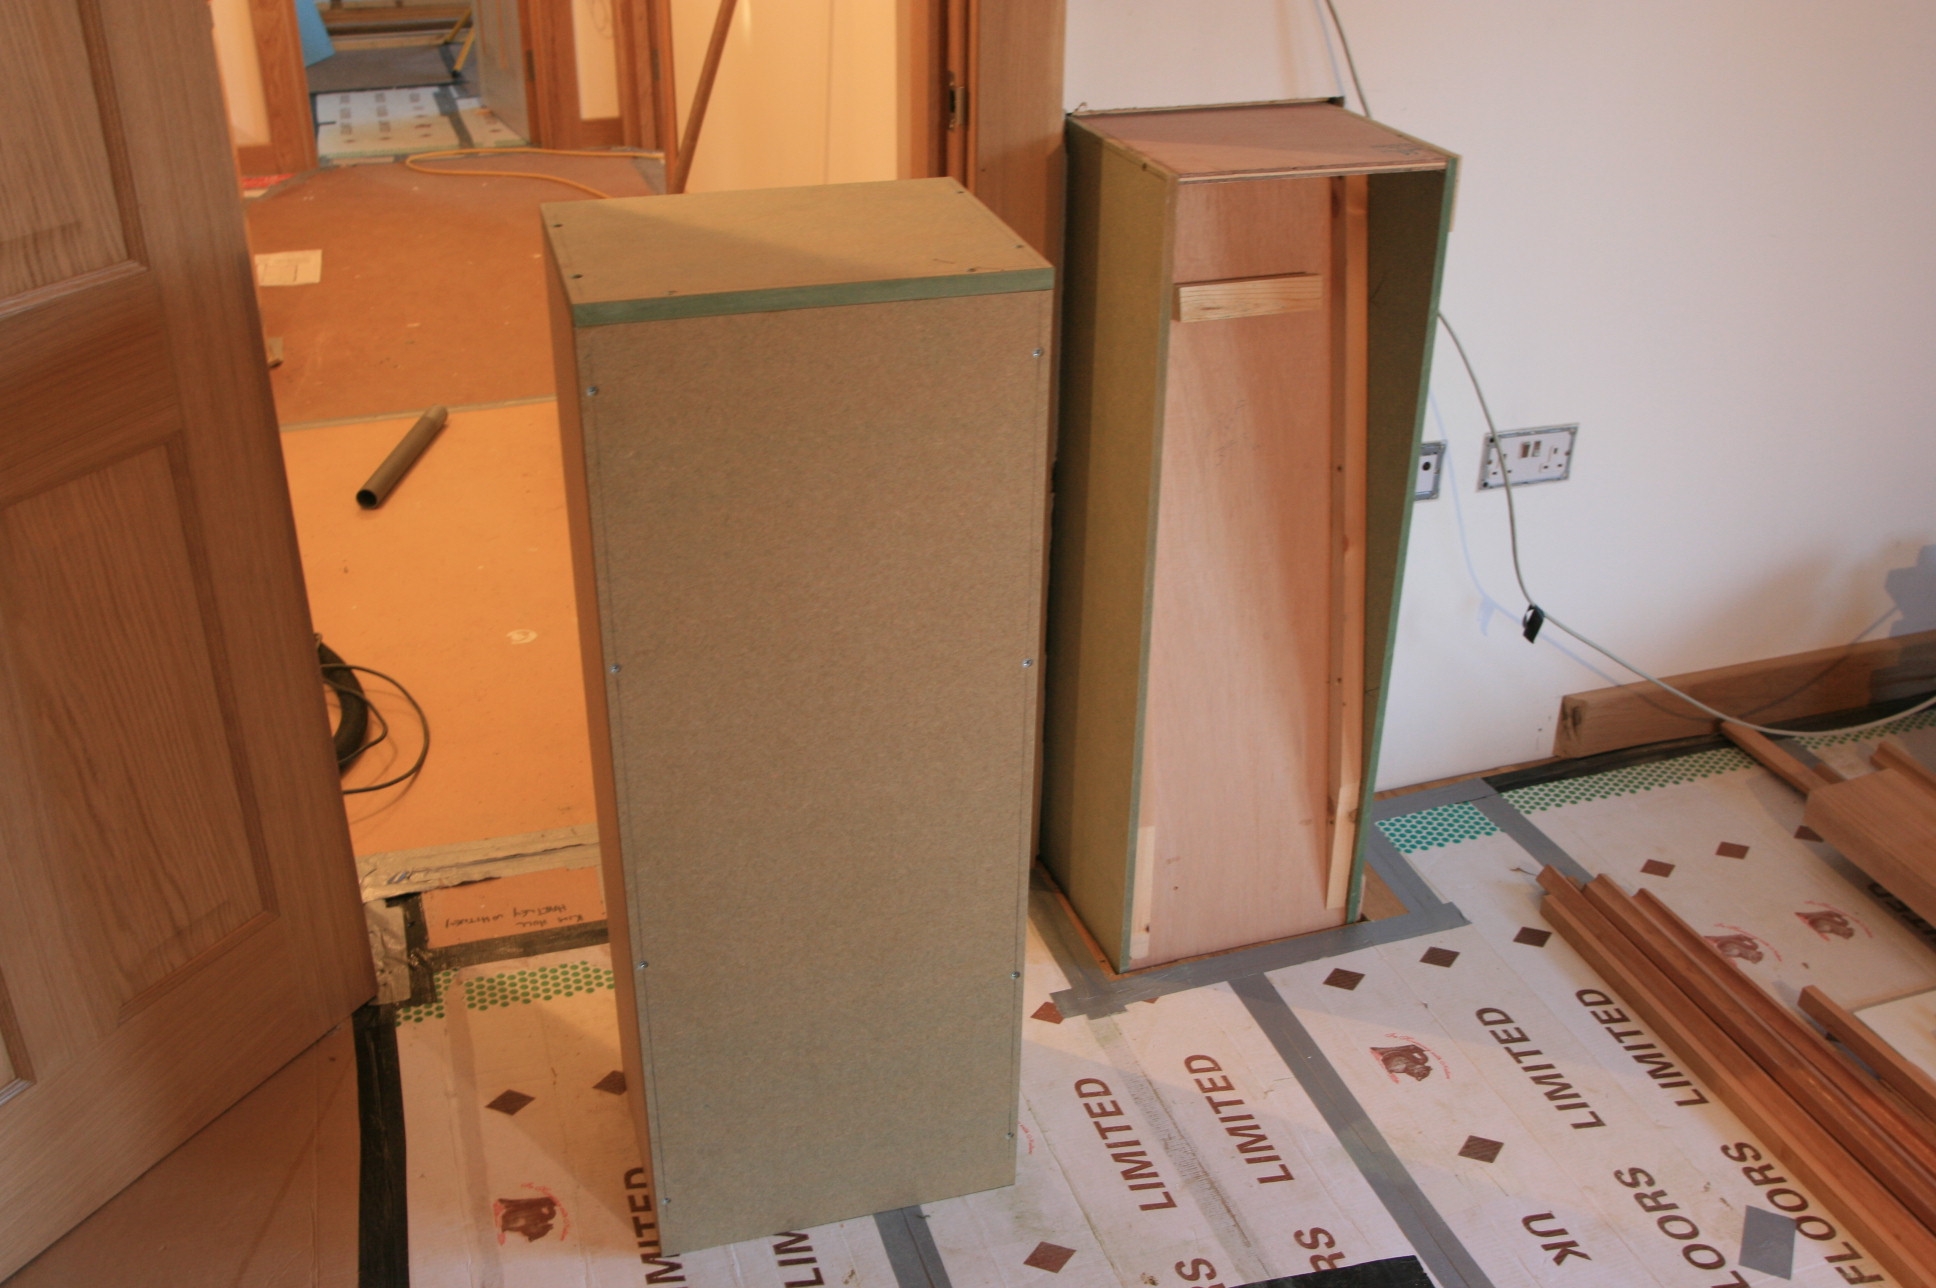
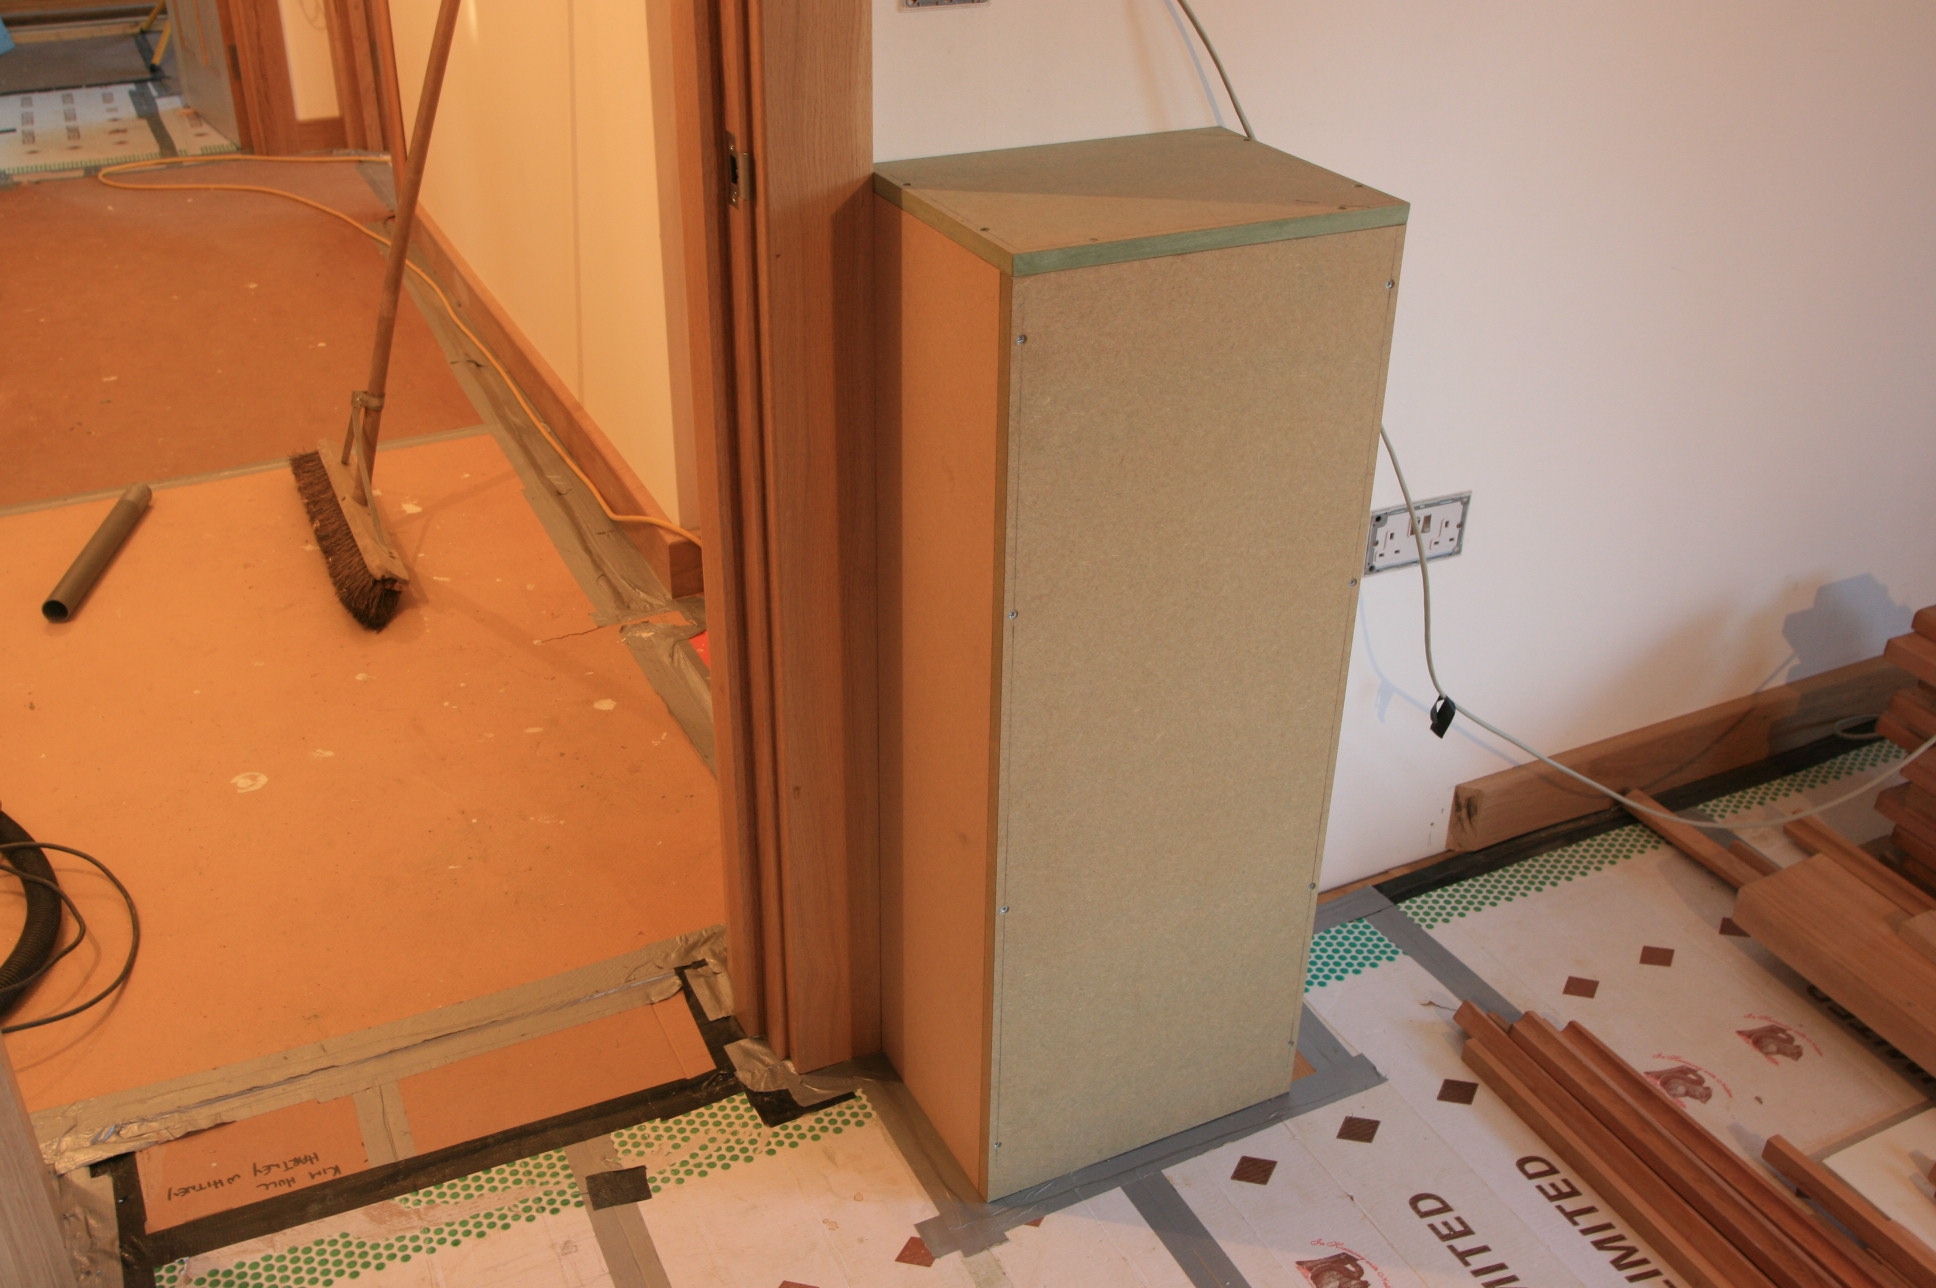
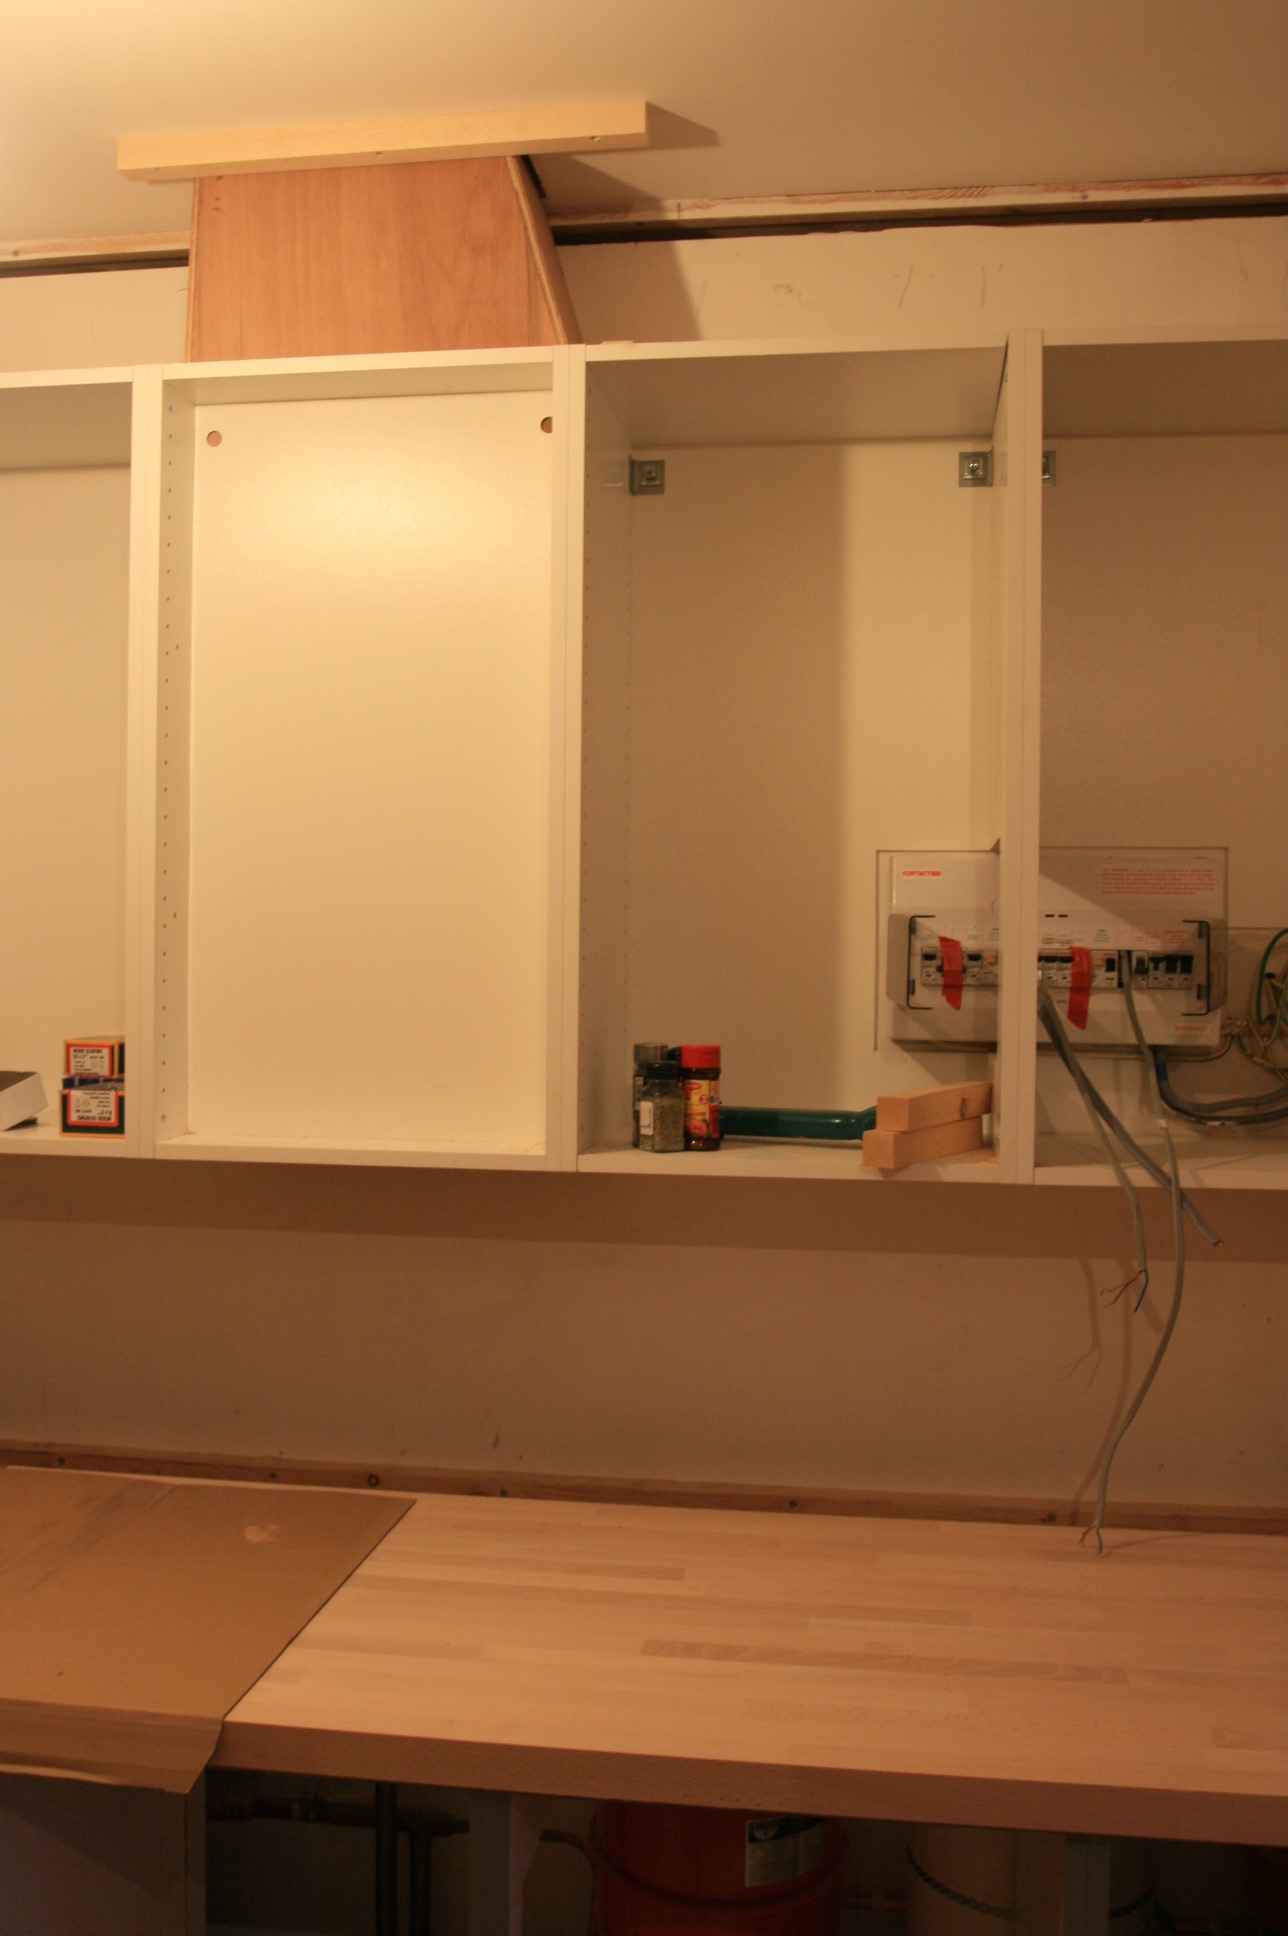 The wall cabinets are now in the utility room, and the laundry chute exit to terra firma has been worked in around them. The chute continues through the ceiling downwards behind the back of one of the wall units, so that laundry can fall into a basket which will sit on the worktop. This leaves about a 6″ shelf space in the cupboard carcass that can be used as a cupboard for spare light bulbs and things like that! We have also made a cover in MDF to cover the chute above the wall unit which has gone off to the spray shop with the vanity units for the bathrooms etc.
Feb
19
2009
Lightening Conductor Questions
Published by in General
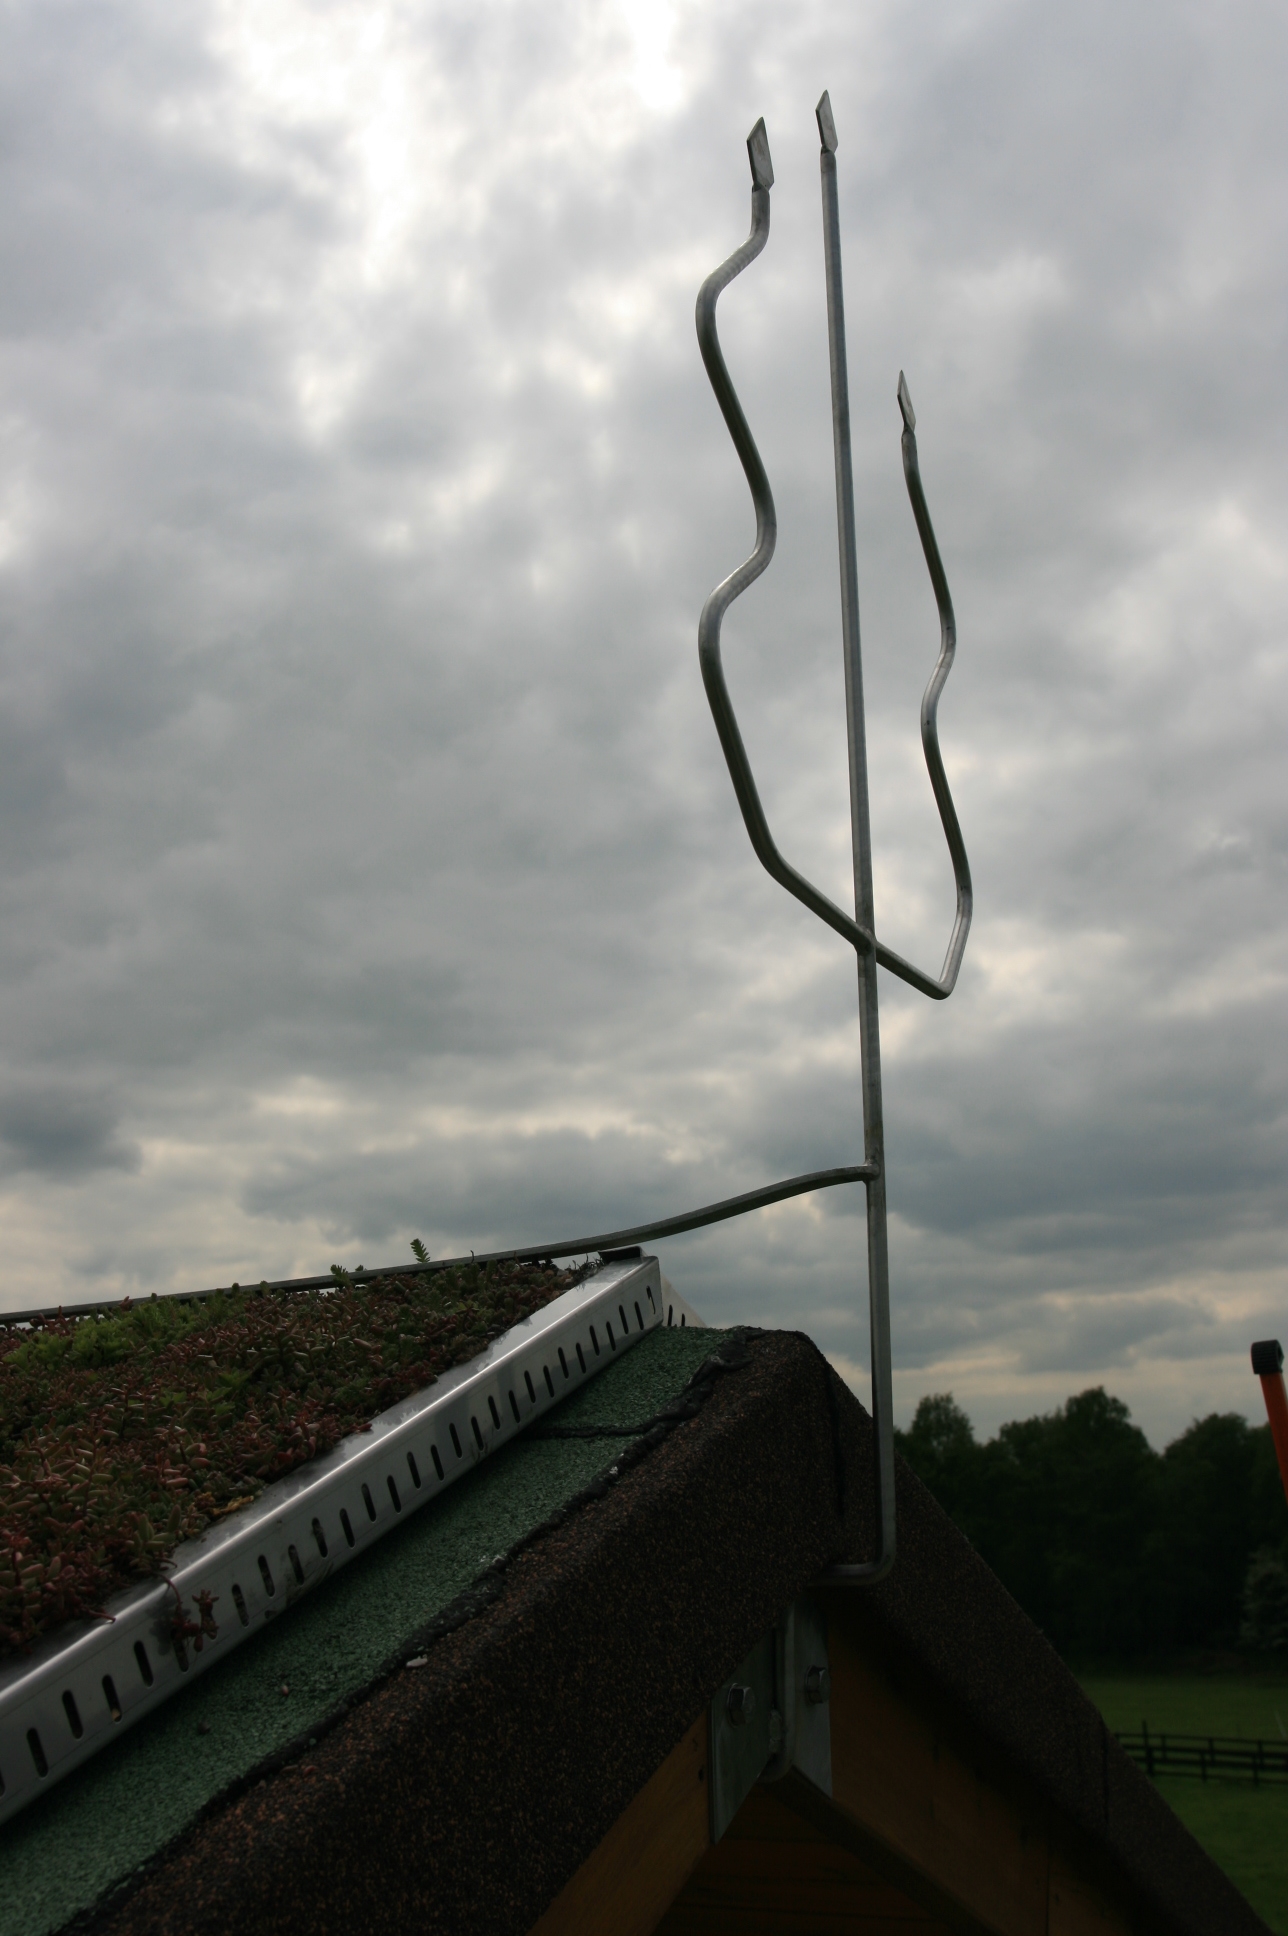 We have had lots of questions about the lightening conductor from other self builders and this does seem to be a poorly supported area of information. We have discussed this with the nice man who gave us some free advice over the phone, and he is happy for us to pass on his contact details. He is Daniel Turner at www.braileys.co.uk or e-mail info@braileys.co.uk
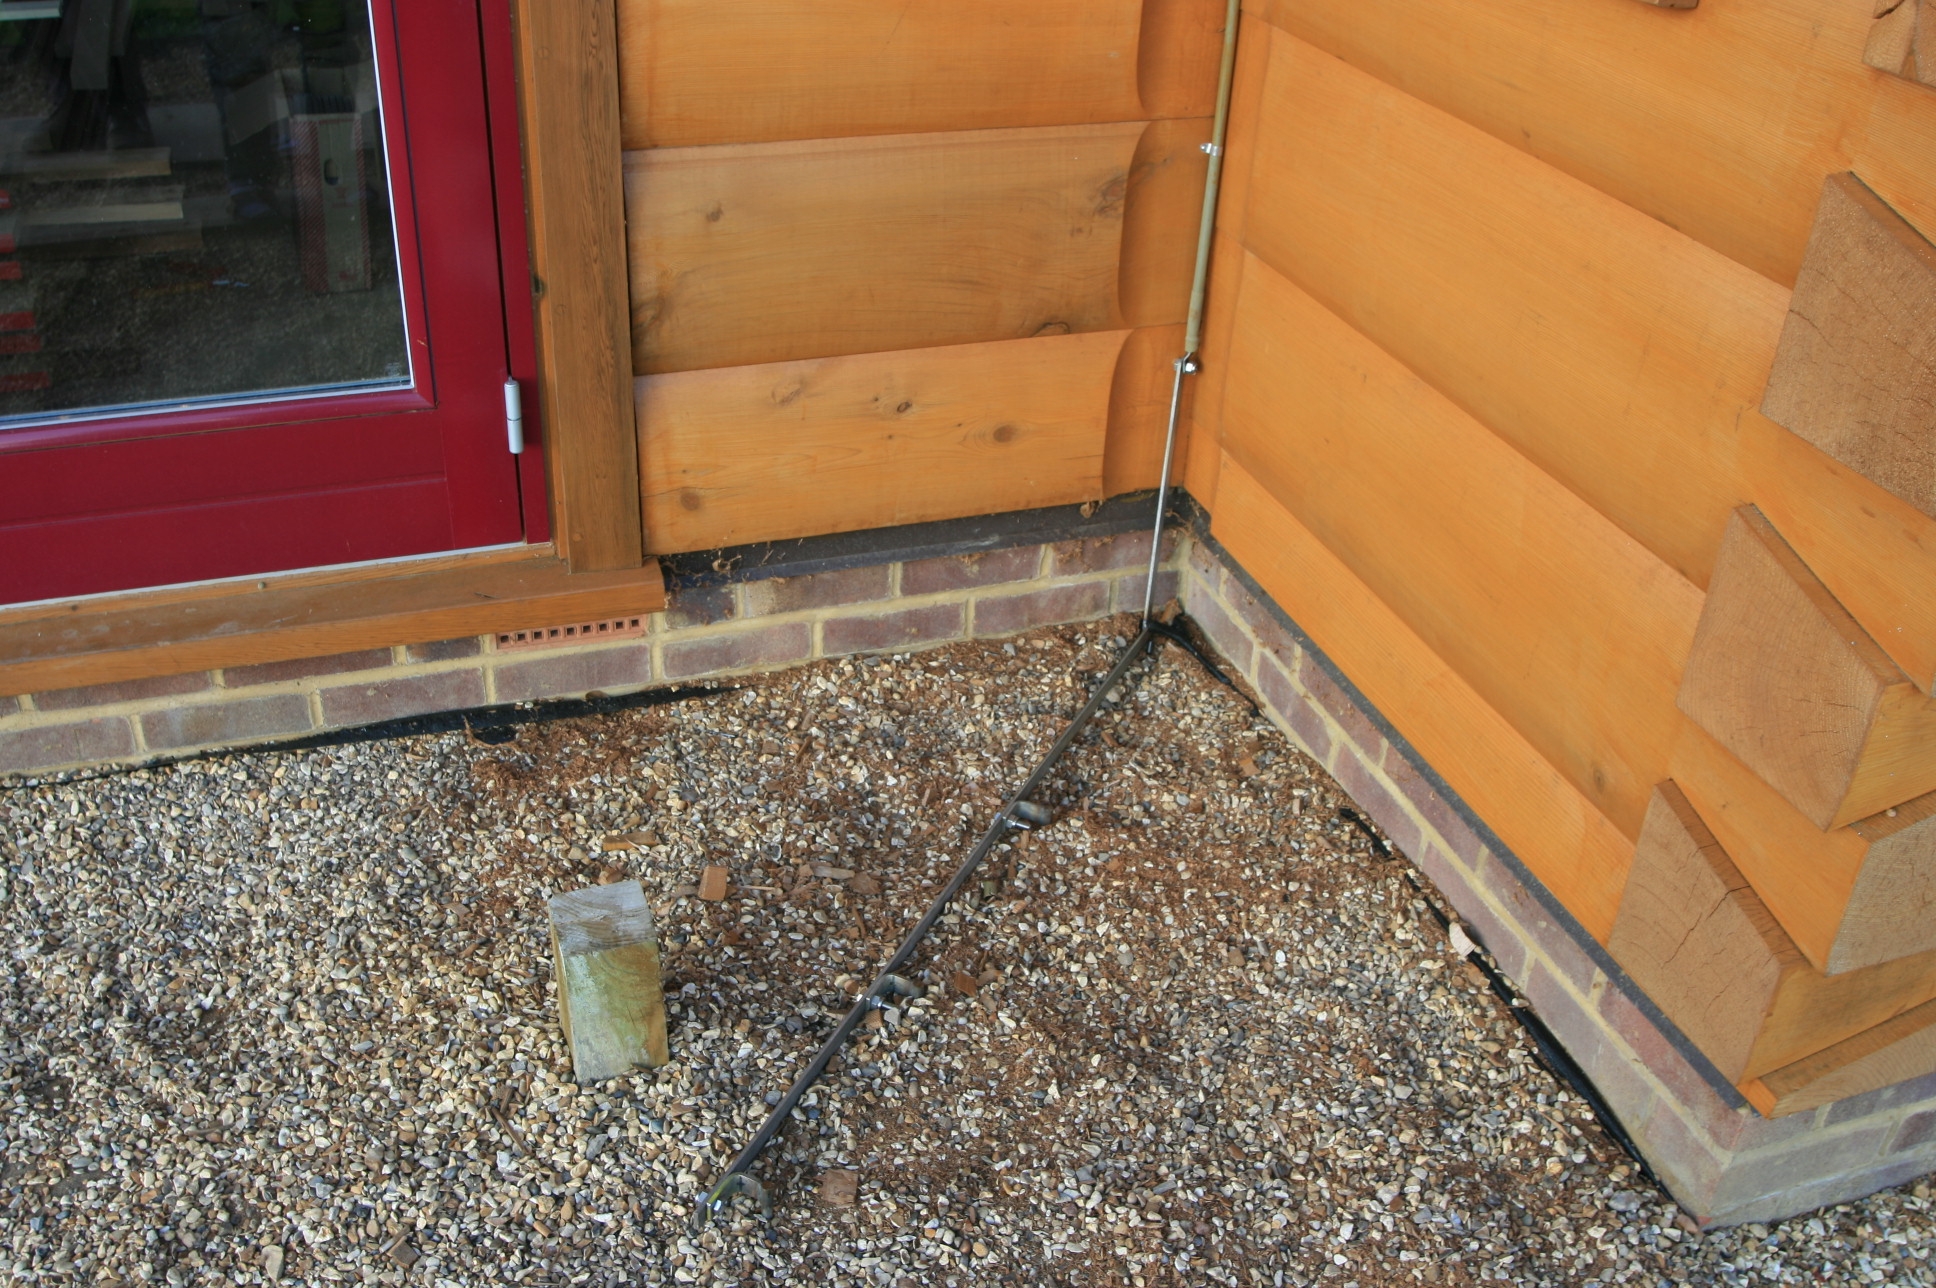 He gave us advice on the number of conductors to have, (which depends on the soil around your house) the size of the copper “wire” etc. We made the conductor design ourselves. You can see more earlier entries about our lightening conductors in the LOG HOUSE CONSTRUCTION tab on this blog.
Feb
6
2009
More sink details on the log house
Comments Off on More sink details on the log house
Published by in General
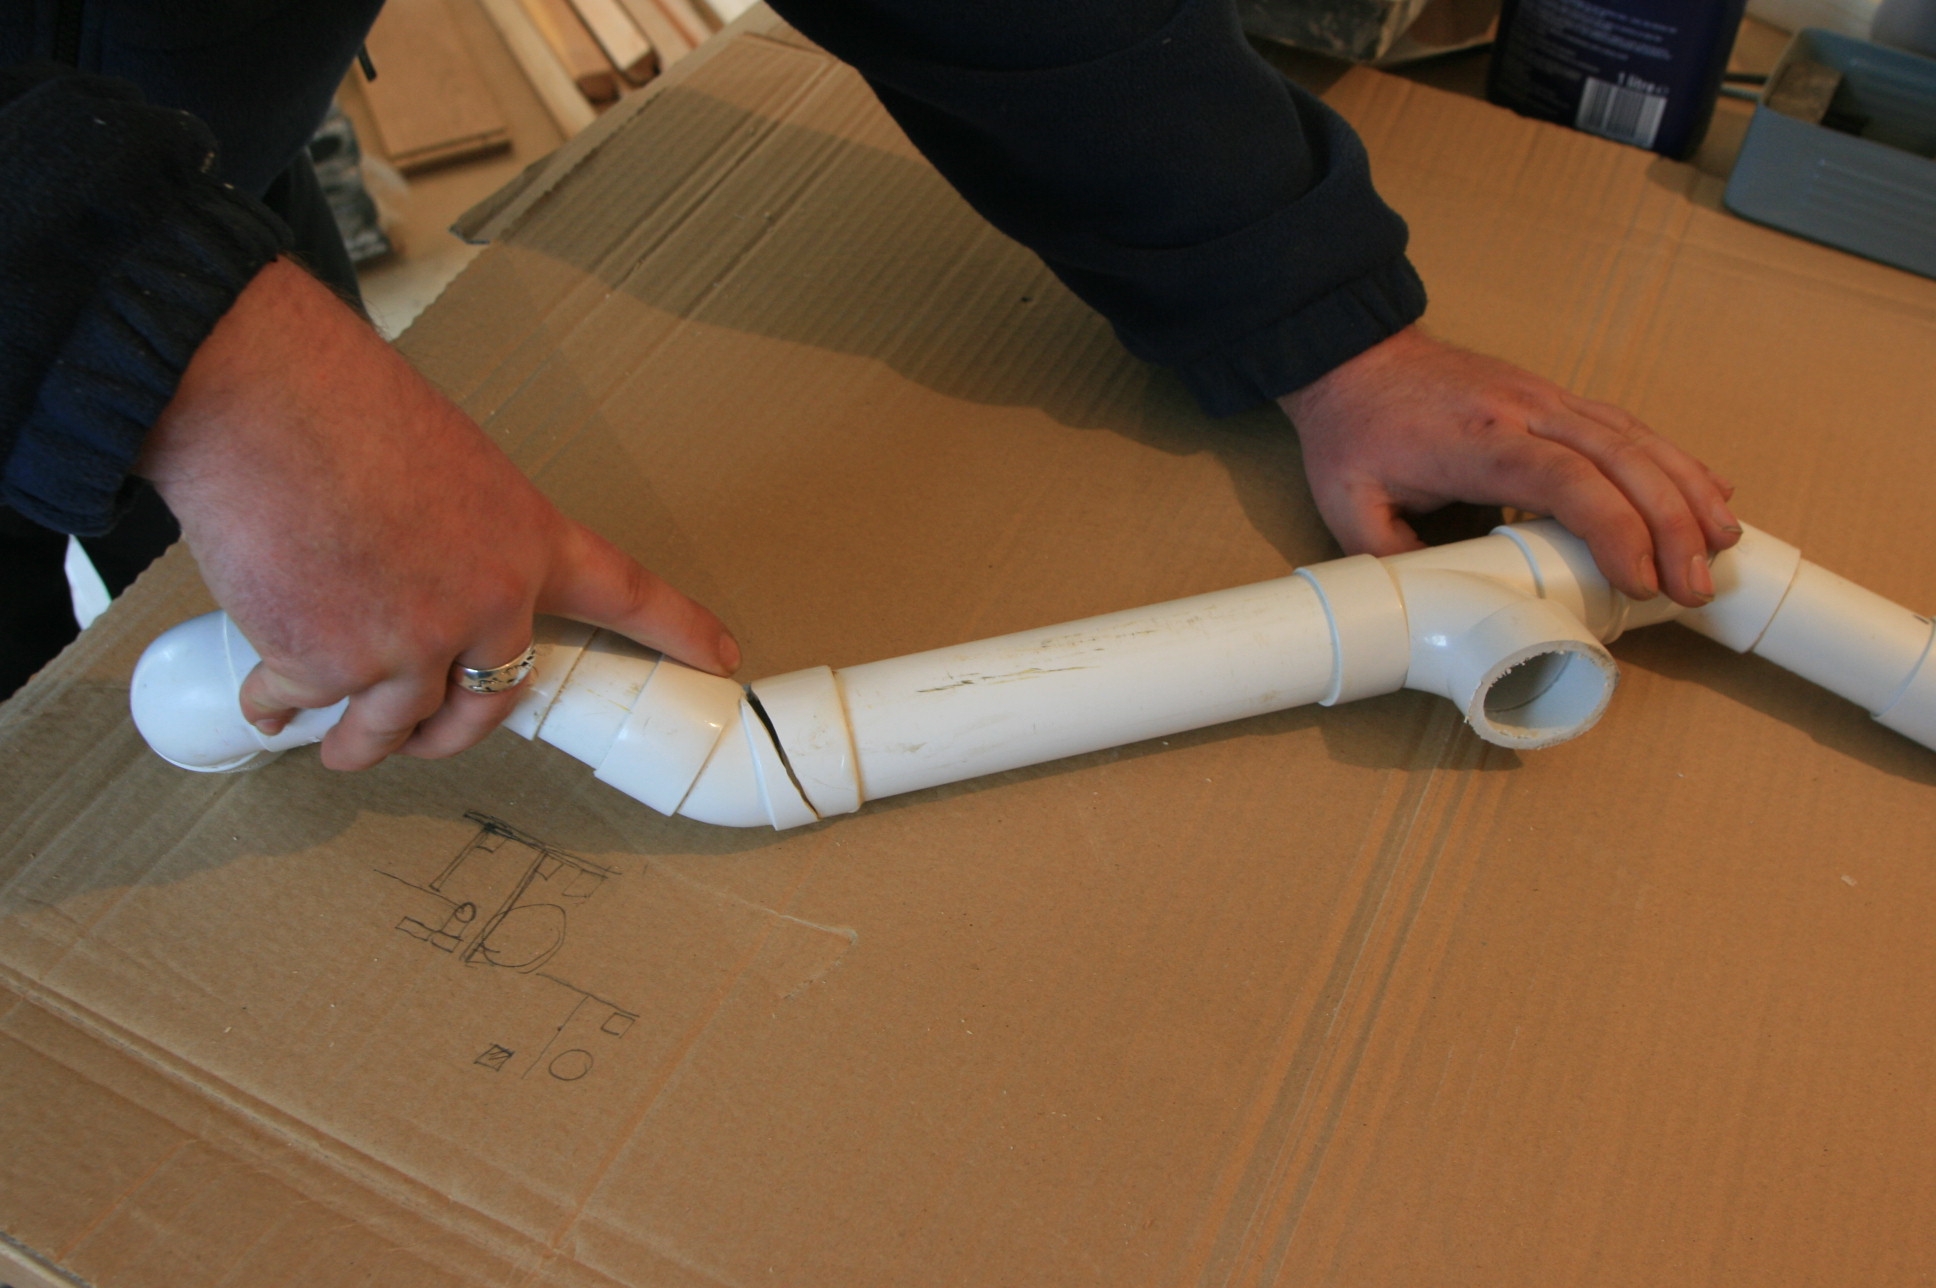
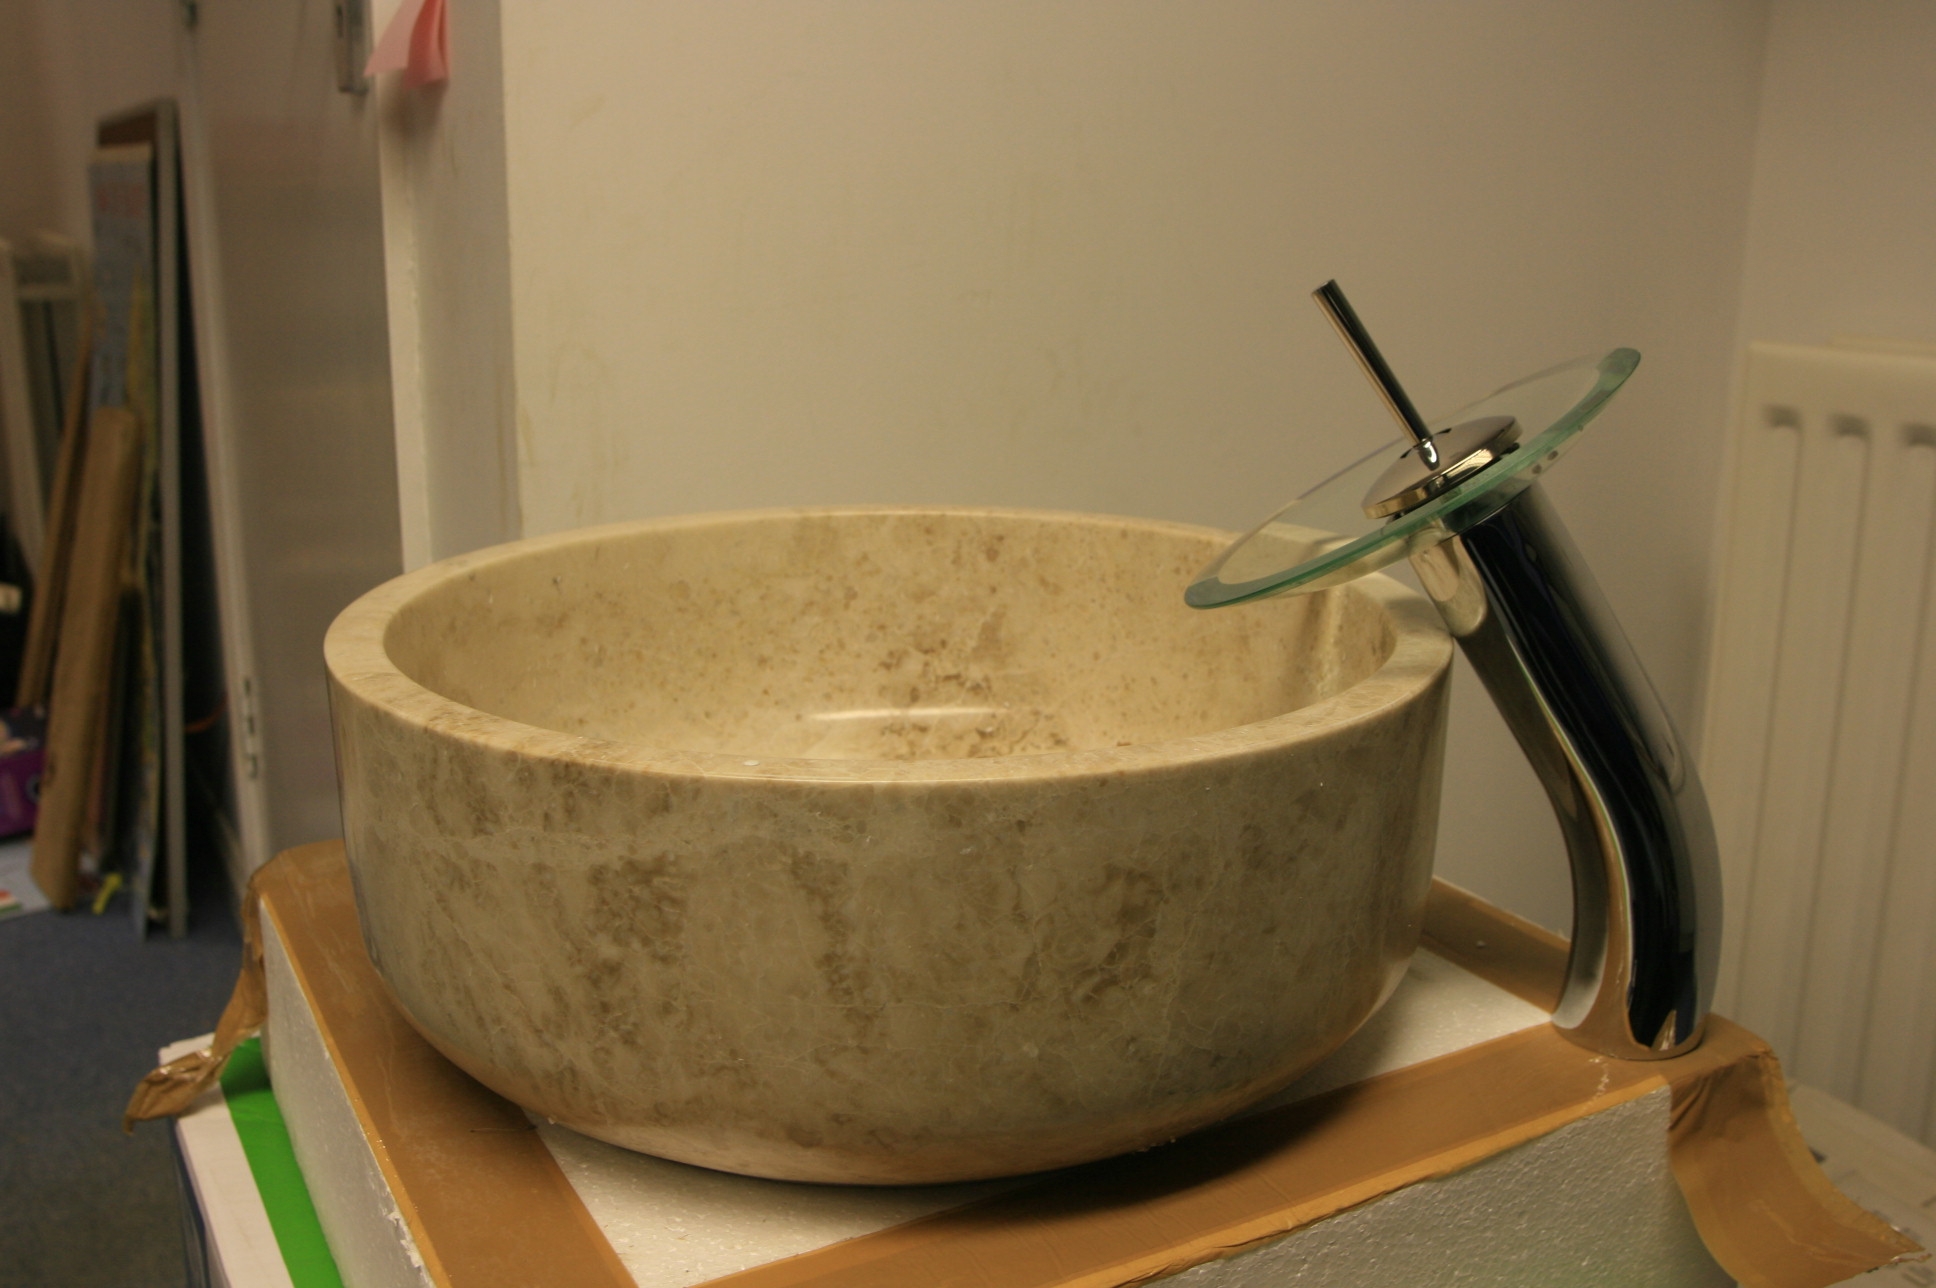 This was another one of those things that we found on the way over the last few years whilst anticipating the construction of our house. Firstly, we saw a shorter version of this “waterfall” tap in a Hansa show room in Germany about 3 years ago. We found this on the web in the UK about a year ago, and bought one for about £350. If you find something you both like , you don’t hang about until one of you changes your mind!
Then we saw the sink, and managed to get the last one they had. We thought the tap and sink would go well together, until we tried them. Clearly the sink is designed to sit on a work top, but our shorter version of the waterfall tap is designed to fit on a more conventional sink with a single tap hole. What to do?
We considered putting the tap on a raised section of work top so that it was high enough to get water into the sink. But it would still have been dropping the water close to the edge. So we saw this taller tap for half the price a few months ago and thought this would solve the problem.
Prices of “designer items” always fall with time as the design is copied by the volume “non branded” manufacturers. However the quality usually falls with price, and certainly this was the case here. The cheaper tap is half the weight as it uses hollow tube instead of a solid brass body for example. The cheaper tap didn’t come with any waste or plug whereas the more expensive one had it’s own pop up waste. so we got a plug you push to close and push to open, a bit like the “touch” action of some waste bins.But the action of the single level tap is not as good. However, water comes out ok!
However, even this taller tap did not solve the problem of delivering the water to somewhere near the centre of the sink. Eventually we came up with the idea of dropping the sink to just above worktop level to make the tap issue work. But we still wanted to make the sink a feature, so we cut the sink into the worktop but made a flat front so that a slice of the sink will be exposed.
Having managed to work out a plan of how to marry the two up, we had to make a base unit from MDF (not very eco material I am afraid) and plumb up the tap to make sure the water goes where we want it.
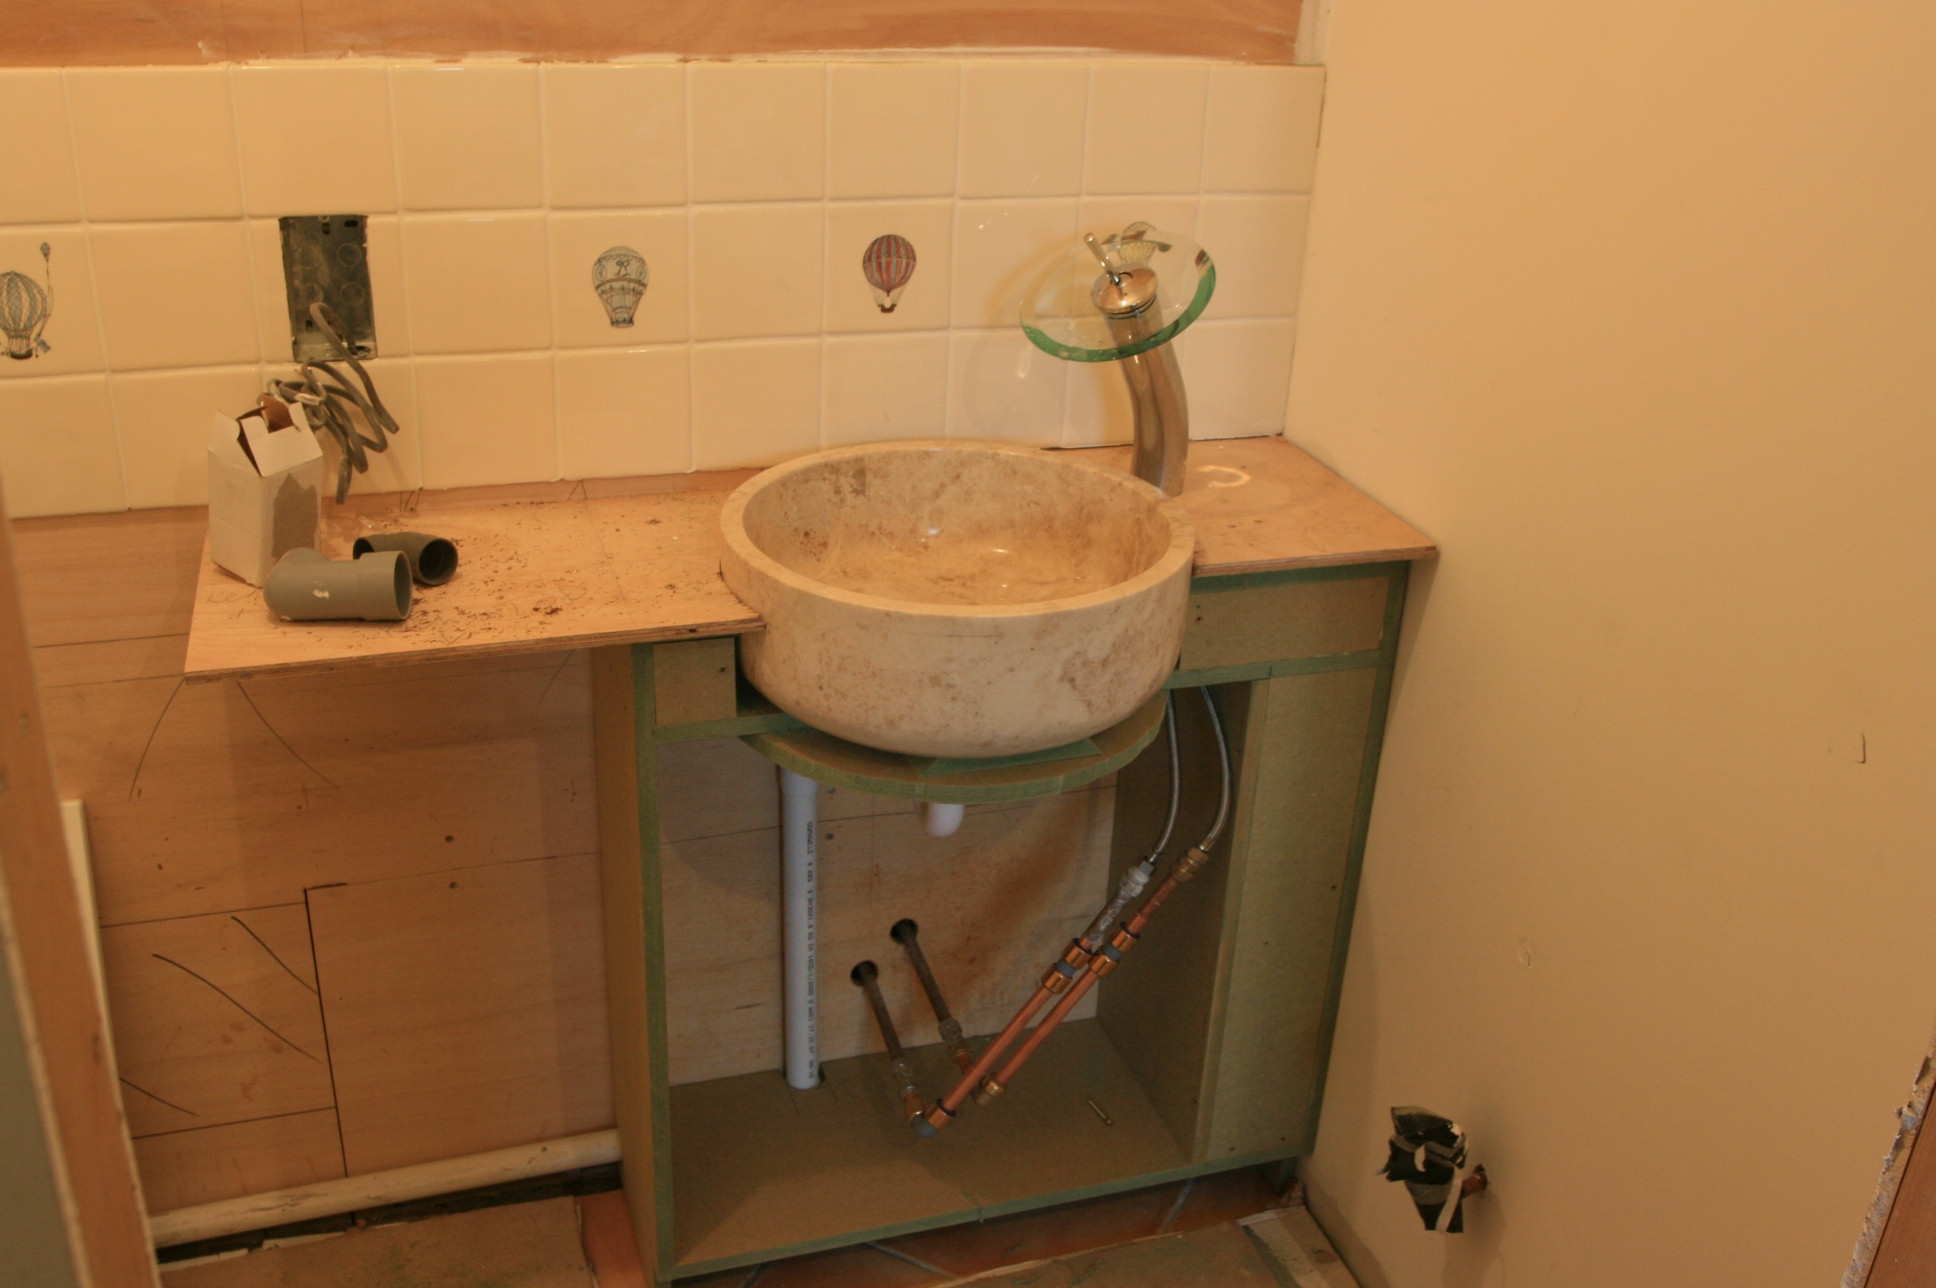 The “top” is a template for the people making the worktops to cut to.The front of the unit will be faced with hardwood and a pair of kitchen sort of doors fitted. More on this in a few weeks when the unit has been sprayed (along with all the others) and the doors and tops have come and we can start the final installation of these bits.
Feb
3
2009
More on the laundry chute
Published by in General