 A long, long time ago, we did the rounds of the self build home exhibitions and at one of these, we saw a beautiful carved gold leaf door, with a classic sun motif. It looked stunning but the “antique” style would not suit our largely contemporary theme in the house.
Later, as we drifted towards non standard window sizes (despite the advice of our architect to go for standard sizes to avoid exhorbitant costs – he was right!) during the specification of the log house kit, the doors were left for us to source independently from the main kit. We looked at various European doors, costing upwards of 3,000 Euros, but felt that this was taking up too much of the budget and the doors whilst stylish were a bit mechanical in their look, because they are produced on the door equivalent of an infinately variable production line, variable that is in size (in 3 millimetre steps) in colour, handles etc but not design.
After some scrabbling around on the internet we eventually found the agents for the original carved doors. By now this Irish couple had moved to America and were working with craftsmen in Spain and Italy.
Instead of having one carved door, caution was thrown to the wind and we (OK, I!) decided that all three single external doors would be carved, one with a sun, one with a moon and one with a star. We would have some glaze quarter panels in the moon and star doors to improve light into the kitchen and utility room, which with UK building regs would need to be double glazed. The door locks would be espagnolet three point and just to make sure, we sent the locks to the door makers in Spain so that they could fit them.
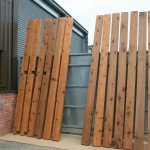
 Well, 7 months late, after many iterations to the carvings trying to get the look right, the doors arrived. The carvings were the least of the problems. The rustic look of the carvings extended to the construction method of the doors, the fitting of the locks, the warped shape of the doors etc. The method of construction with softwood tongues between iroko “planks” with no rail and stile construction meant the doors would almost certainly continue to warp and bend if used in an external environment where one side is warm and dry and the other side is exposed to the elements.
The agents had been working with the Spanish Artisan for several years, had clearly had similar problems in the past and this was the last straw. They wound up their business and could have left us high and dry. But in a credit to their business ethics they gave us a substantial refund on the doors and we have managed to use them in the house as rather expensive internal doors.
 To reduce the risk of distortion our builder routered out chanels in the backs of the doors, fitted steel strips and covered them with “rails” which had a similar radius to the logs on the house so that the door looked appropriate to the internal face of the adjacent logs. Time will tell if this bends much.
Of course in a blog this makes one entry, in the real world this whole sorry saga from the doors arrival (seven months late) took a further eight weeks.
We replaced the external function of these doors with some “production line” doors from the nice people who made our aluminium clad windows and doors on the rest of the house, but more of these and what happened to the star and moon doors later.
 At last our wood burning stove has arrived. With a log house there are lots of wood off cuts to be disposed of, so a wood burning stove was a no brainer. Also with underfloor heating, a system to respond to sudden changes in temperature (which underfloor heating is not good at responding to) was required.


