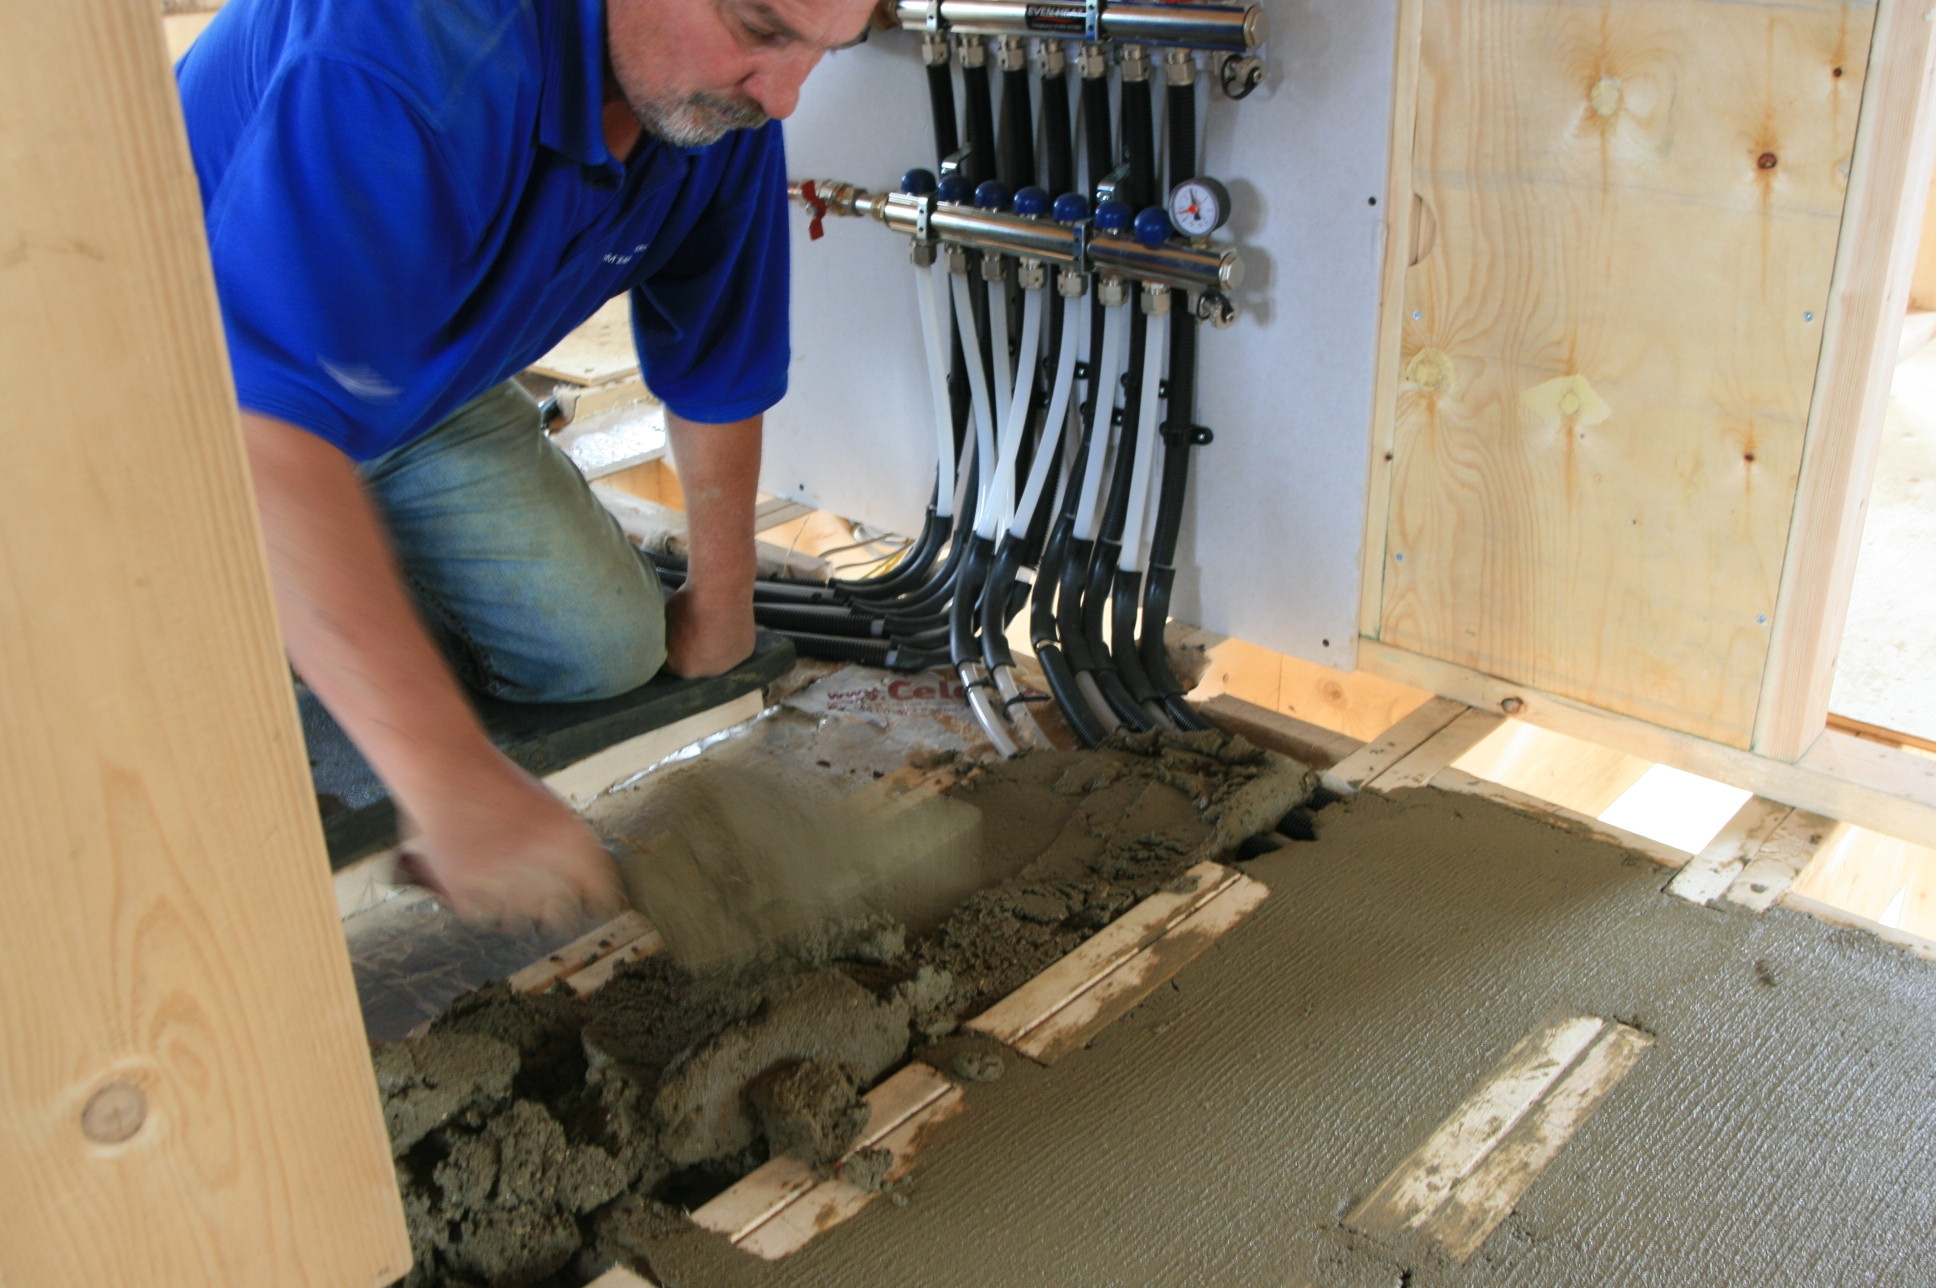
 With the first floor all piped up, hooked up to the manifold and pressure tested the “pugging” can be done. Normal underfloor heating installations might use a concrete screed but because of the wooden joist construction which is dictated by the fact that we are building a log house, we have to put in plywood trays on battens, 50mm of Cellotex FF grade insulation (this is slightly denser than normal Cellotex to help the pipe holding clips stay in place) and then use a pug mix of soft sand and cement to cover the underfloor pipes. This is a bit more laborious than other methods of underfloor heating installation. We also went this route because we did not want to loose any ceiling height.
Archive for July, 2008
Jul
25
2008
More underfloor progress
Published by in Ground Source Heat Pump
Jul
23
2008
Underfloor heating installation
Published by in Ground Source Heat Pump
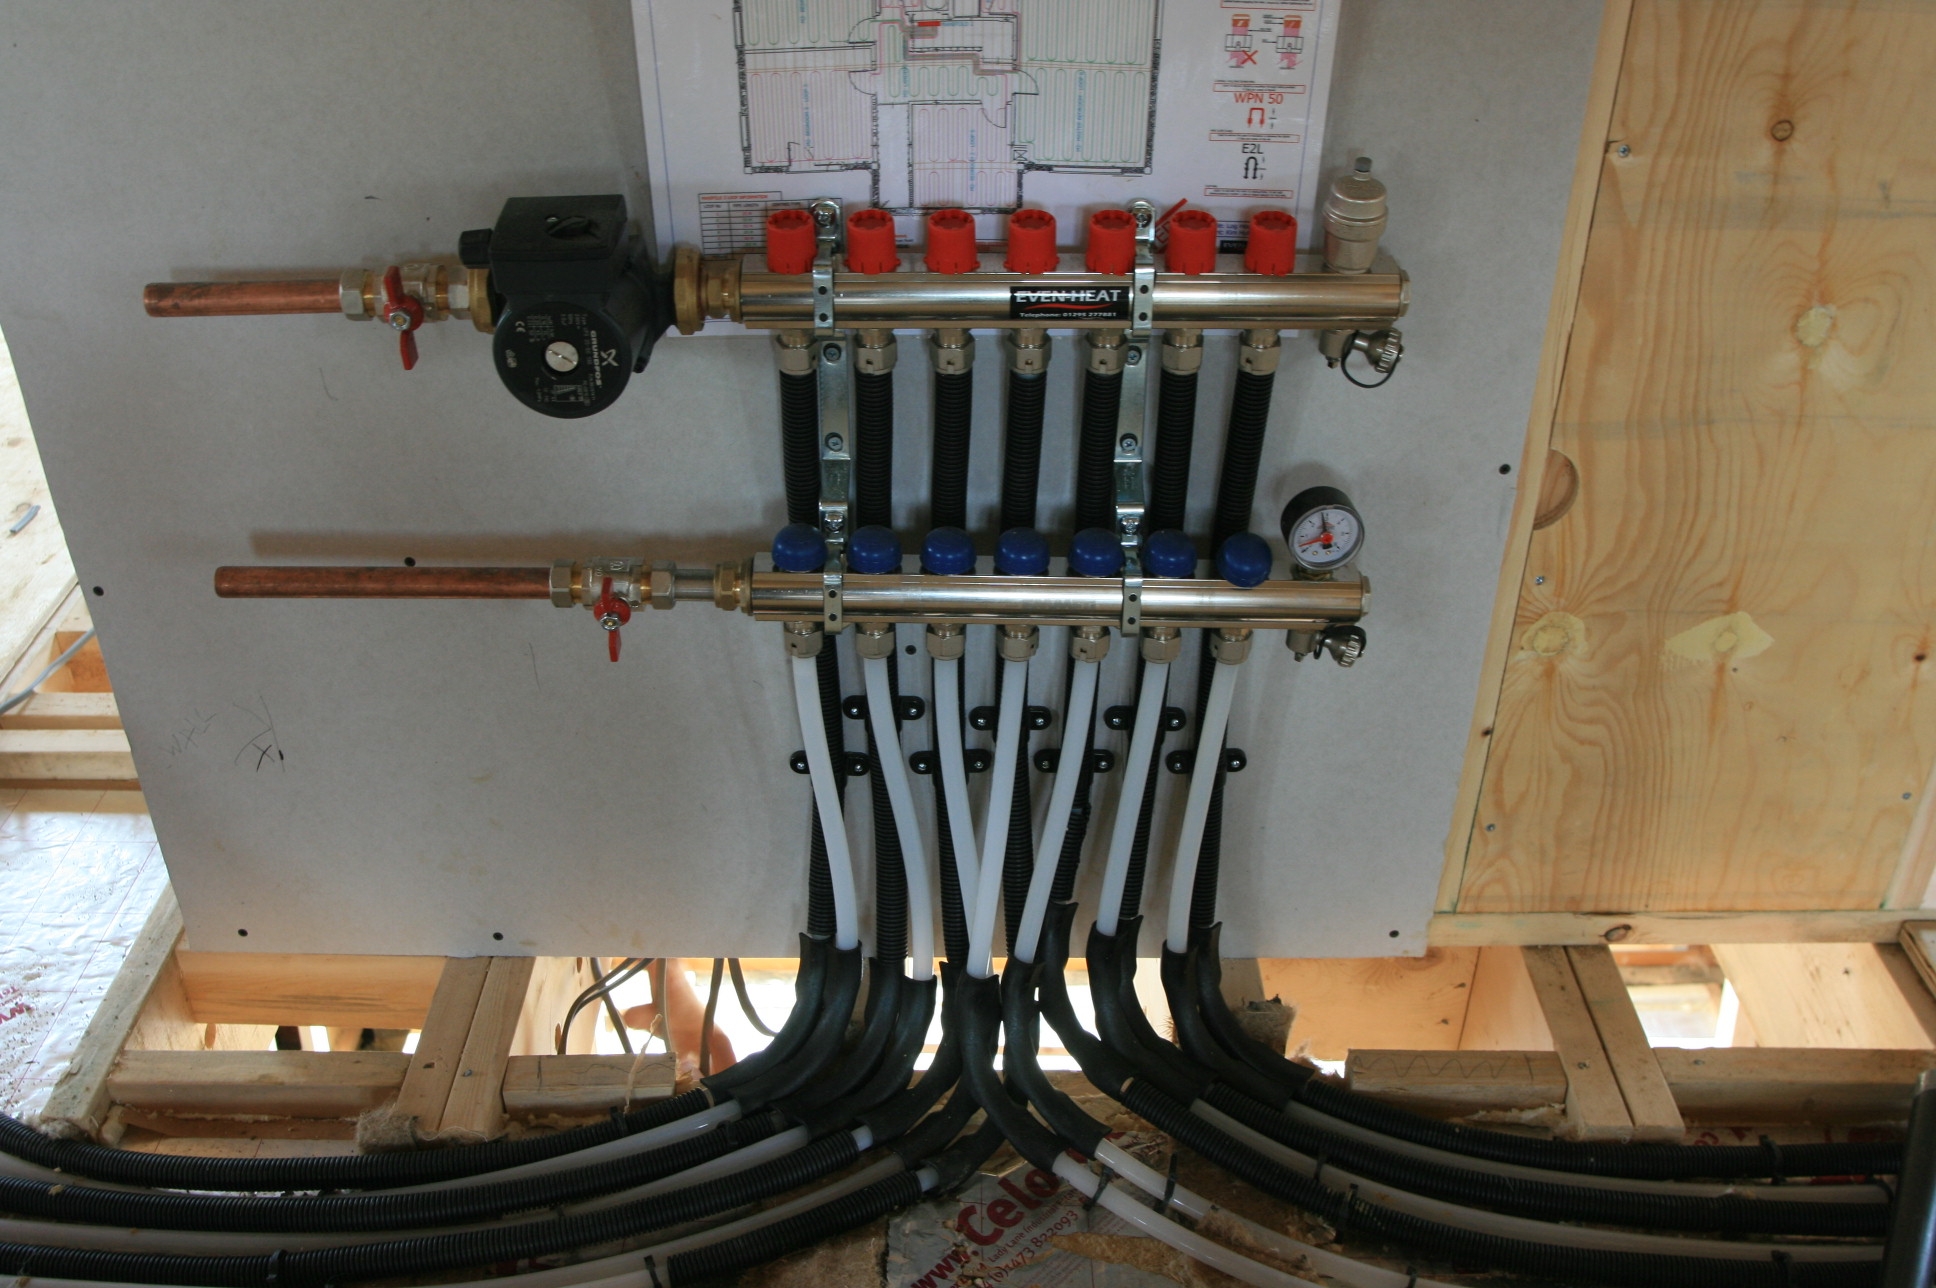 We are now getting to that detailed part of the house construction where progress seems slow but lots is actually going on. Here is our first underfloor heating manifold in place for the upstairs rooms. This will be fed from the ground sourced heat pump below.
Jul
17
2008
Rain Water Harvesting further developement
Published by in Rainwater Harvesting
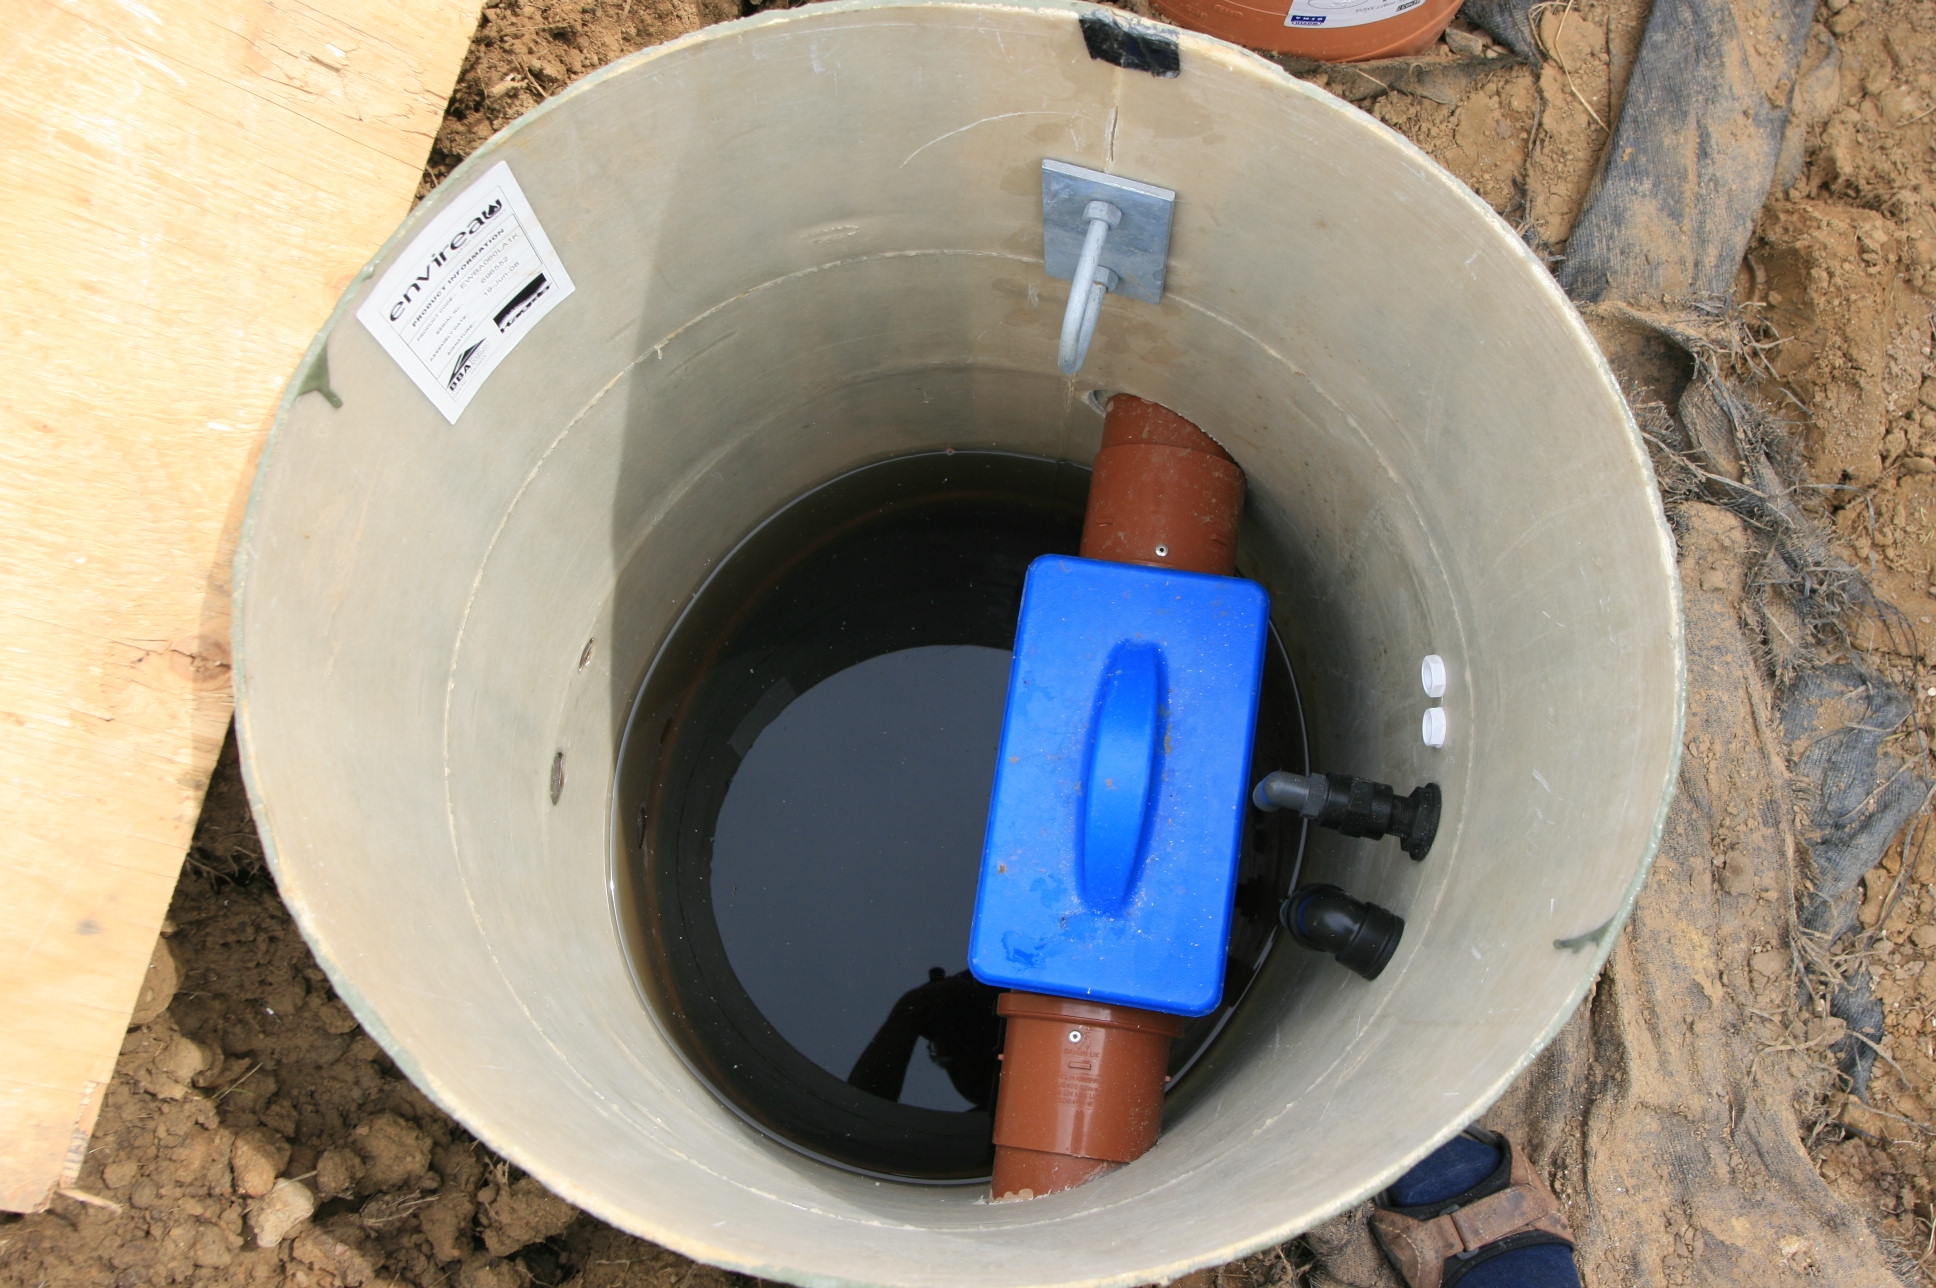
 So now we have to put the submersible pump in place and the water level sensor. These come in the kit which cost £2,600 plus VAT. It has probably cost the same amount to put the tank in the ground and concrete it in so it will be a long time before we get our money back at current water charges. However with the long term picture of every supply into a house being upwards in price it could be less than we think.
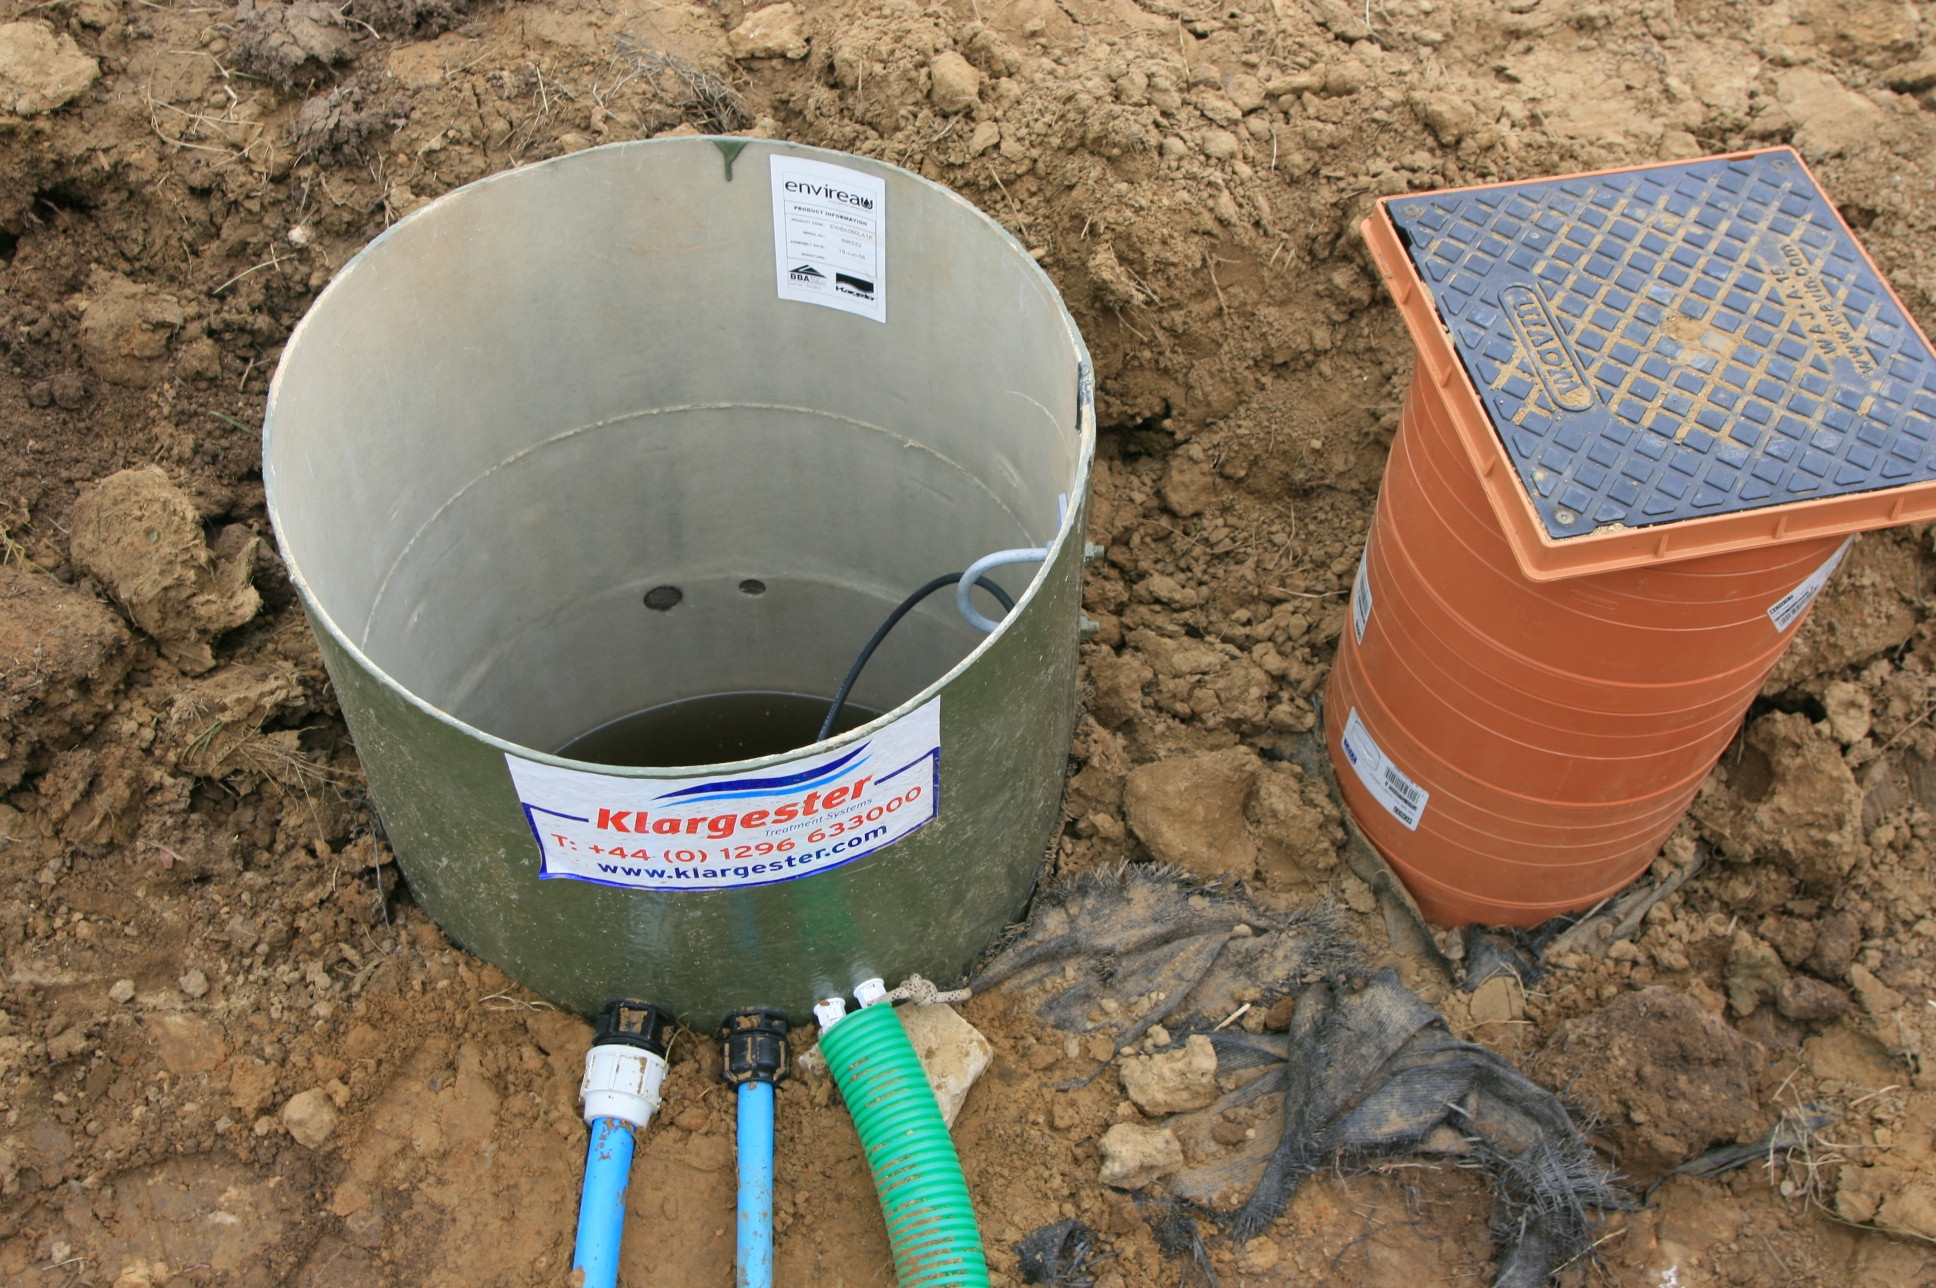
The tank came with two holes on one side, and the inlet and outflow sides for the main 110mm pipe clearly marked. Checking with the technical department of the suppliers it did not matter which way we fed the water in, but as the outflow was bonded in the tank at a slightly different height to the inlet, we decided to put it that way round, fibre-glass up the existing two holes and create new ones on the other side.
We have two holes for the pump and level sensor, one for the 1″ pump fed pipe feeding to the header tank in the house and we are putting in a 1.25″ pipe over towards one of our large farm sheds (as in – “one we prepared earlier”) just in case we need to take rain water from a “normal” roof with no risk of organic content.
Jul
15
2008
Rain water harvesting developements
Published by in Rainwater Harvesting
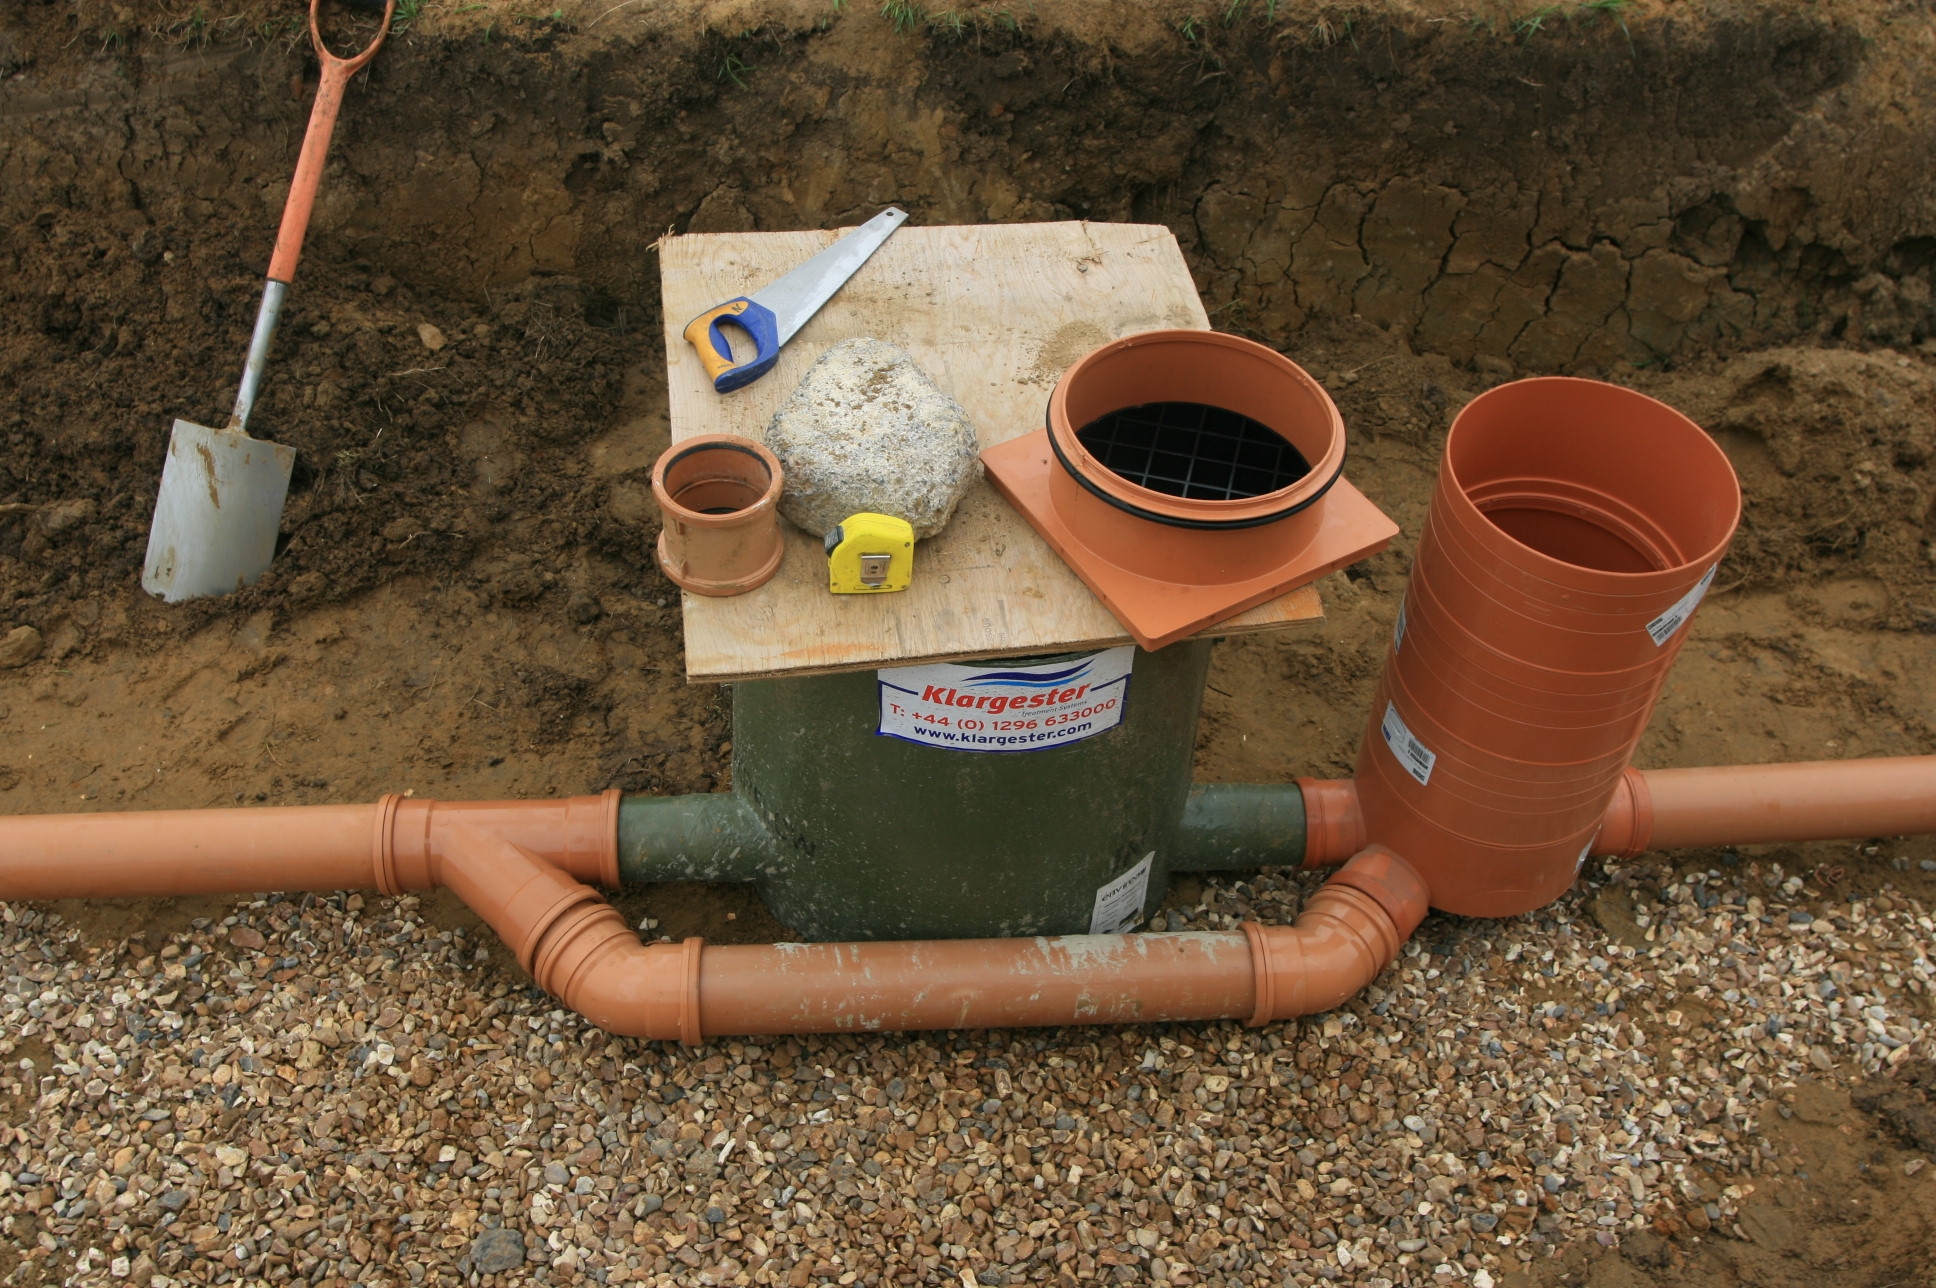
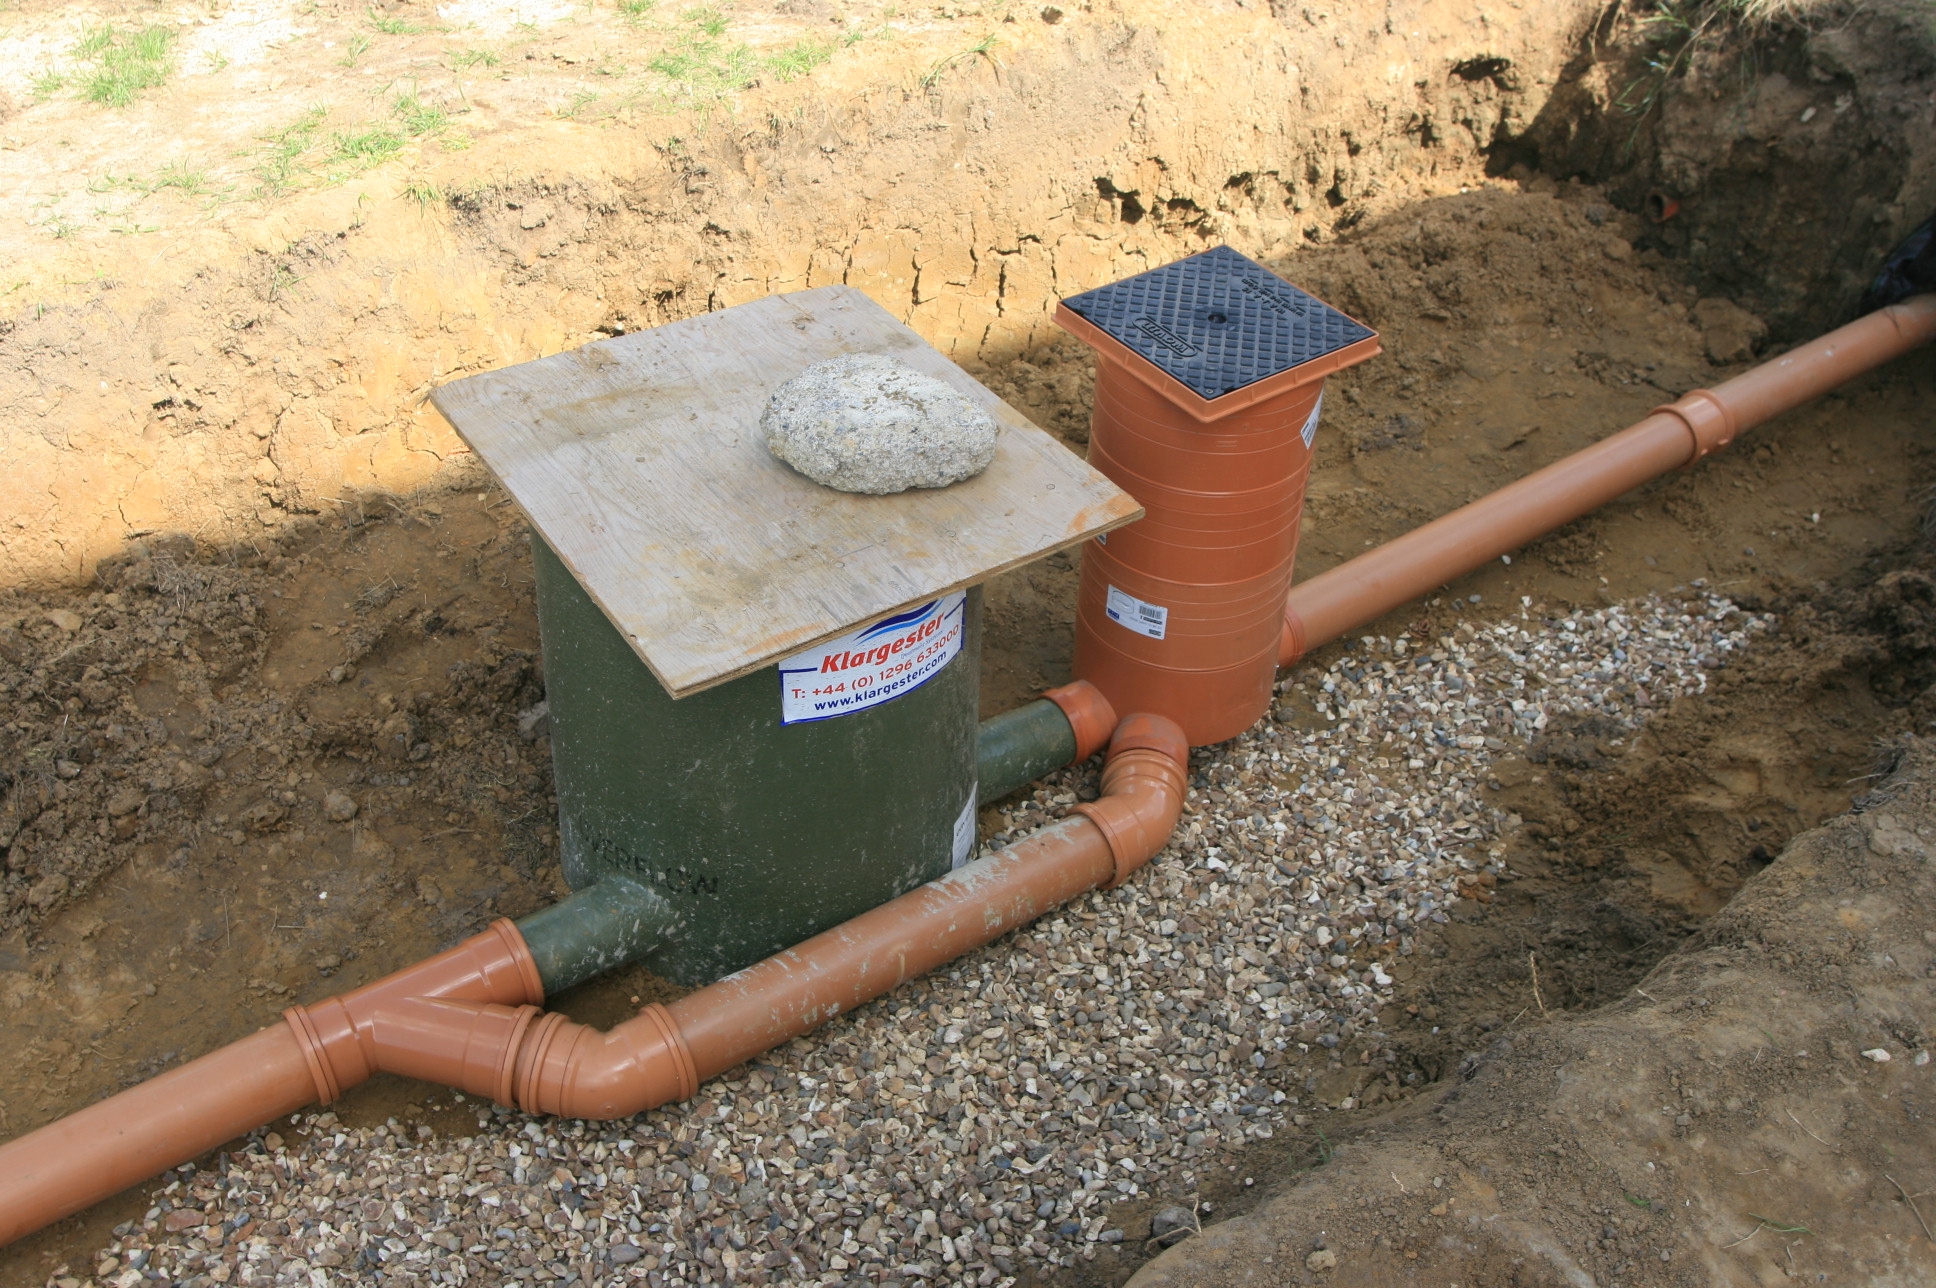
Well, after some more thought we thought of a way to engineer a solution to the possible problem of having to divert the water from the sedum roof downpipes should “organic blooming” be an issue. Yes, as all boys will spot it is just like a railway siding that you might get after Christmas to augment your oval loop of track! An Osma 45 degree Y base with……..

one of these, something I did not know existed, but is called a “bung” (something I thought you gave a concierge) to block up the “siding”.
In the event that we have to divert the flown of the down pipes away from the tank, we just take the bung out of the “siding” and put it in the main flow to the tank (the other branch of the “Y”).
So now HMS Overflow has a second conning tower plus a side mounted torpedo tube (according to the children that is) and we can backfill and cover it all up.
Jul
10
2008
Rain Water Recovery tank fills up with a days rain
Published by in Rainwater Harvesting
 Well yesterday it rained for nearly the whole day across the southern half of England and guess what, our part filled 6,000 litre tank filled to the top. The Sedum Roof had had a good wetting a few days before so had probably absorbed as much water as it wanted so it’s normal delay in allowing rain water through was much less than the normal 2 hours or so.
Jul
8
2008
Rain Water Recovery tank installation three
Published by in Rainwater Harvesting
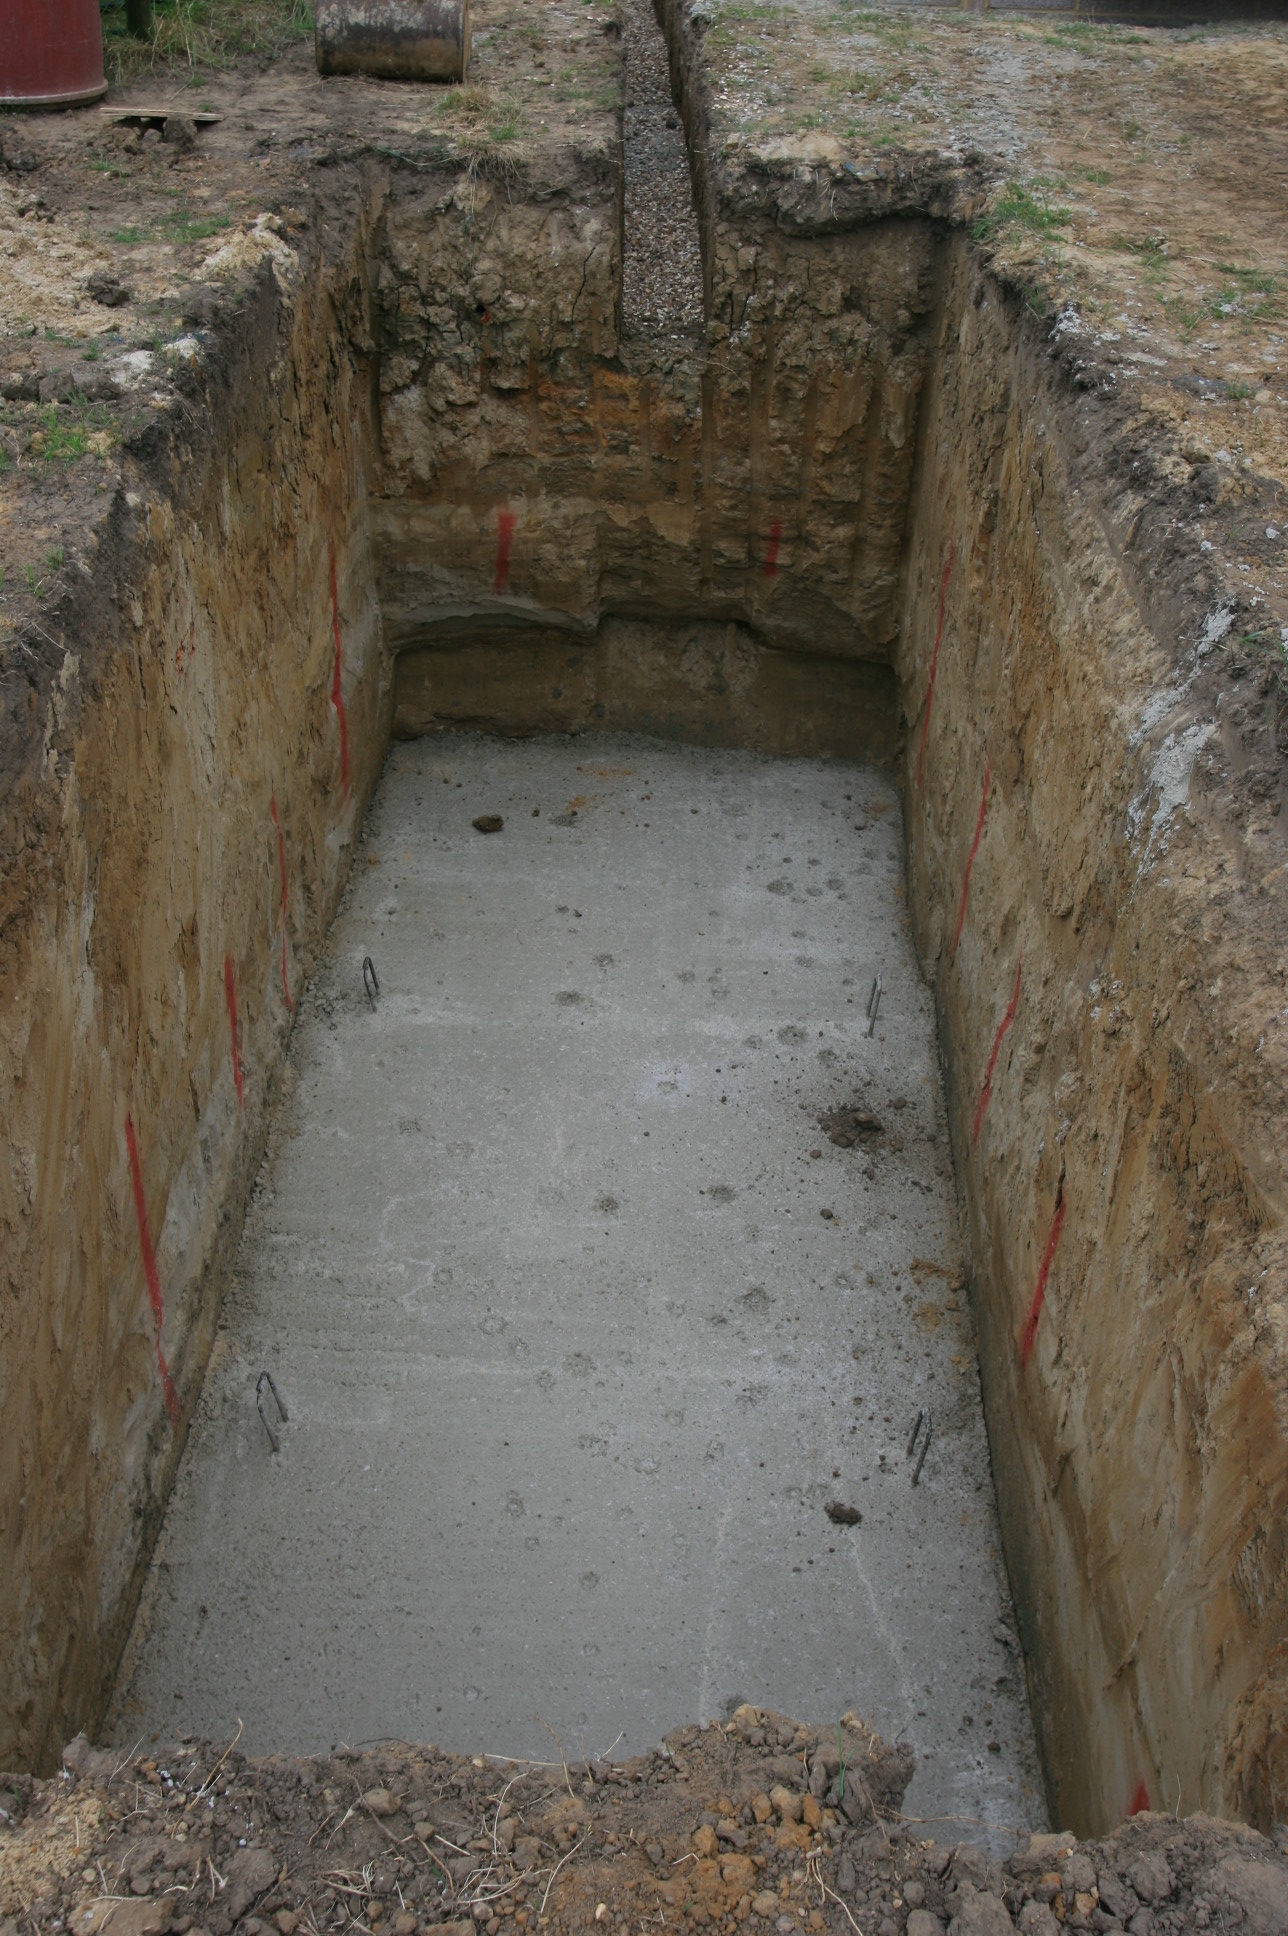
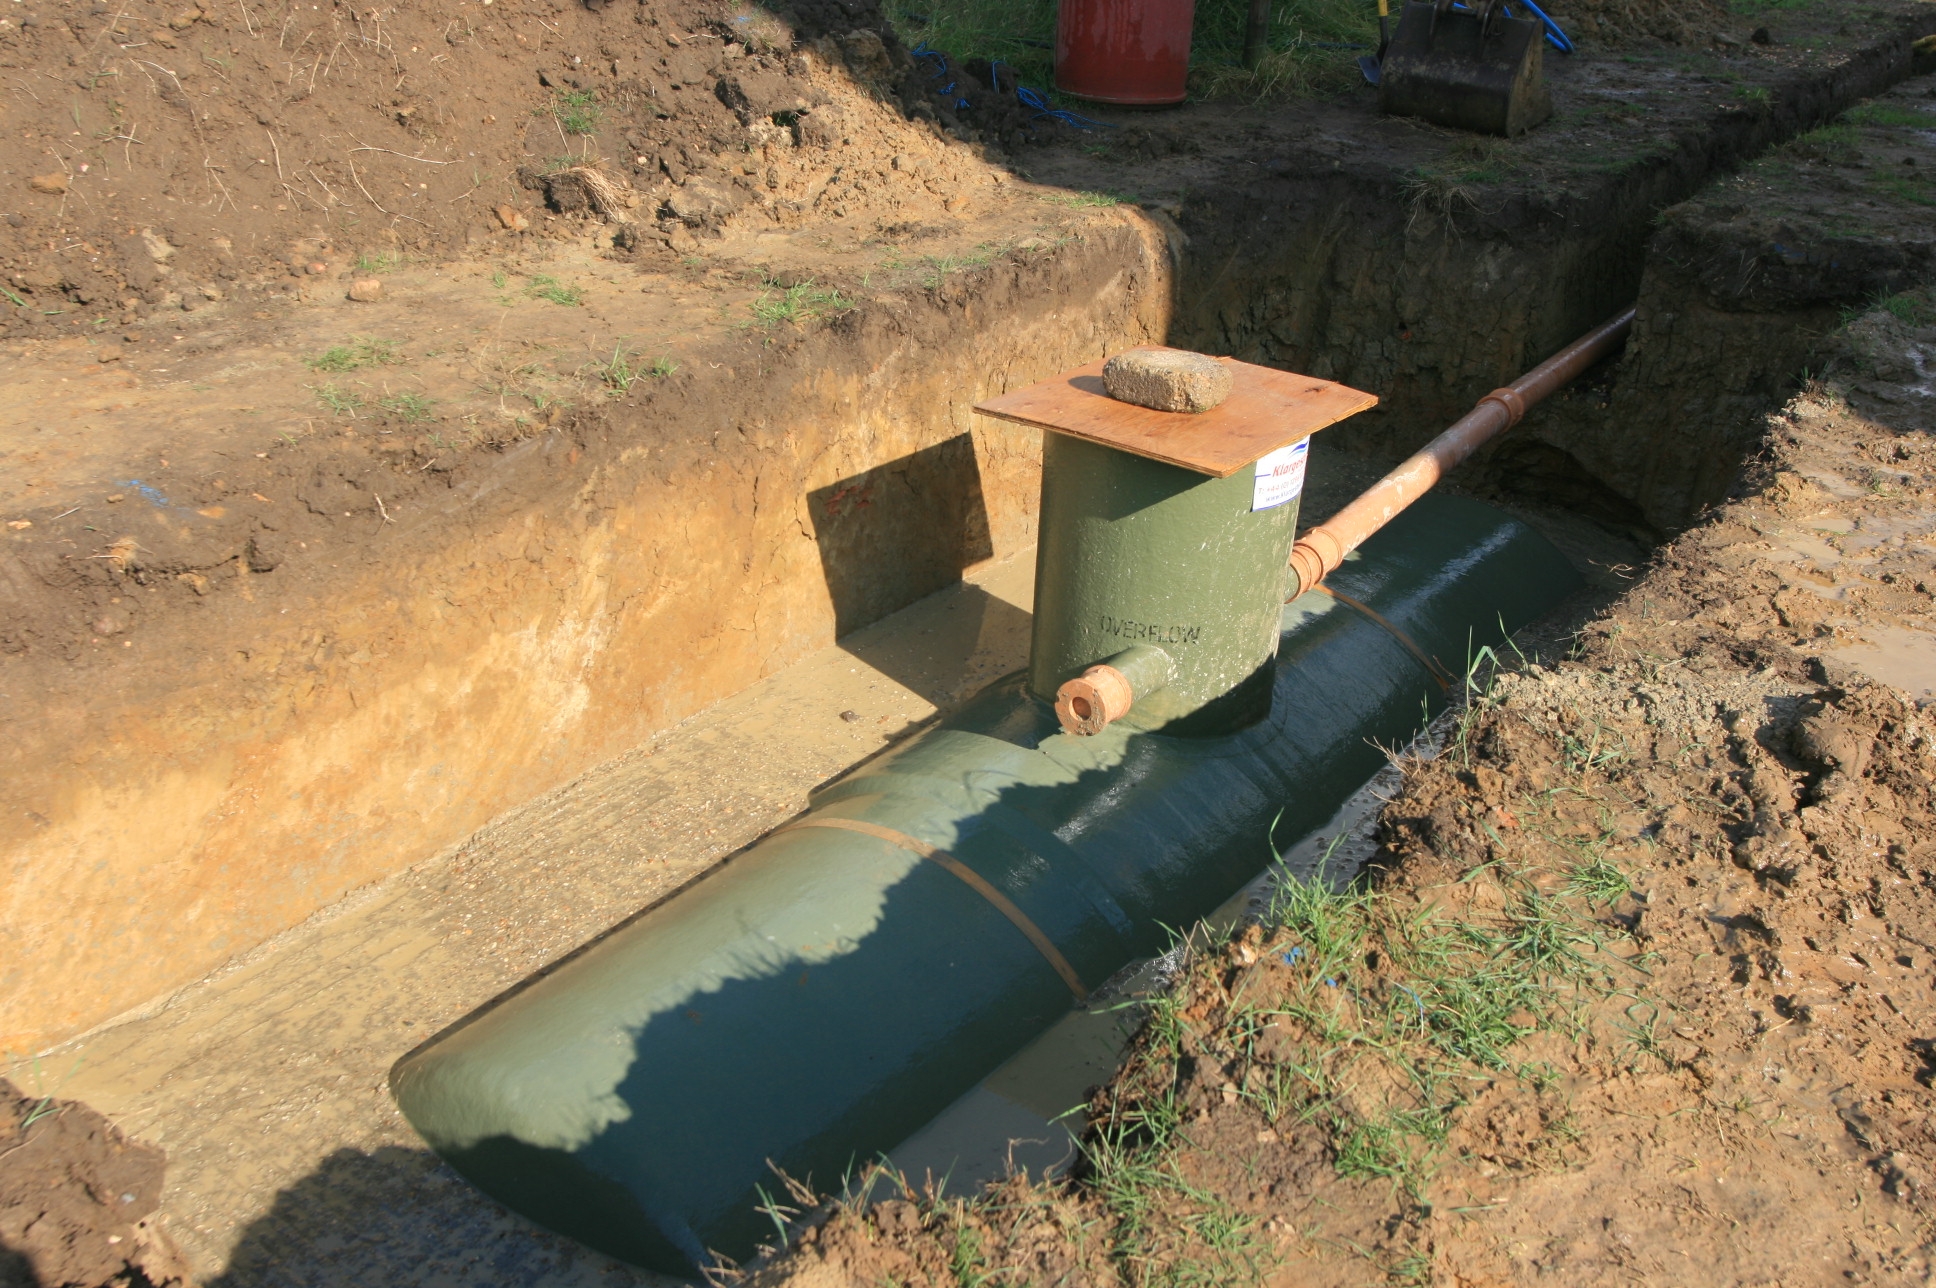 With the concrete pour finished our submarine HMS Overflow (enlarge the pic to see the name on the “conning tower”) is in her final resting place. The rest of the level will be made up with sand previously extracted from the hole and this means that if we need to change the pipe layout into or out of the tank in future due to any problems with the sedum we can do this as they will be accessible in the sand.
Jul
7
2008
Rainwater Harvesting tank installation part two
Published by in Rainwater Harvesting
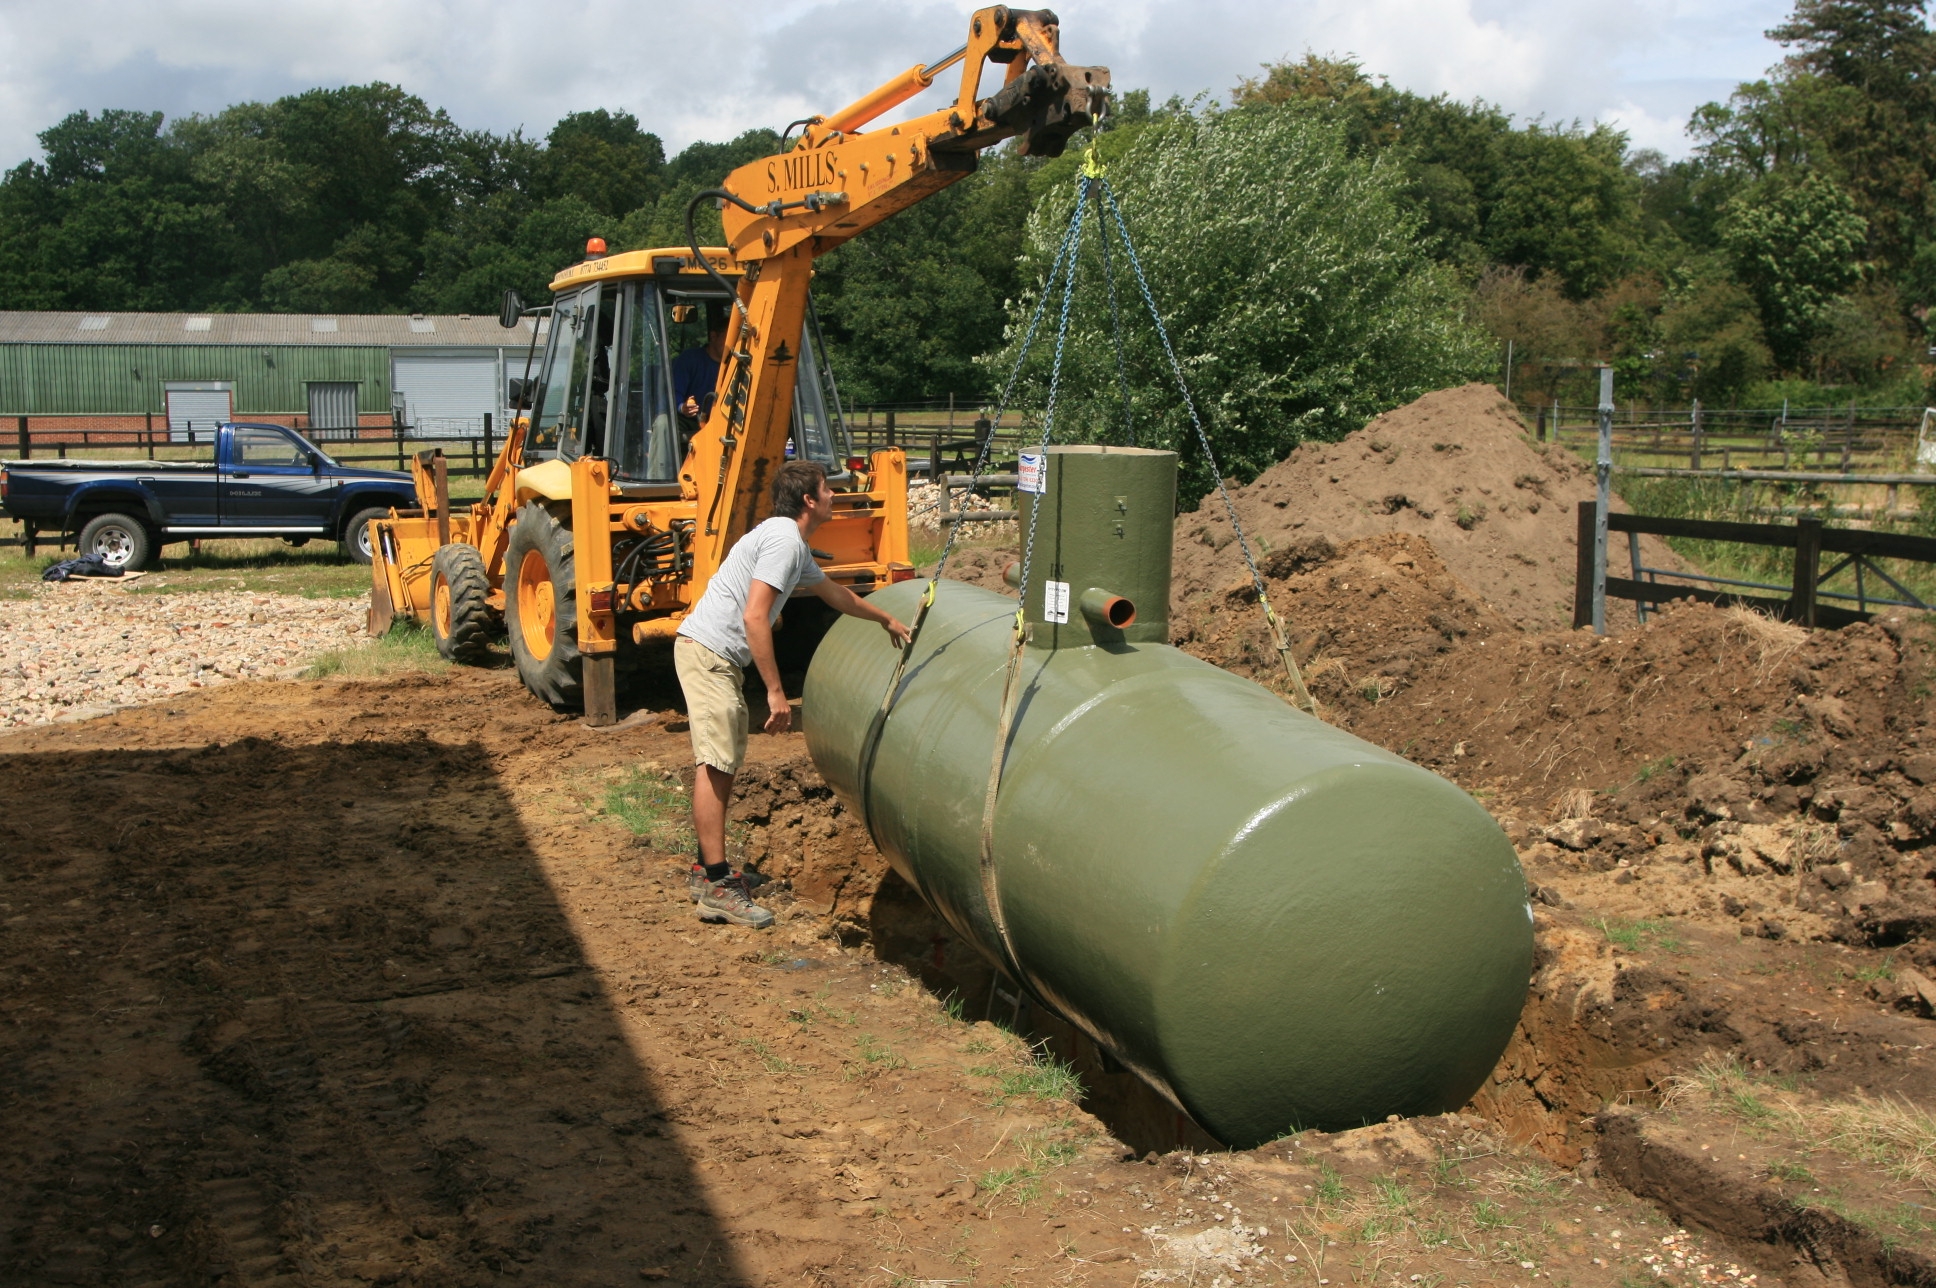 Firstly we lower the tank onto the concrete slab we prepared earlier
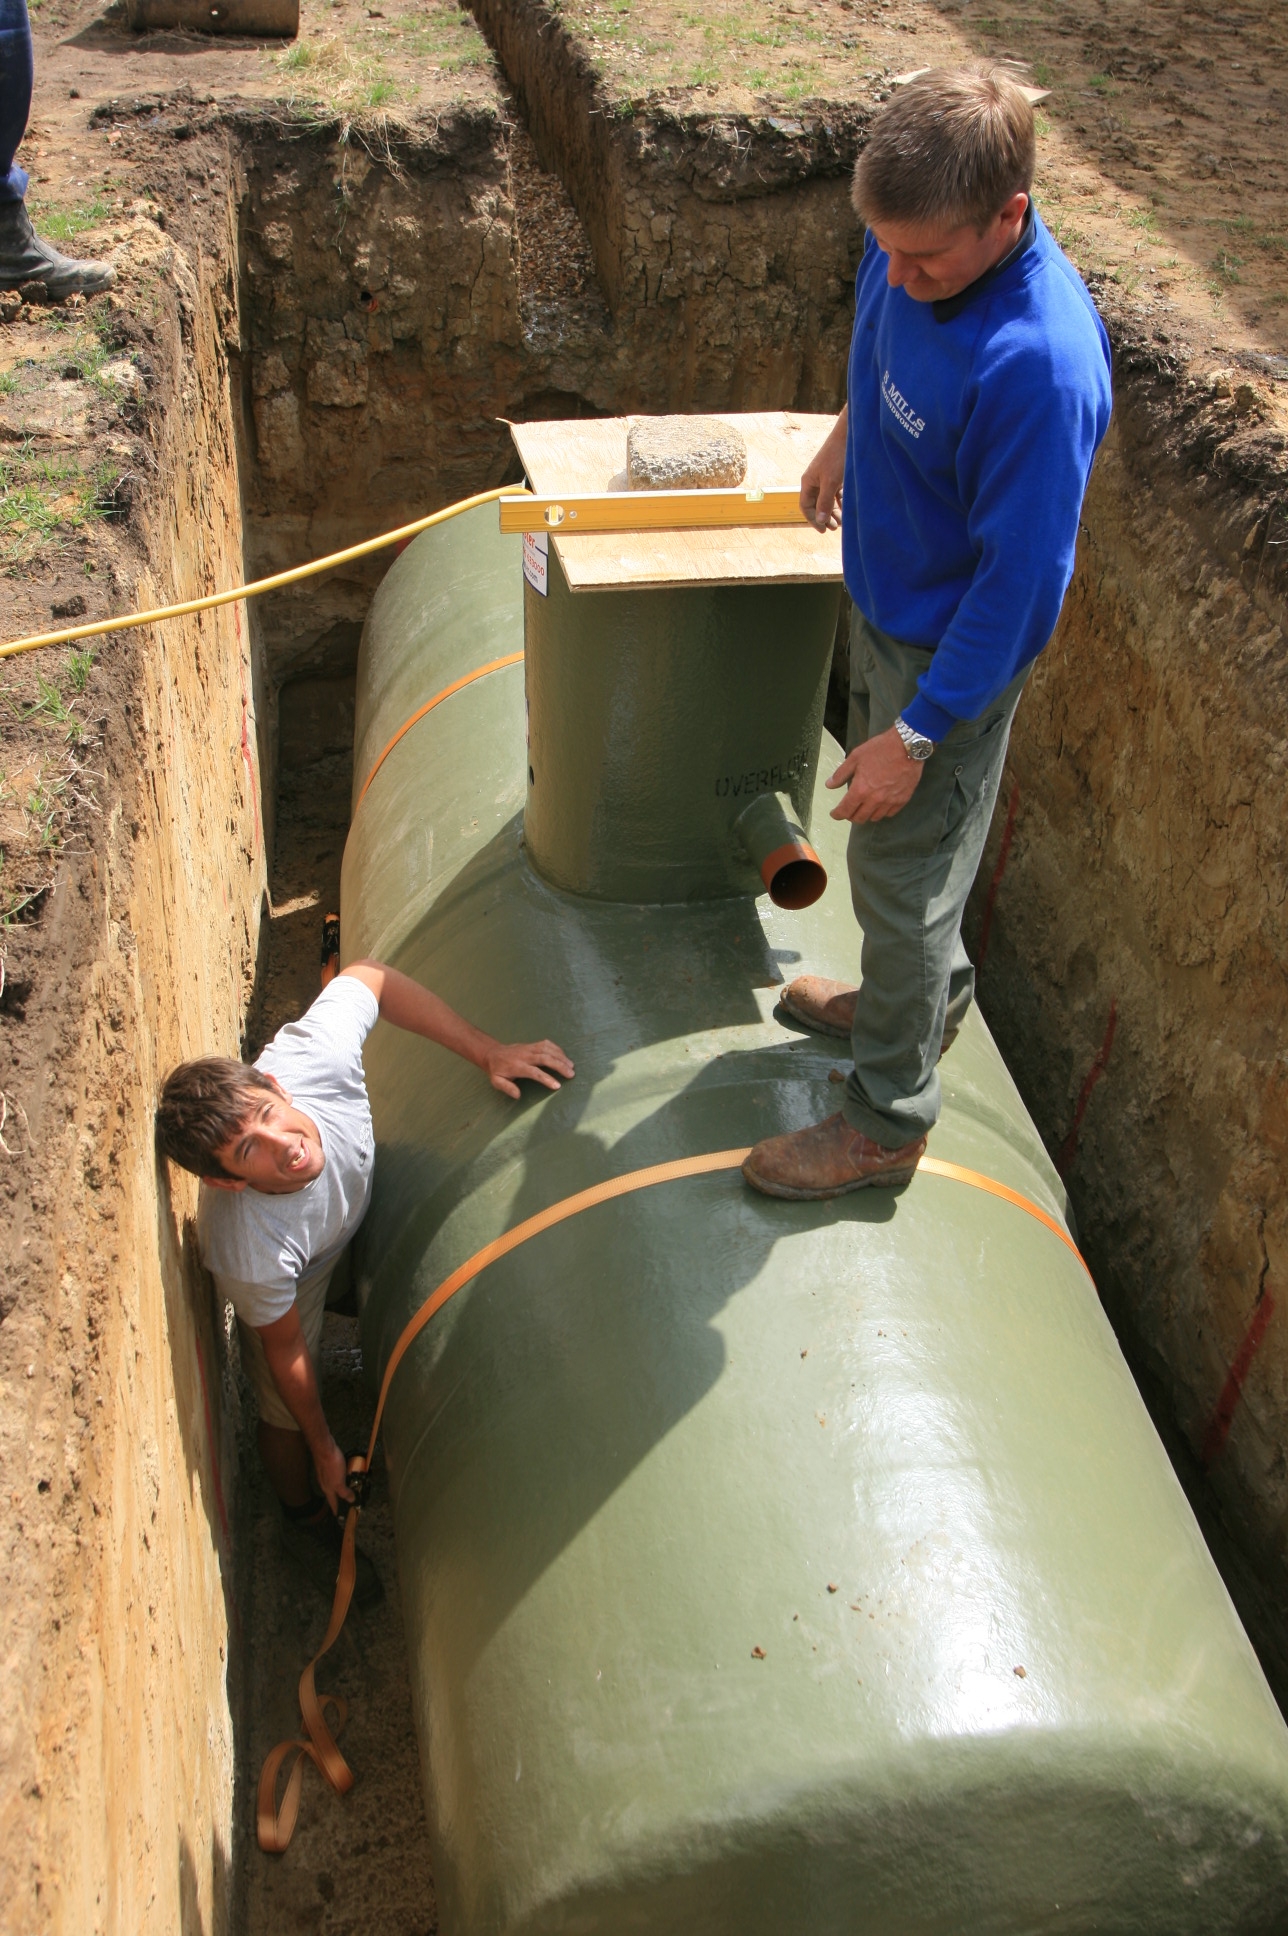 Then it’s “strap”, check it’s level and start filling the tank with the garden hose to help weight the tank down. We gave the tank a thorough clean on the inside to make sure we were starting with a clean tank in view of the warning about organic matter “blooming” with fertilizer from the sedum roof.
 The concrete lorry arrives late in the day after a few beefy showers. We had taken the precaution of temporarily connecting the outflow from the the roof to the tank to avoid any of the side of the hole being washed onto the slab. We had some considerable flow into the tank during the rain, as the sedum had already had a good soaking over the weekend, so it’s a good job we did hook it up, and pleasing to see that we will get water in the tank! Phew!
Jul
4
2008
Rainwater Havesting installation
Published by in Rainwater Harvesting
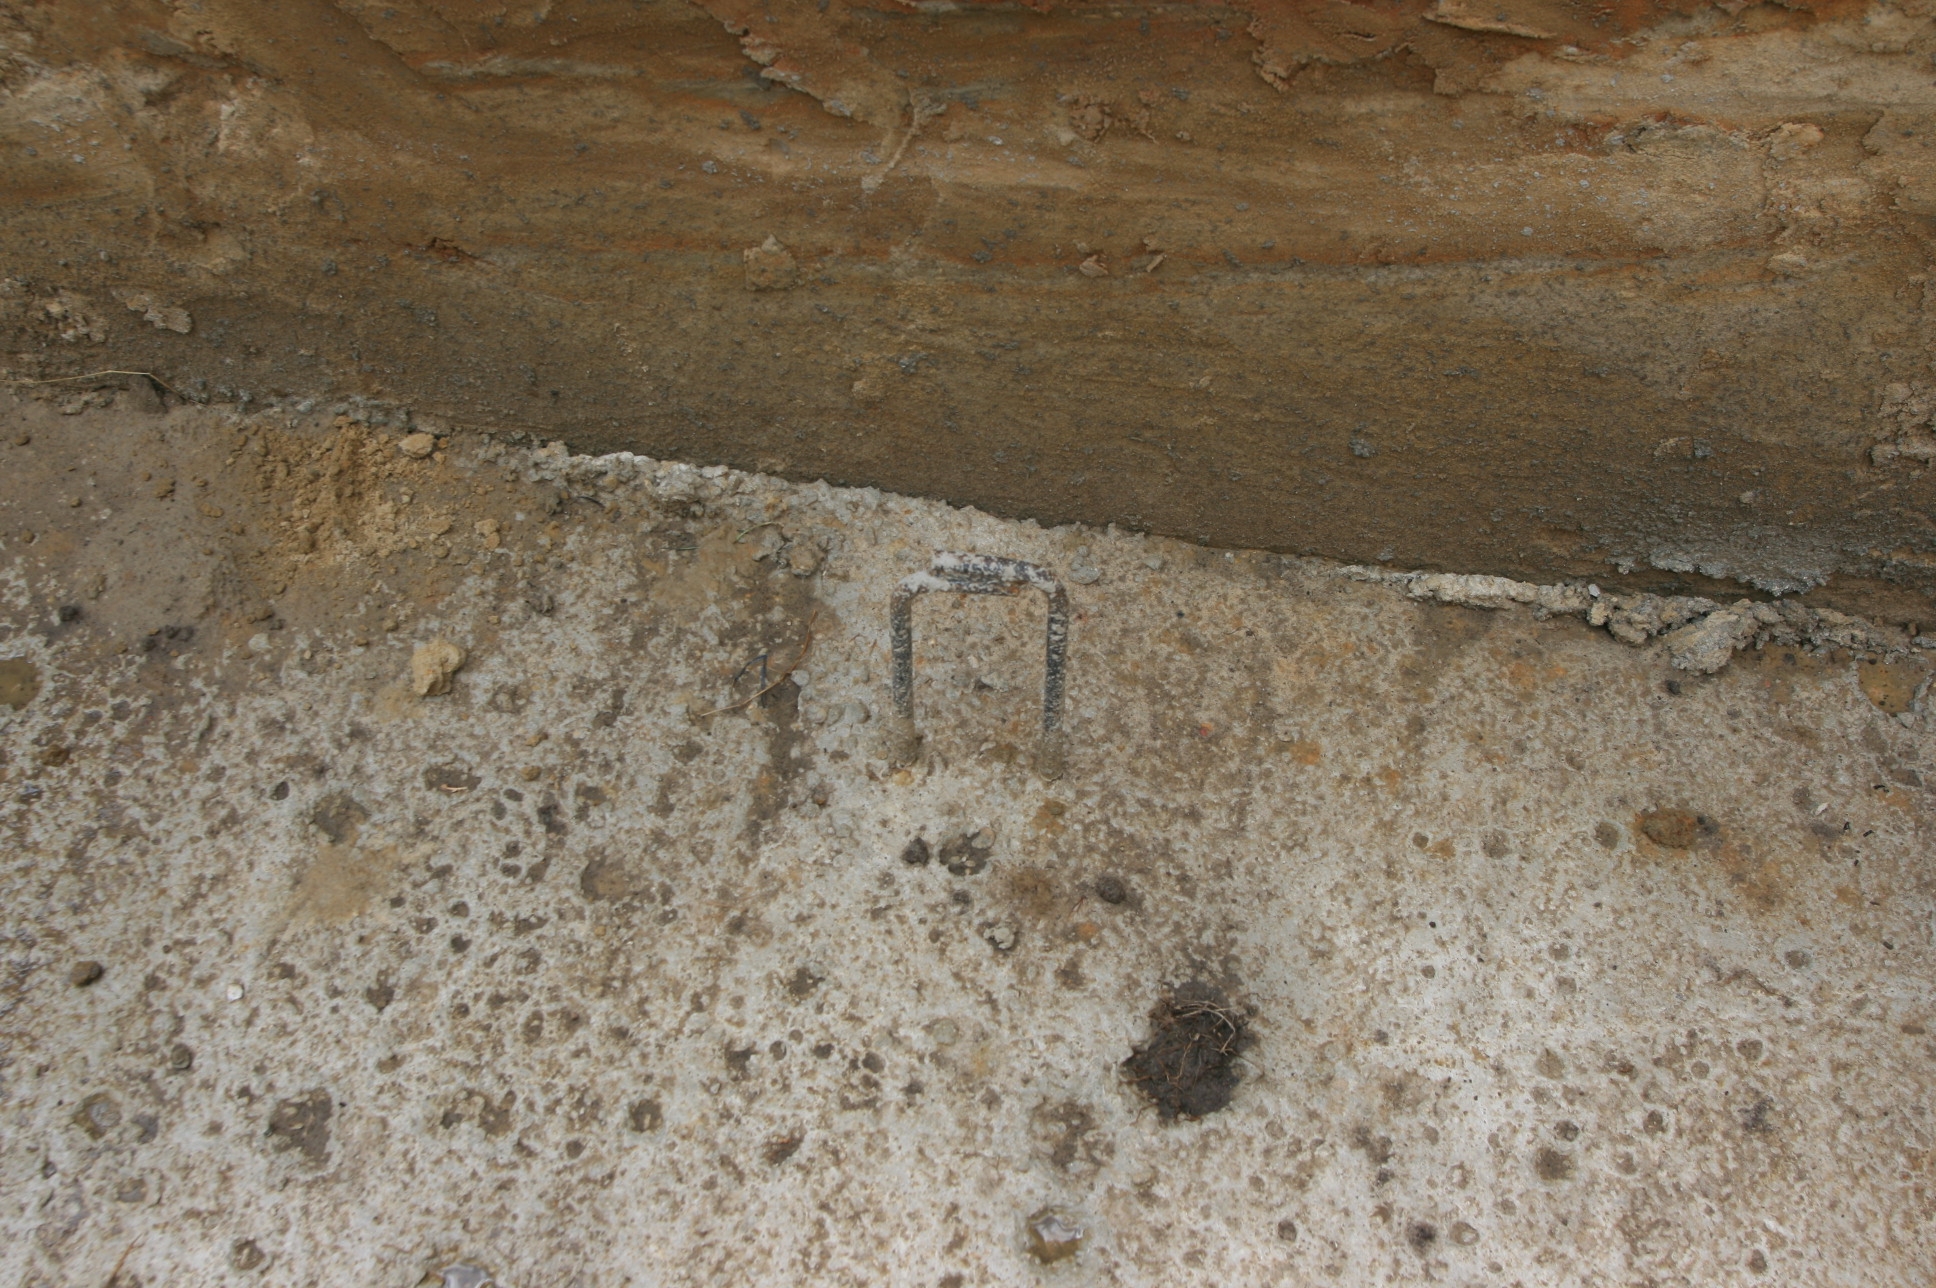
 So you make a big hole in the ground for the rain water harvesting tank, pour some concrete to make a slab (about 6″ thick is fine) making sure you place some steel loops to strap the tank down on to the slab so that it does not float up when you put more concrete on it to hold it down. We are on very free draining sandy soil but with the heavy flooding of recent times, the idea of the tank rising up out of the ground if it were empty prior to heavy rain fall was something we wanted to avoid. Our tank supplier said there have been a few stories of people who just backfilled with pea shingle or similar having such uplifting experiences so for £500-600 of concrete (about 8 cubic metres) it did not seem worth taking the risk.
Jul
1
2008
Rain Water Harvesting tank arrives
Published by in Rainwater Harvesting
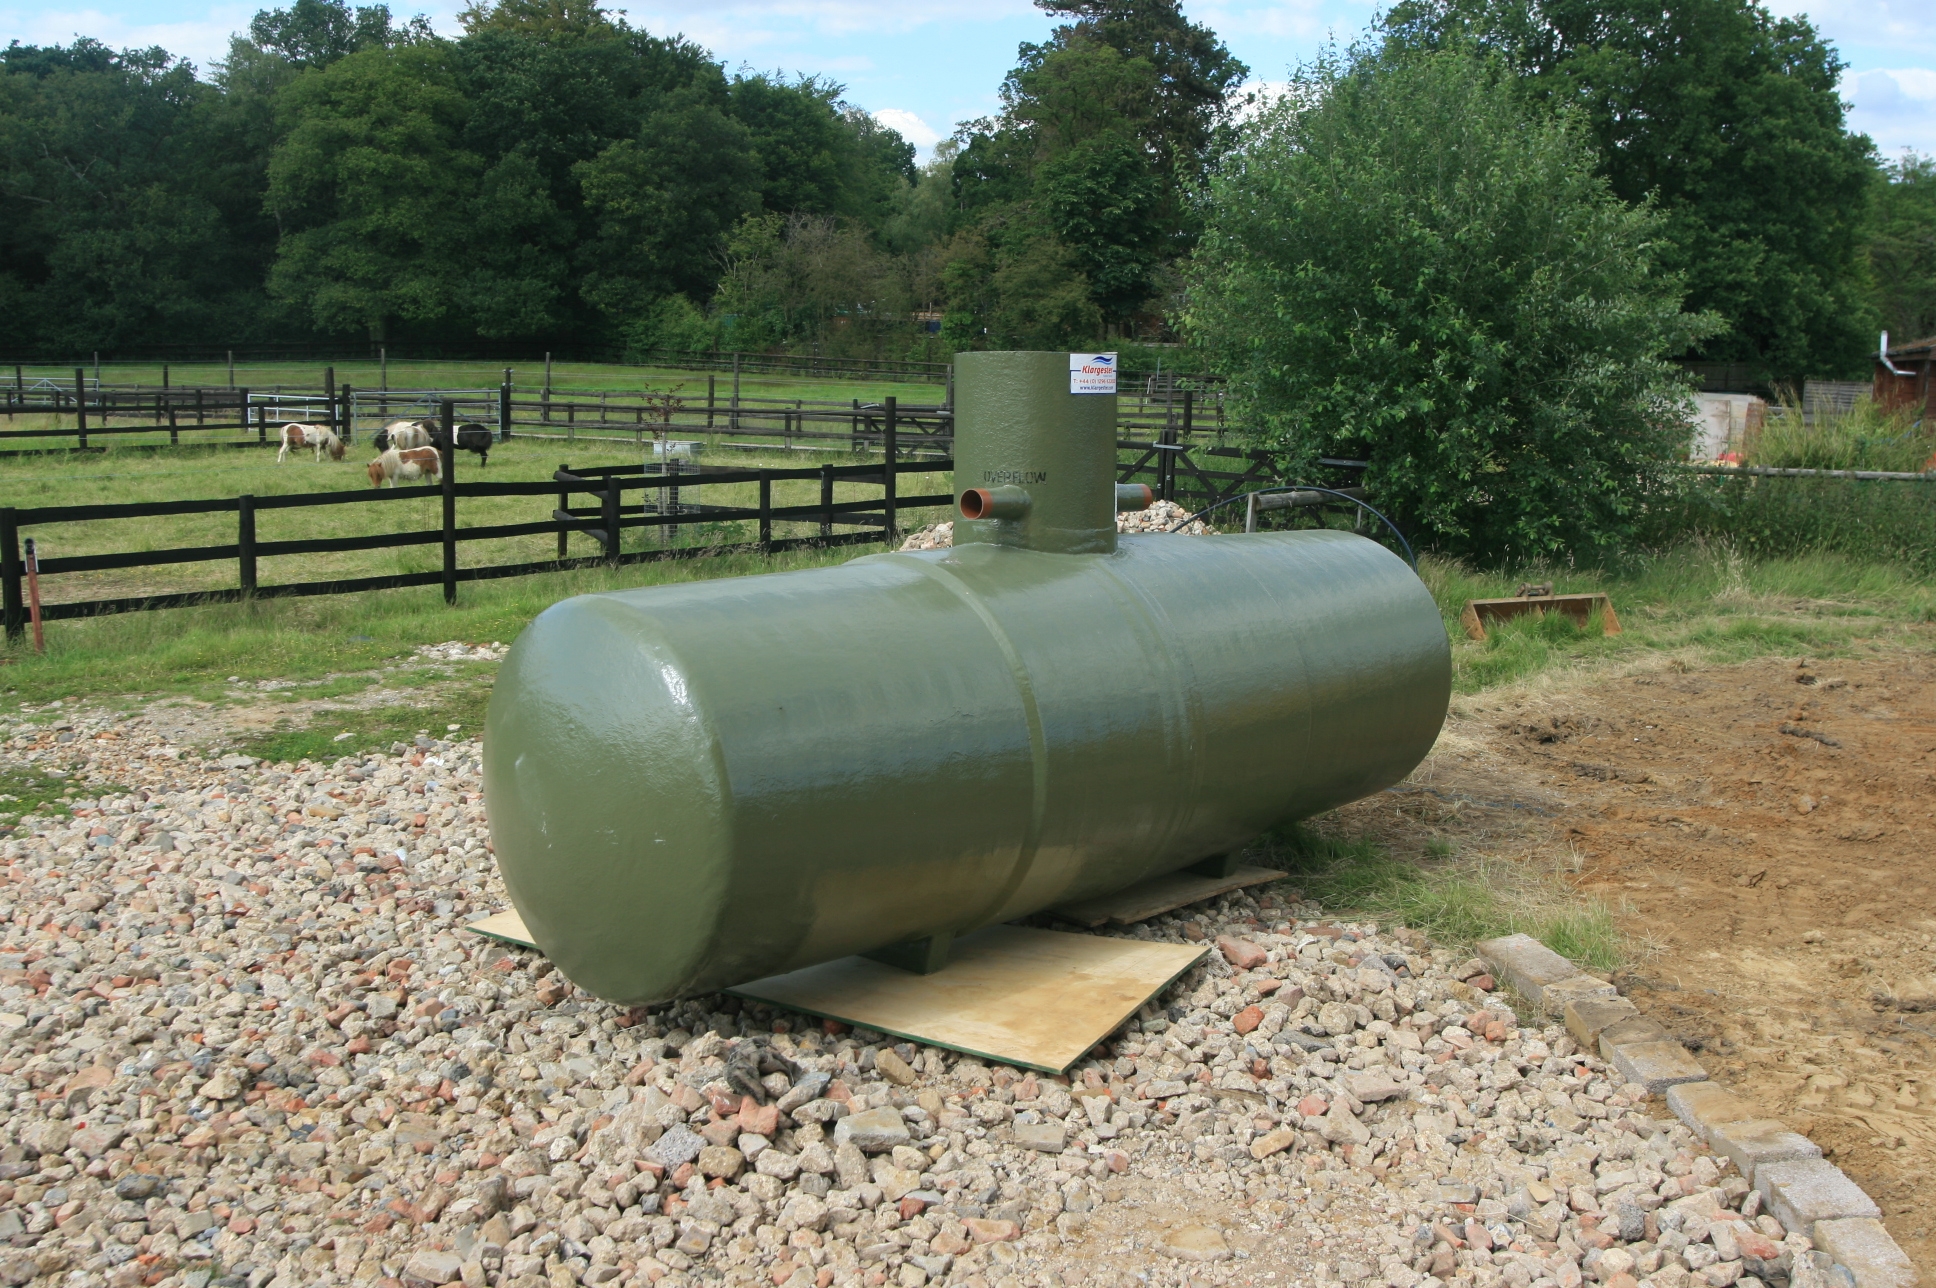 Here’s our latest bit of technological fun. We have decided to try to engineer a rainwater recovery system into the house, despite our sedum roof, which will absorb a lot of the water unless we get heavy rain. The tank is oversized at 6,000 ltrs so that the reduced rainwater because of the sedum can be made up in period of heavy rain.
However, having made this bold decision we now find there are two issues we will have to contend with. Firstly running a bigger tank works against the principle that the tank should regularly rise and fall during wet and dry periods so that the water is regularly exchanged.
Secondly the fertilizer put on the sedum roof at installation could possibly wash into the tank, encouraging orgnic matter to bloom. This has been a problem on other installations so we will have to watch out for this. However our roof and the installation fertilizing was done some months ago so hopefully most of this has been adsorbed or washed through.
Certainly we are advised by the technical department of the tank suppliers not to use the system for the washing machine, only the toilets.
The tank and pump kit cost £2,600 (plus VAT) and the groundwork installation plus the additional “grey water” plumbing system in the house (with it’s own header tank) will probably double this cost. So another thing to play with but unless water prices soar over the next 10 years a doubtfull excercise in cost effectiveness.