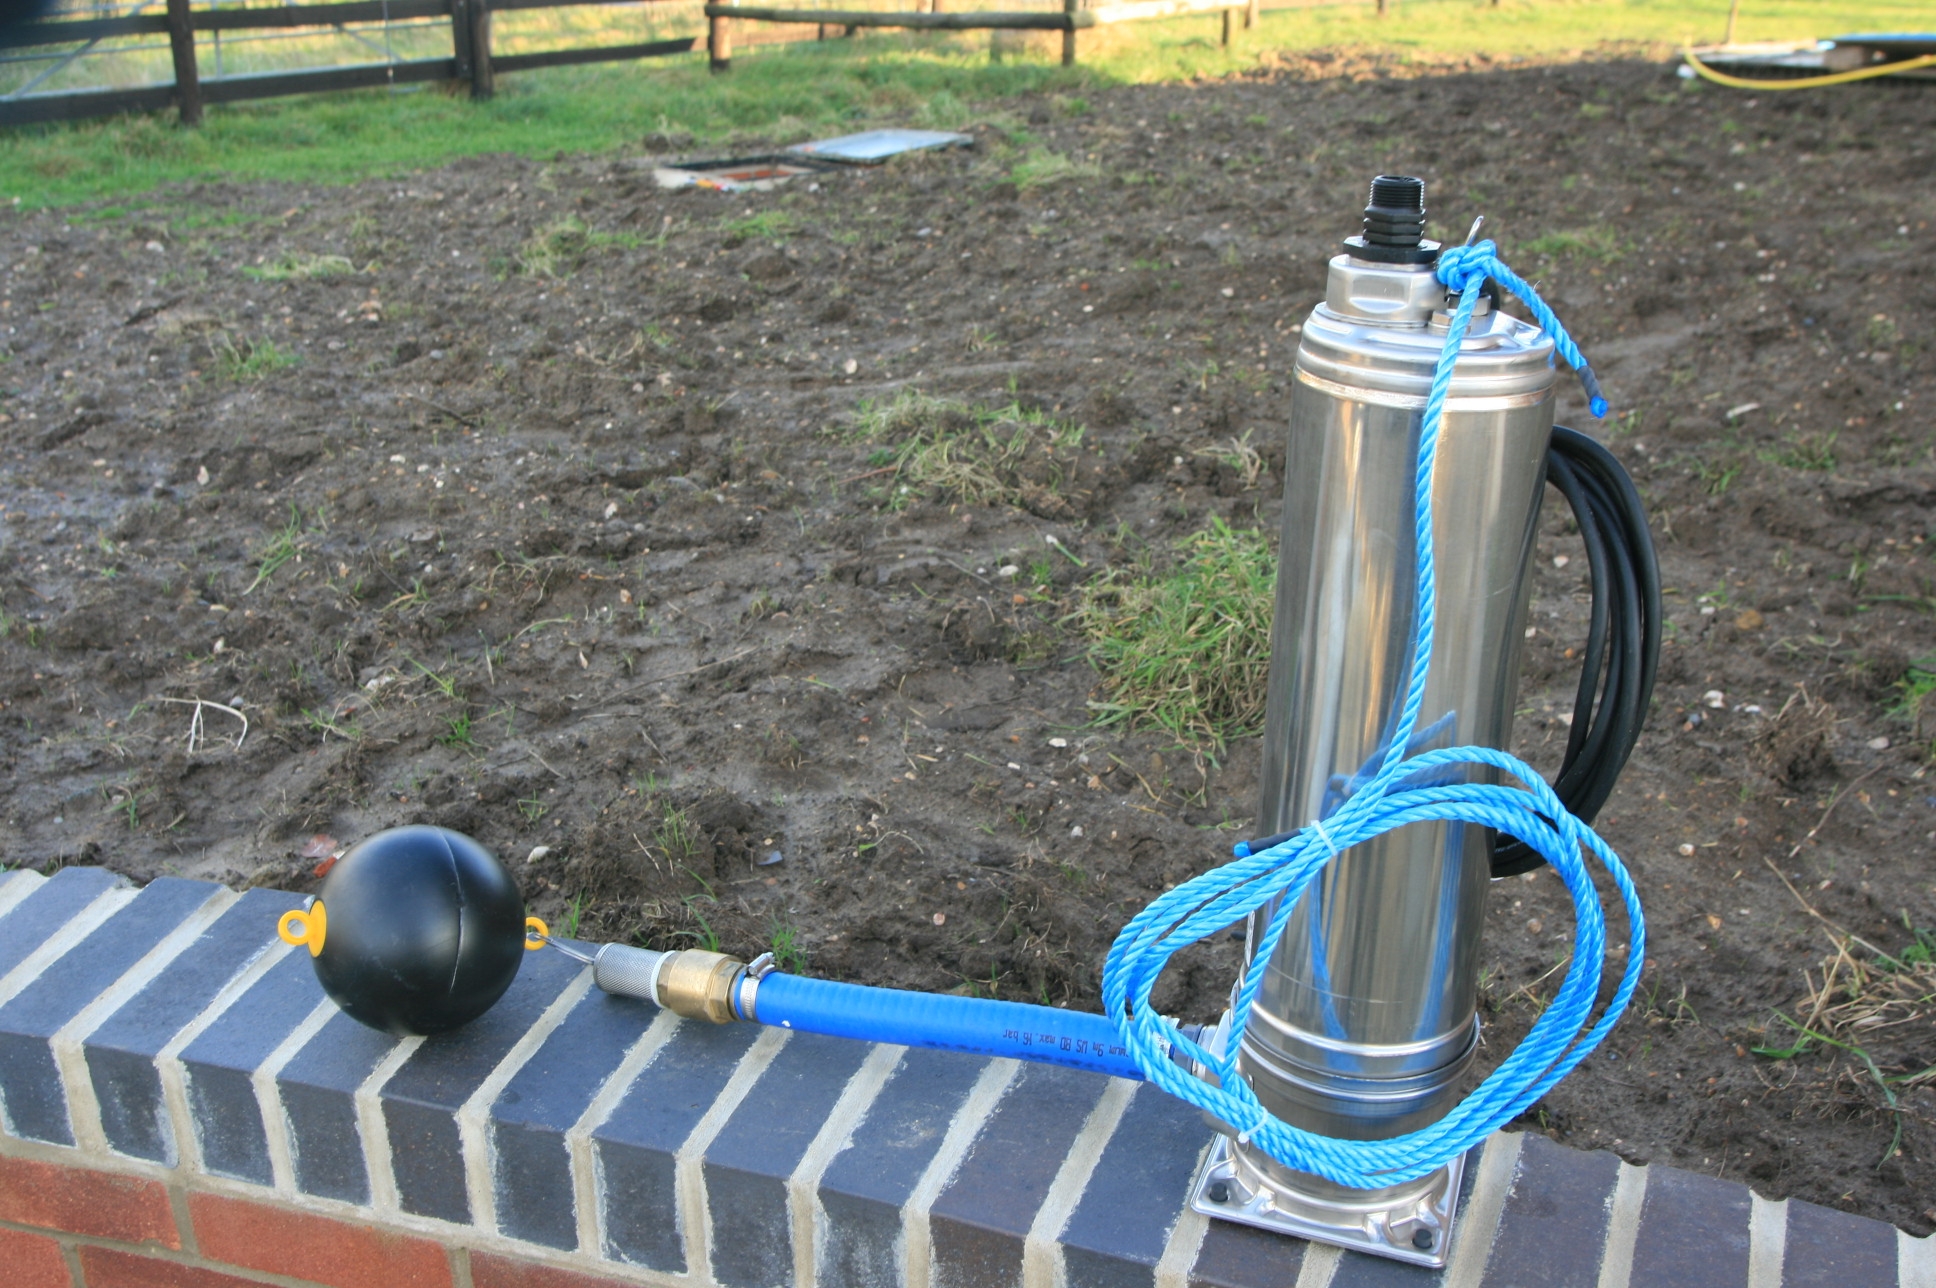
 With the toilet cisterns now connected up we need to fill the header tank in the roof space with rain water. The installation instructions for the rain water harvesting system say to leave the pump out until you are ready to install it. IIn the background you can see the cover is off the manhole into the tank. The pump assembly is ready with its float to keep the gauze mesh pick up point off the bottom of the tank and the blue cord to lower it into the tank (and retrieve it later if servicing is required!)
Archive for November, 2008
Nov
30
2008
Installing the rain water harvesting submersible pump
Published by in General, Rainwater Harvesting
Nov
28
2008
Testing the roof safety system on the sedum roof
Published by in Roof Safety System
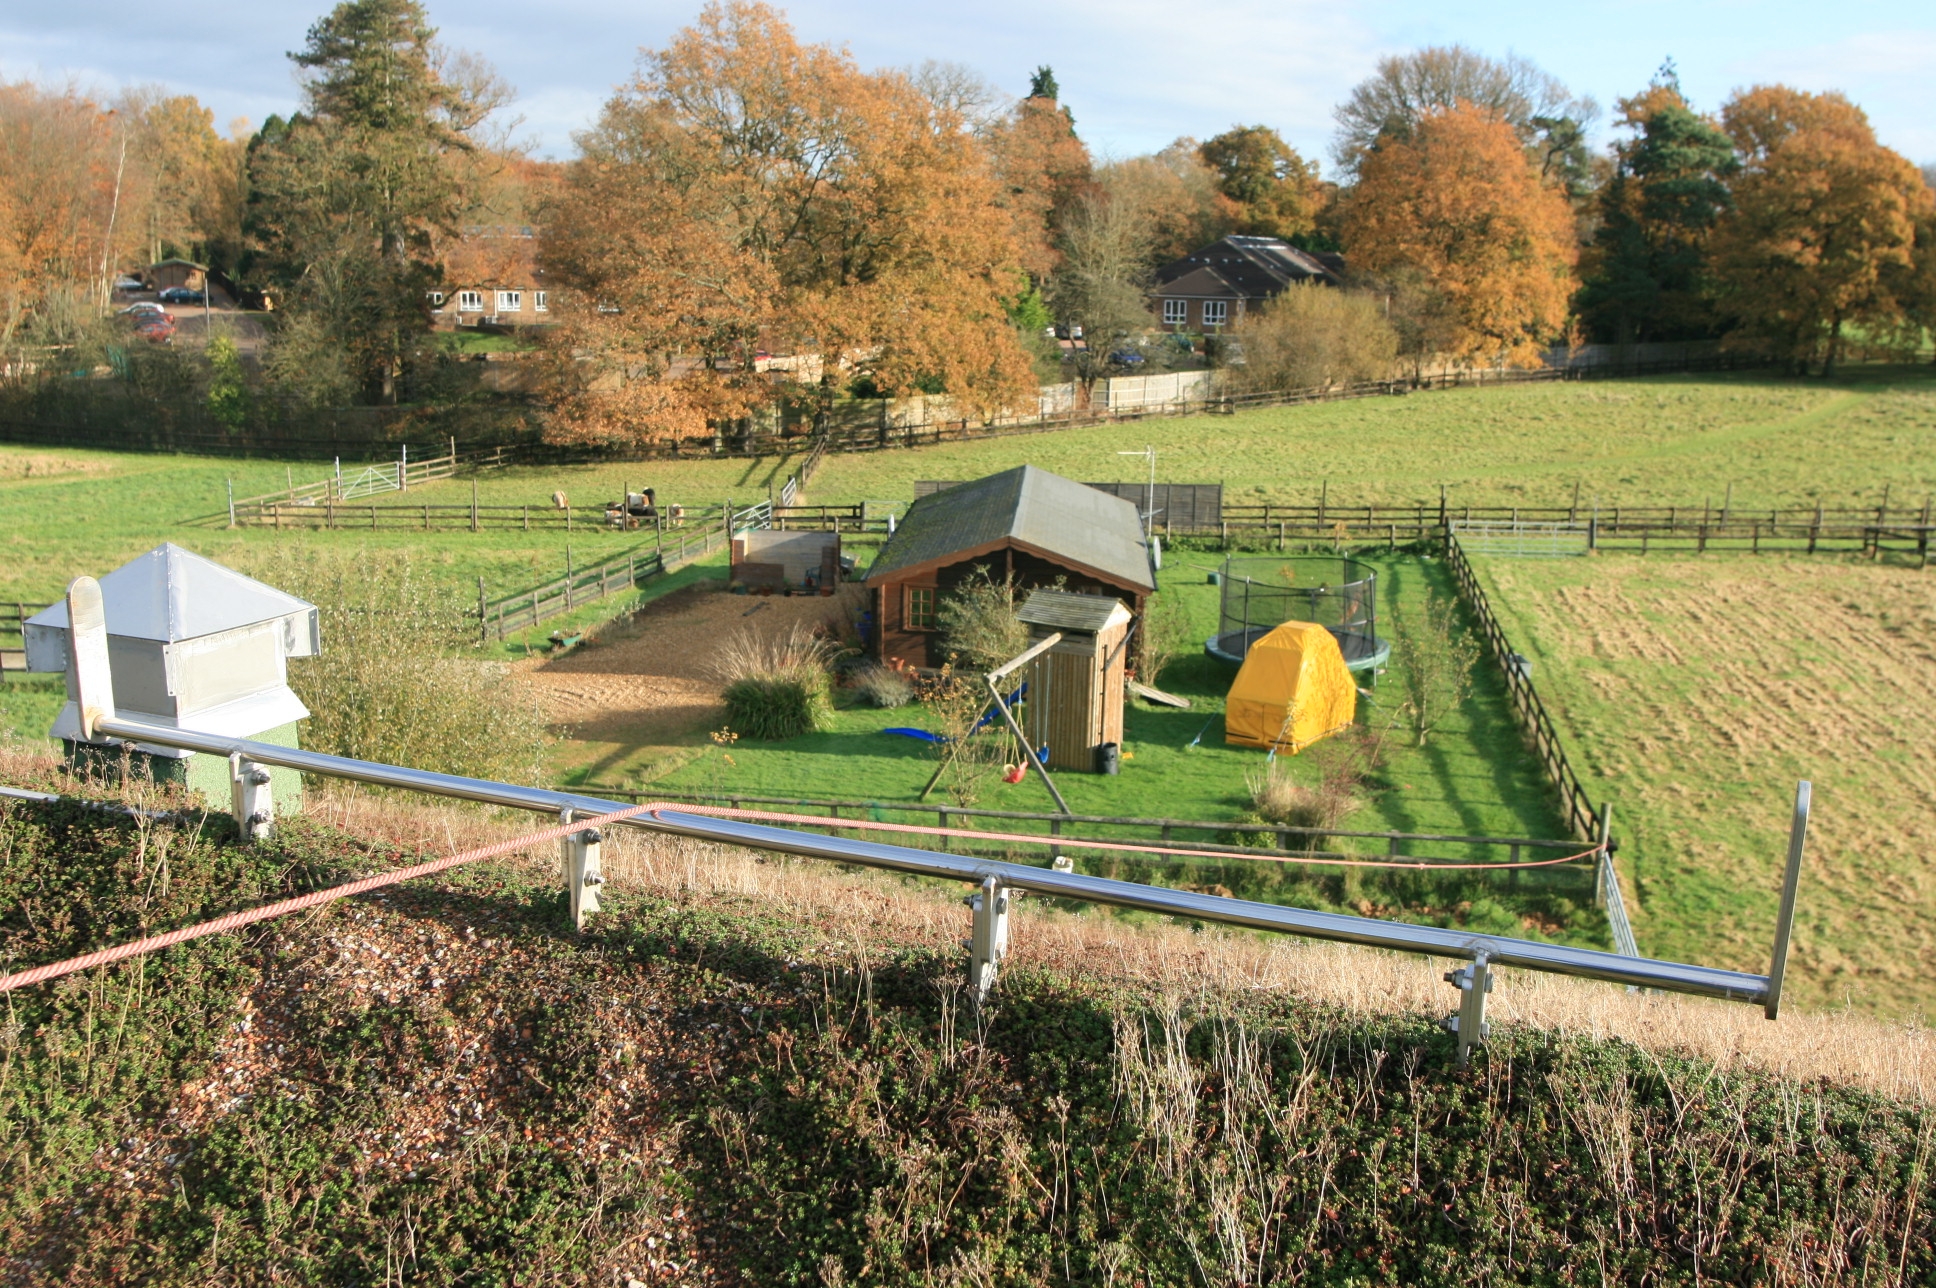 While we were up on the roof fixing the leak around the flue collar we used the safety line to secure to. This goes over the top of the roof and was secured to a fence post. The stainless steel bar along the top of the roof keeps the line off the sedum and the vertical bits at the end stop the rope letting you swing off the gable ends of the roof . Pleasing to see it works. We’ll tell you how we get the line on the roof soon too!
You can see our original log “mobile home” at the end of the rope too.
Nov
26
2008
Checking the sedum roof on the log house
Published by in Sedum Roofing
 While we were up on the roof checking the chimney flue, we had a good look at the sedum. We had seen some wispy white looking stuff, but this turns out to be dead growth from one of the summer flowering varieties. Everything else looked fine and the areas where the rolls meet are gradually dissappearing as the sedum grows across the joins.
Nov
24
2008
Sorting a leaky chimney on the log house roof
Published by in General, Sedum Roofing
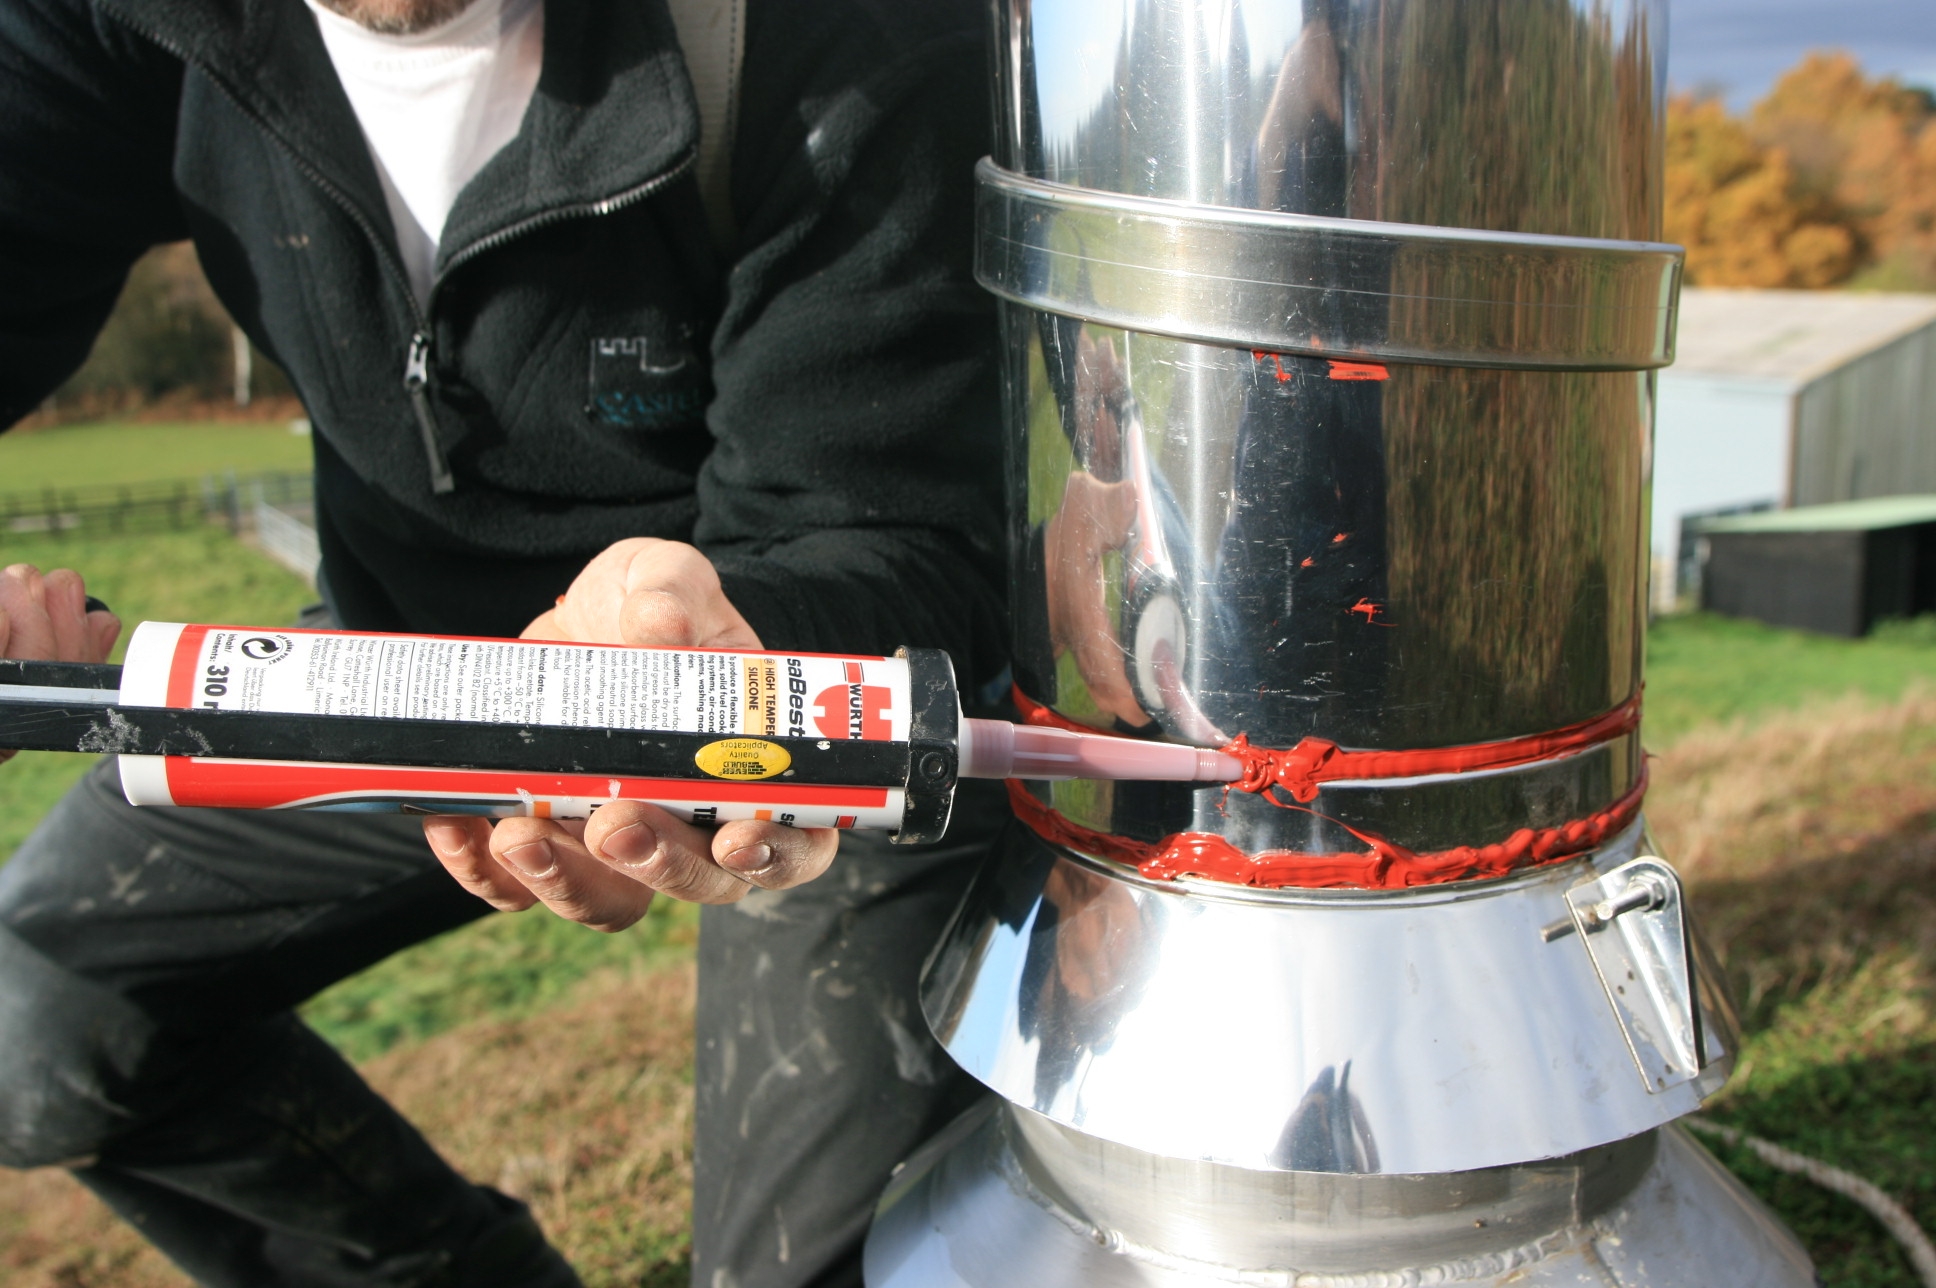
We have suffered from a small amount of water creeping in the chimney flue. It ran down the outside of the flue pipe, suggesting there was some sealing issue with the rain collar supplied with the flue.
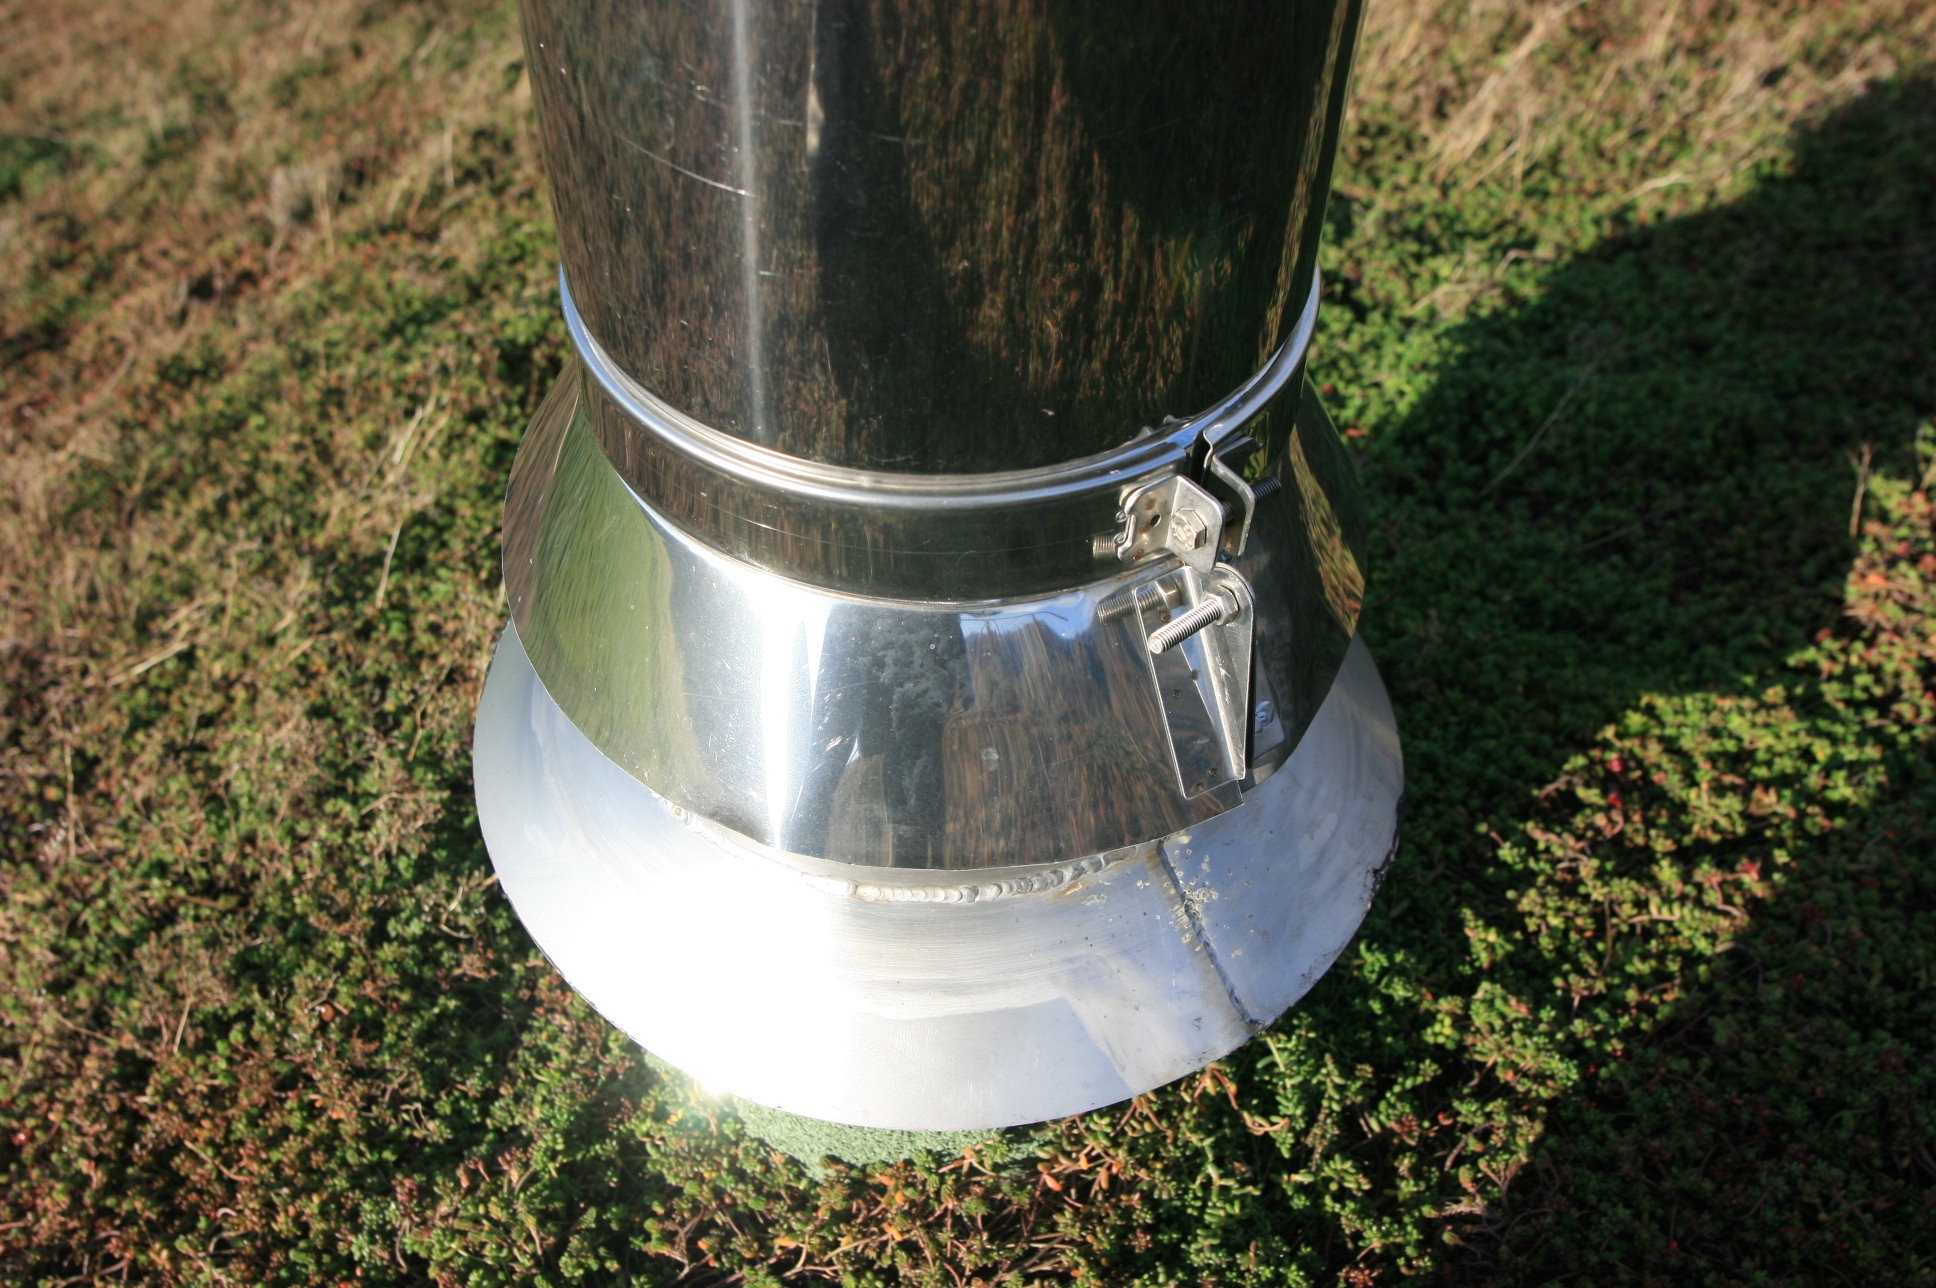 What we weren’t aware of when we fitted the flue was that the collar needs high temperature silicone to ensure a totally watertight seal. So it was up onto the sedum roof and off with the collar and out with the silicon gun.
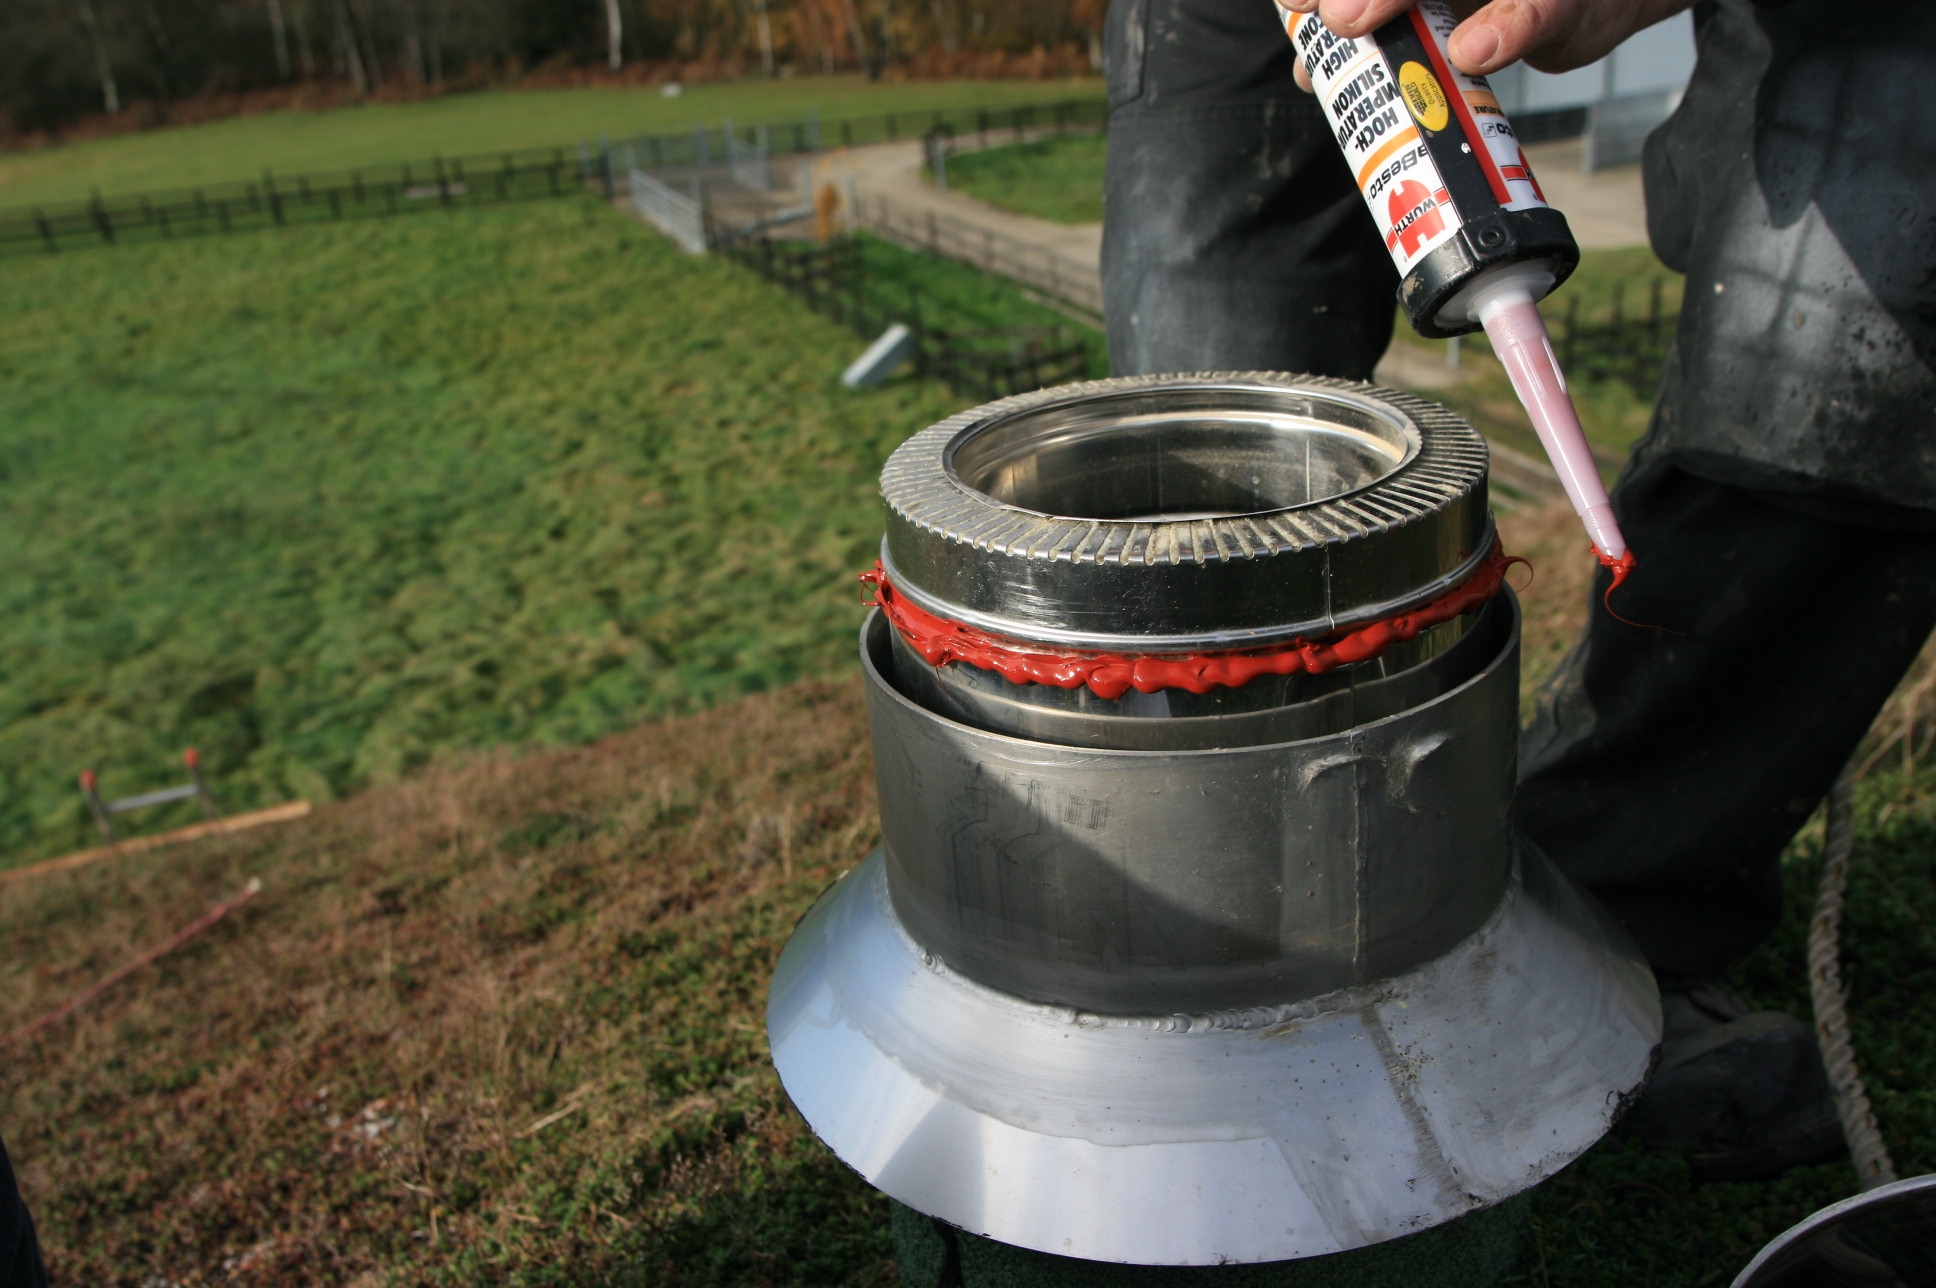 As we had a whole tube of sealant and did not want to go up again, we put the high temperature silicon on the obvious places and the less obvious places to make sure we did not have to get the ladders out and up on the roof again in a hurry.
 Hopefully the next time it rains we will find the job has worked!
Nov
20
2008
Floor tiling protection methods
Published by in General
With the tiled floor in the hallway laid, it will need protection for the remainder of the build.
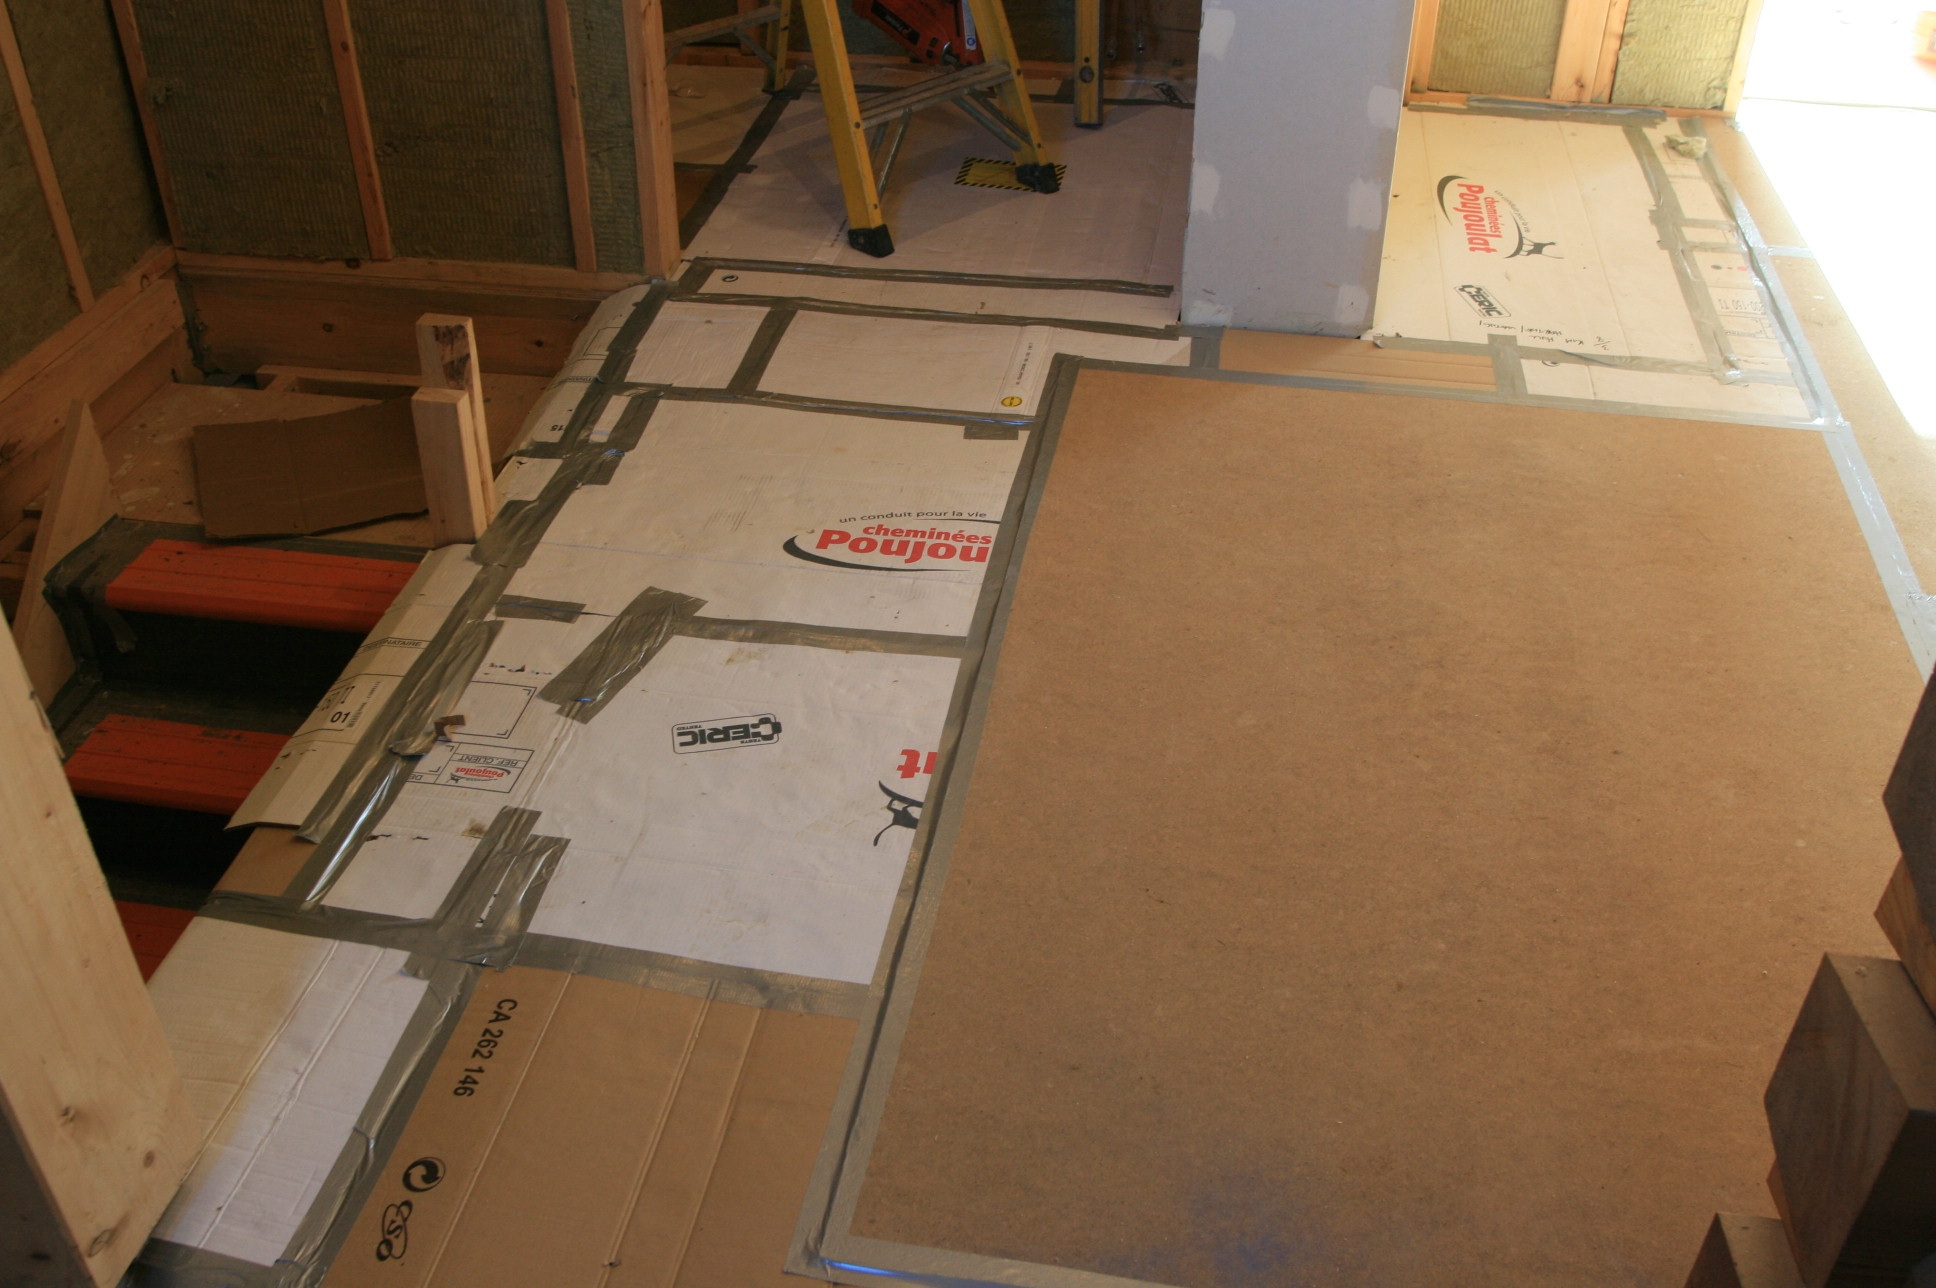 So after brushing and hoovering the tiles to take up any debris, cardboard packaging is used with any metal staples removed to completely cover the tiled areas. The cardboard sections are taped up with duct tape. Then hardboard is used smooth side down to create a hard wearing surface.
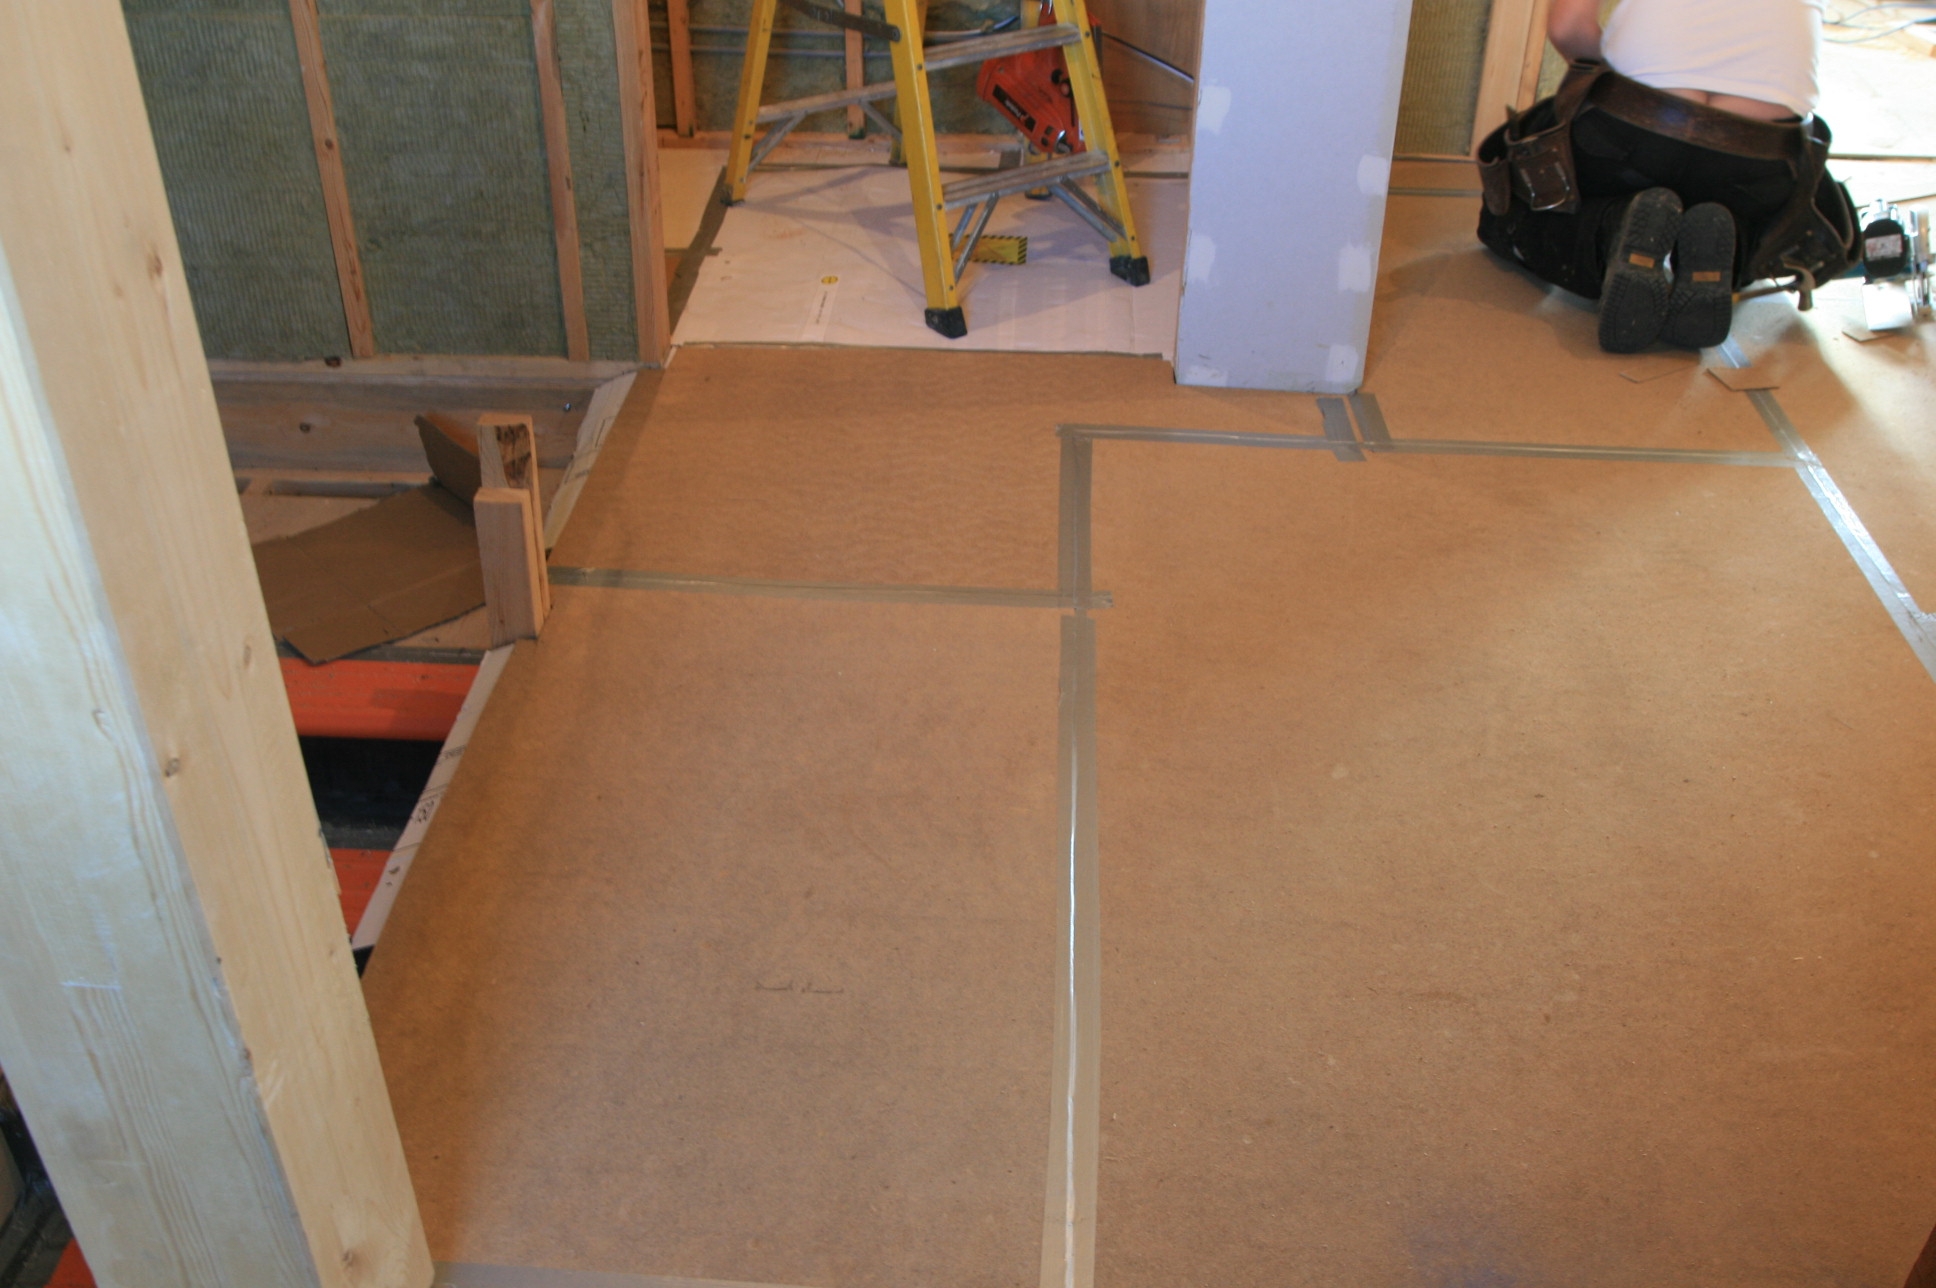 The hardboard is used this way round to avoid creating a slippery surface if it gets wet. The carboard will stop any sharp gritty bits from marking the tiles. This will now stay down until we need to put the skirting down just before the house is finished.
Nov
18
2008
Shower and mixer units for the bathrooms in the log house
Published by in General
To get a smooth look to the tiled walls in the bathrooms we have used the Hans Grohe “I Box” system to enable the mixer units to be fitted and serviced from the front because rear access to the stud walls would have been difficult to organise.
 The Hans Grohe system enables the “I box” to be plumbed up and pressure tested using the pressure test plate on the front (the white bit) before you fit the thermostatic mixer (for the shower) or mixer diverter (for the shower and bath). So all this can be done before the plywood wall is fixed into place and then tiled. You can see a helpful video on You Tube at http://uk.youtube.com/watch?v=EiW3NhMCd8Y
Nov
16
2008
Isolating Tiled areas from vibration
Published by in General
Another advantage of a self build construction is that you can make things exactly how you want them. Of course you need to be careful because this can make costs spiral! We already knew we had a problem with our high spin speed Siemens washing machine, which we have had to move from our existing small log house to the shed which has a concrete floor.
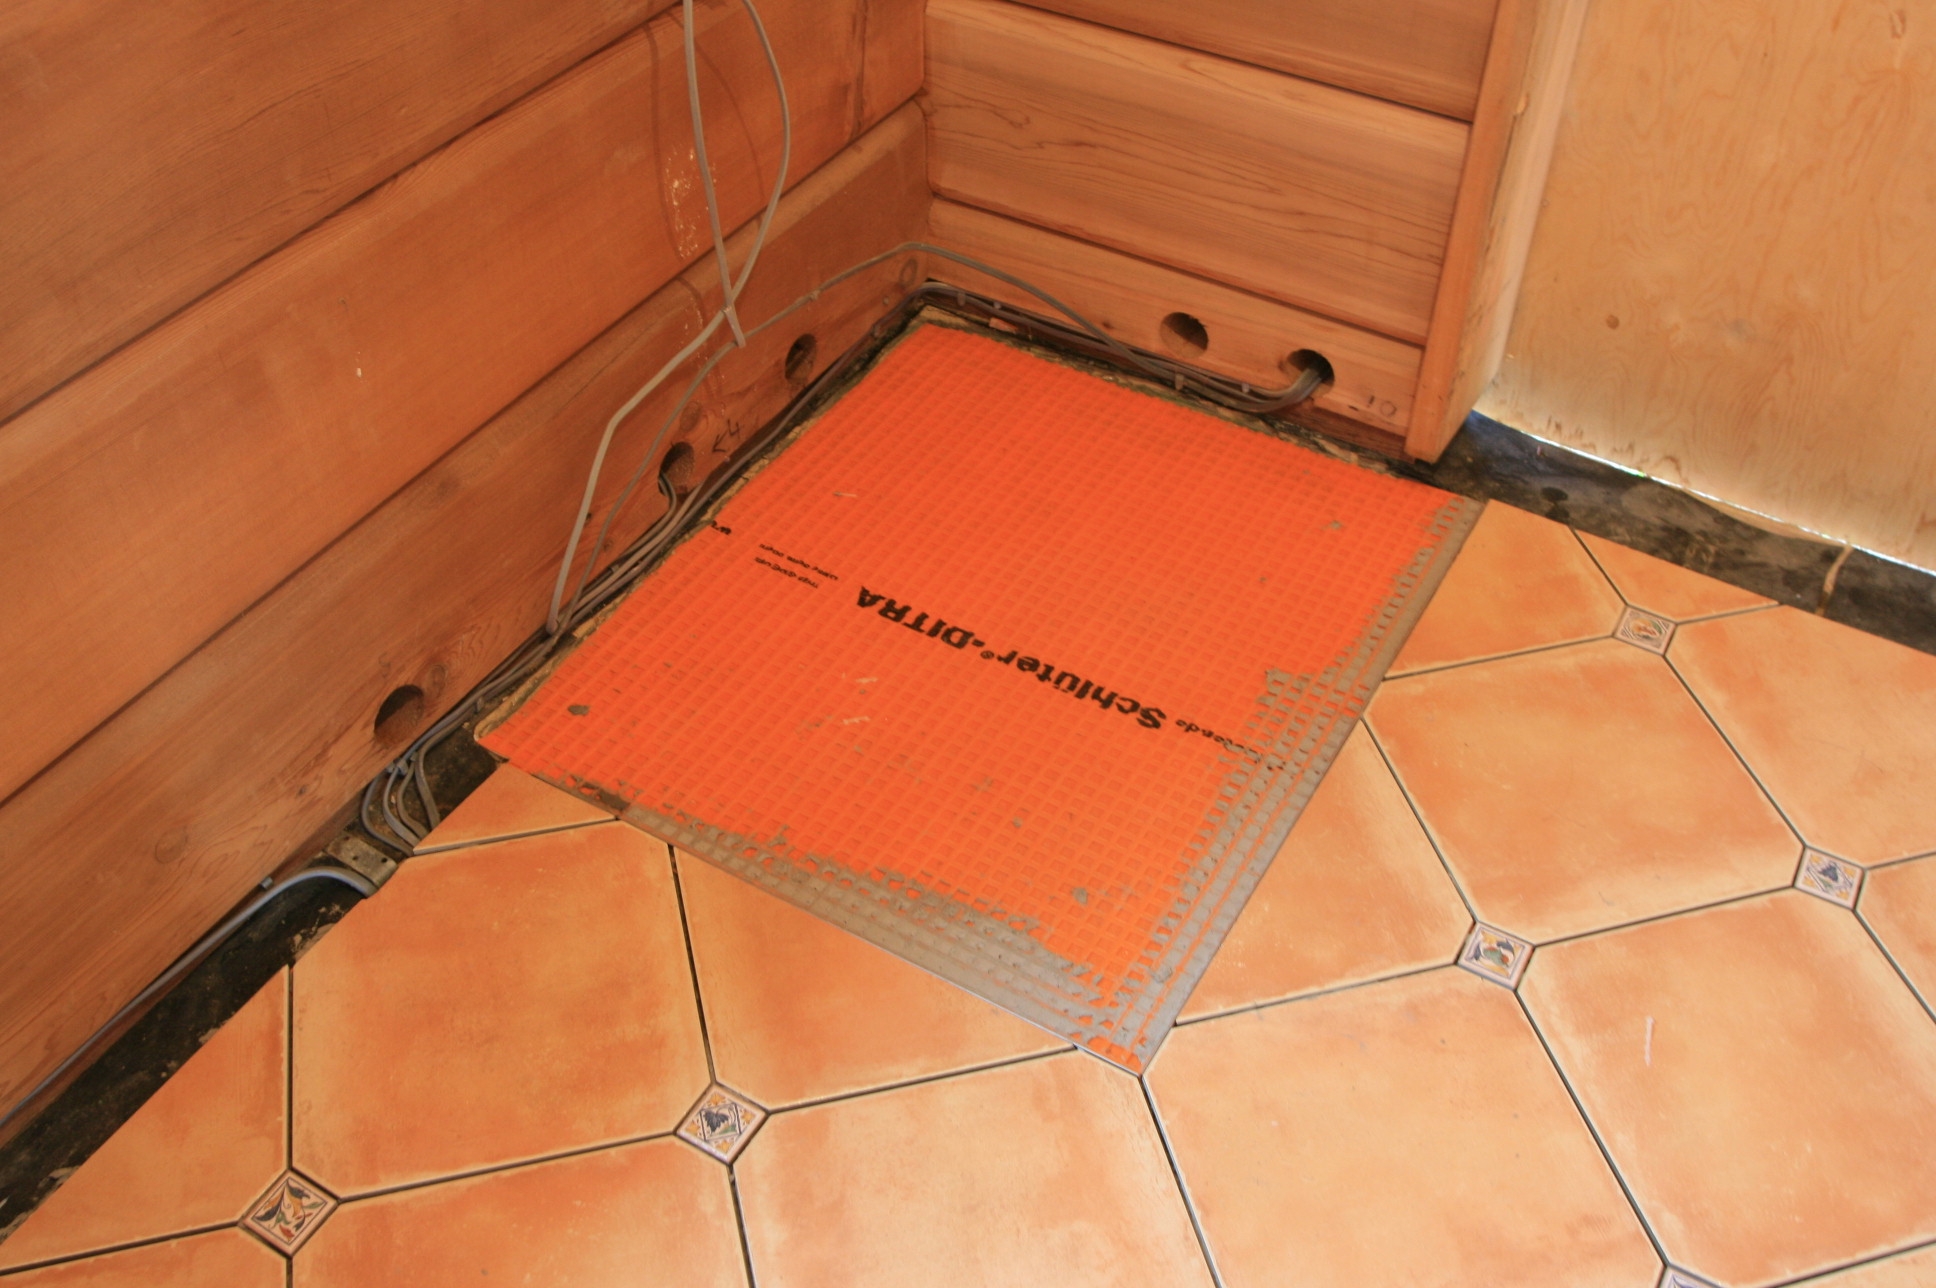 The washing machine will sit in this corner where we have already made a big concrete base for it which will have sufficient mass to damp out the vibration it would otherwise transmit if it sat on floor joists like the rest of the house. To separate this bit of tiling from the rest of the floor an expansion strip of aluminium is set in and a clean break made between the tiling under the washing machine and the tiling of the main floor of the utility room. You can have the strip made from aluminium or brass, so as most of our door handles, electrical switches etc will be chrome or stainless, aluminium was the most appropriate colour for us.
Nov
14
2008
“Octagon and Dot” tiling for the log house
Published by in General
When you are starting a self build you often see things you like during the preparation for the build. If they are on special offer, particularly clearance stocks, it’s a good idea to buy them. We got these Octagon and dot tiles from Porcelanosa for just £10 per square metre which is about a third of their normal price, because they were being discontinued. They have been waiting in our shed for over a year, but we are very pleased with them and it was an easy choice to buy them as we both agreed they looked good! With the tiling being done we are beginning to see the end in site.
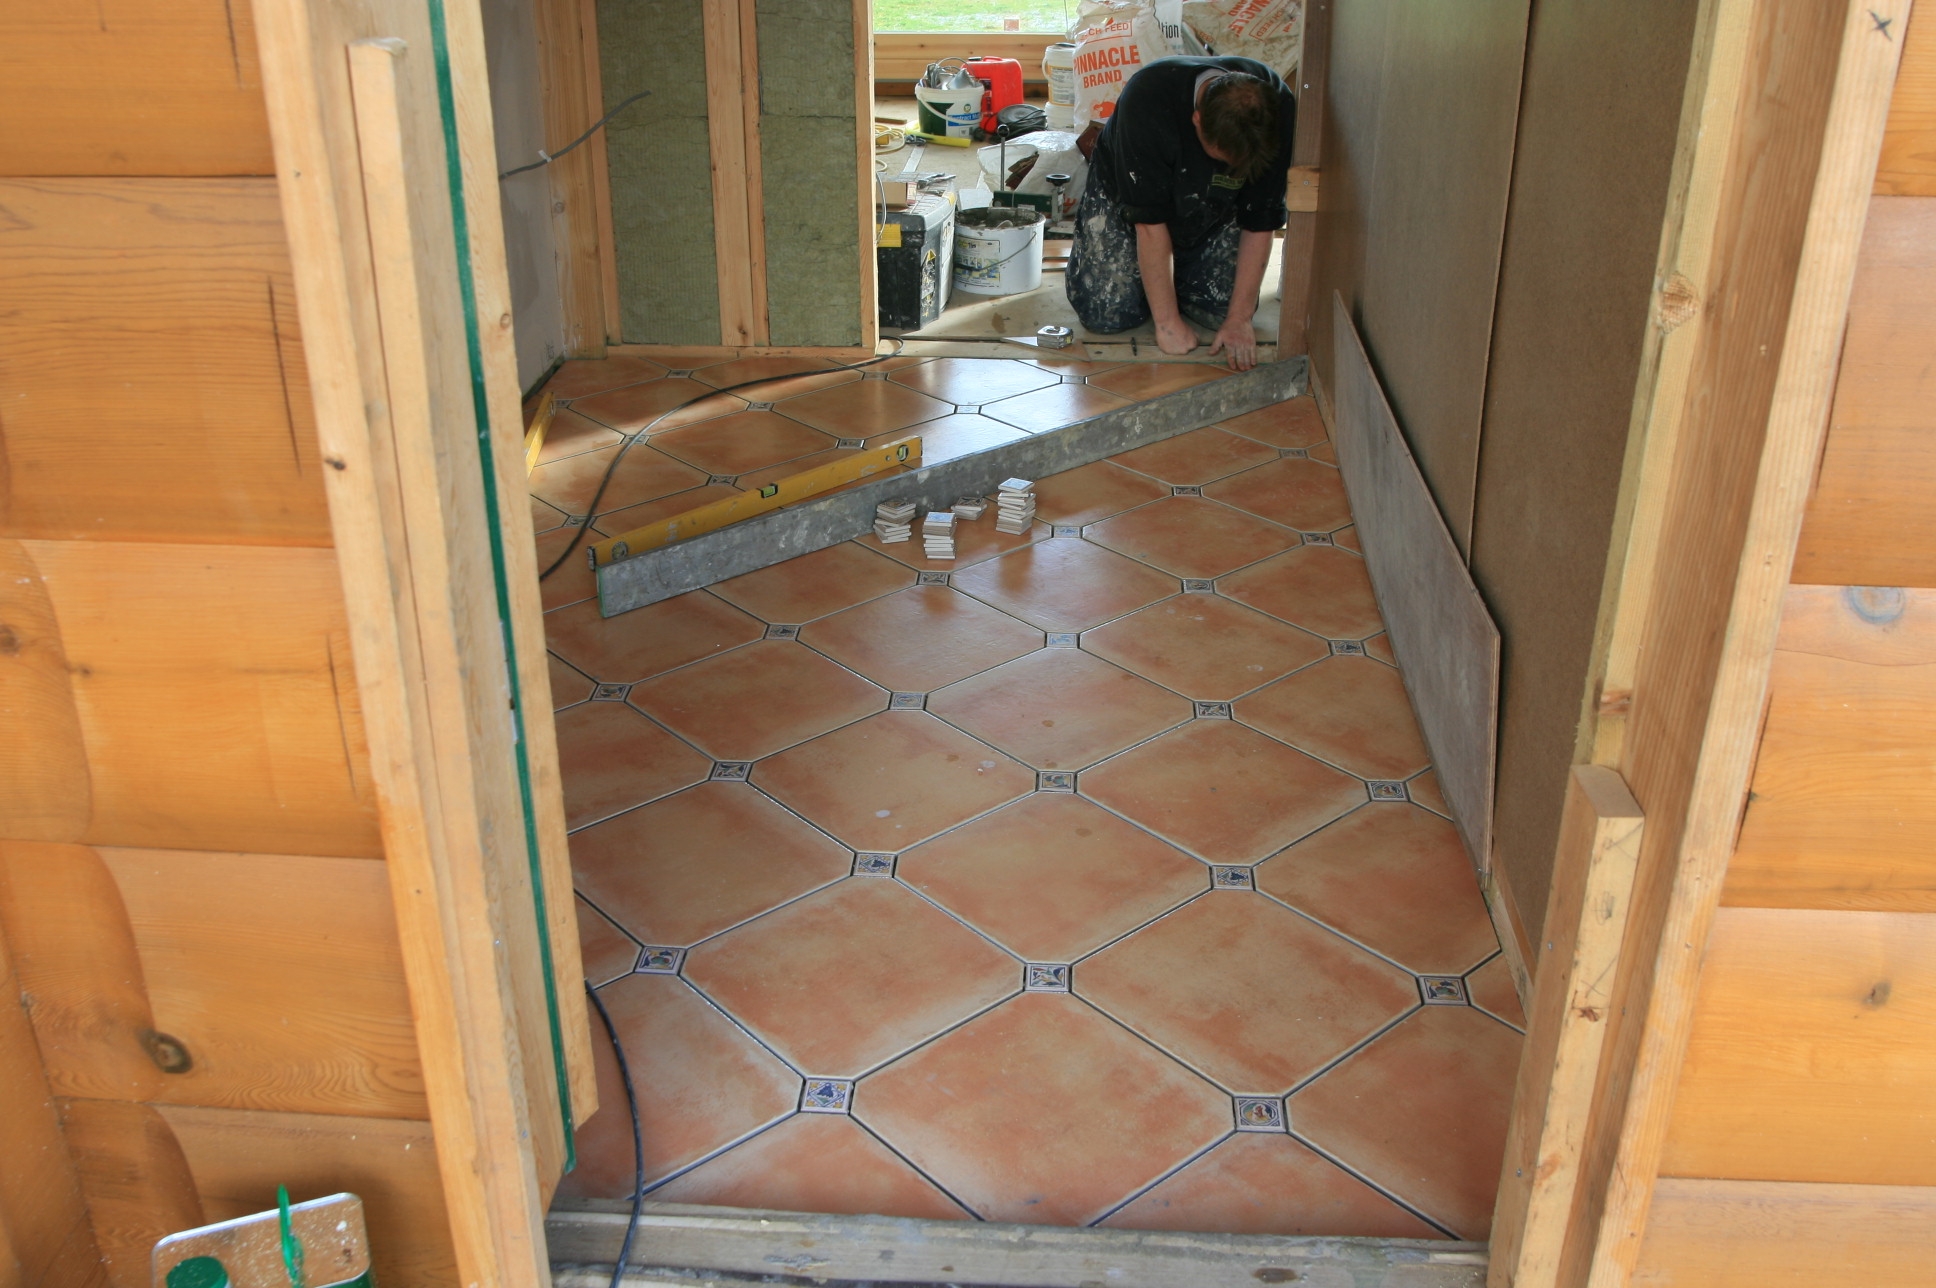 You can lay this style of tile either square to the walls or on the diagonal as we have done here. We layed a number of tiles out in each orientation first to decide which way we preferred. The diagonal way is more work for the tiler as there is more cutting to do, so takes more time and costs a bit more.
Nov
12
2008
Low Energy Lighting for the log house
Published by in General
The latest building regulations require all new houses have to have a certain amount of the lighting installed as low energy, with low energy light fittings so that conventional bulbs cannot be fitted later.
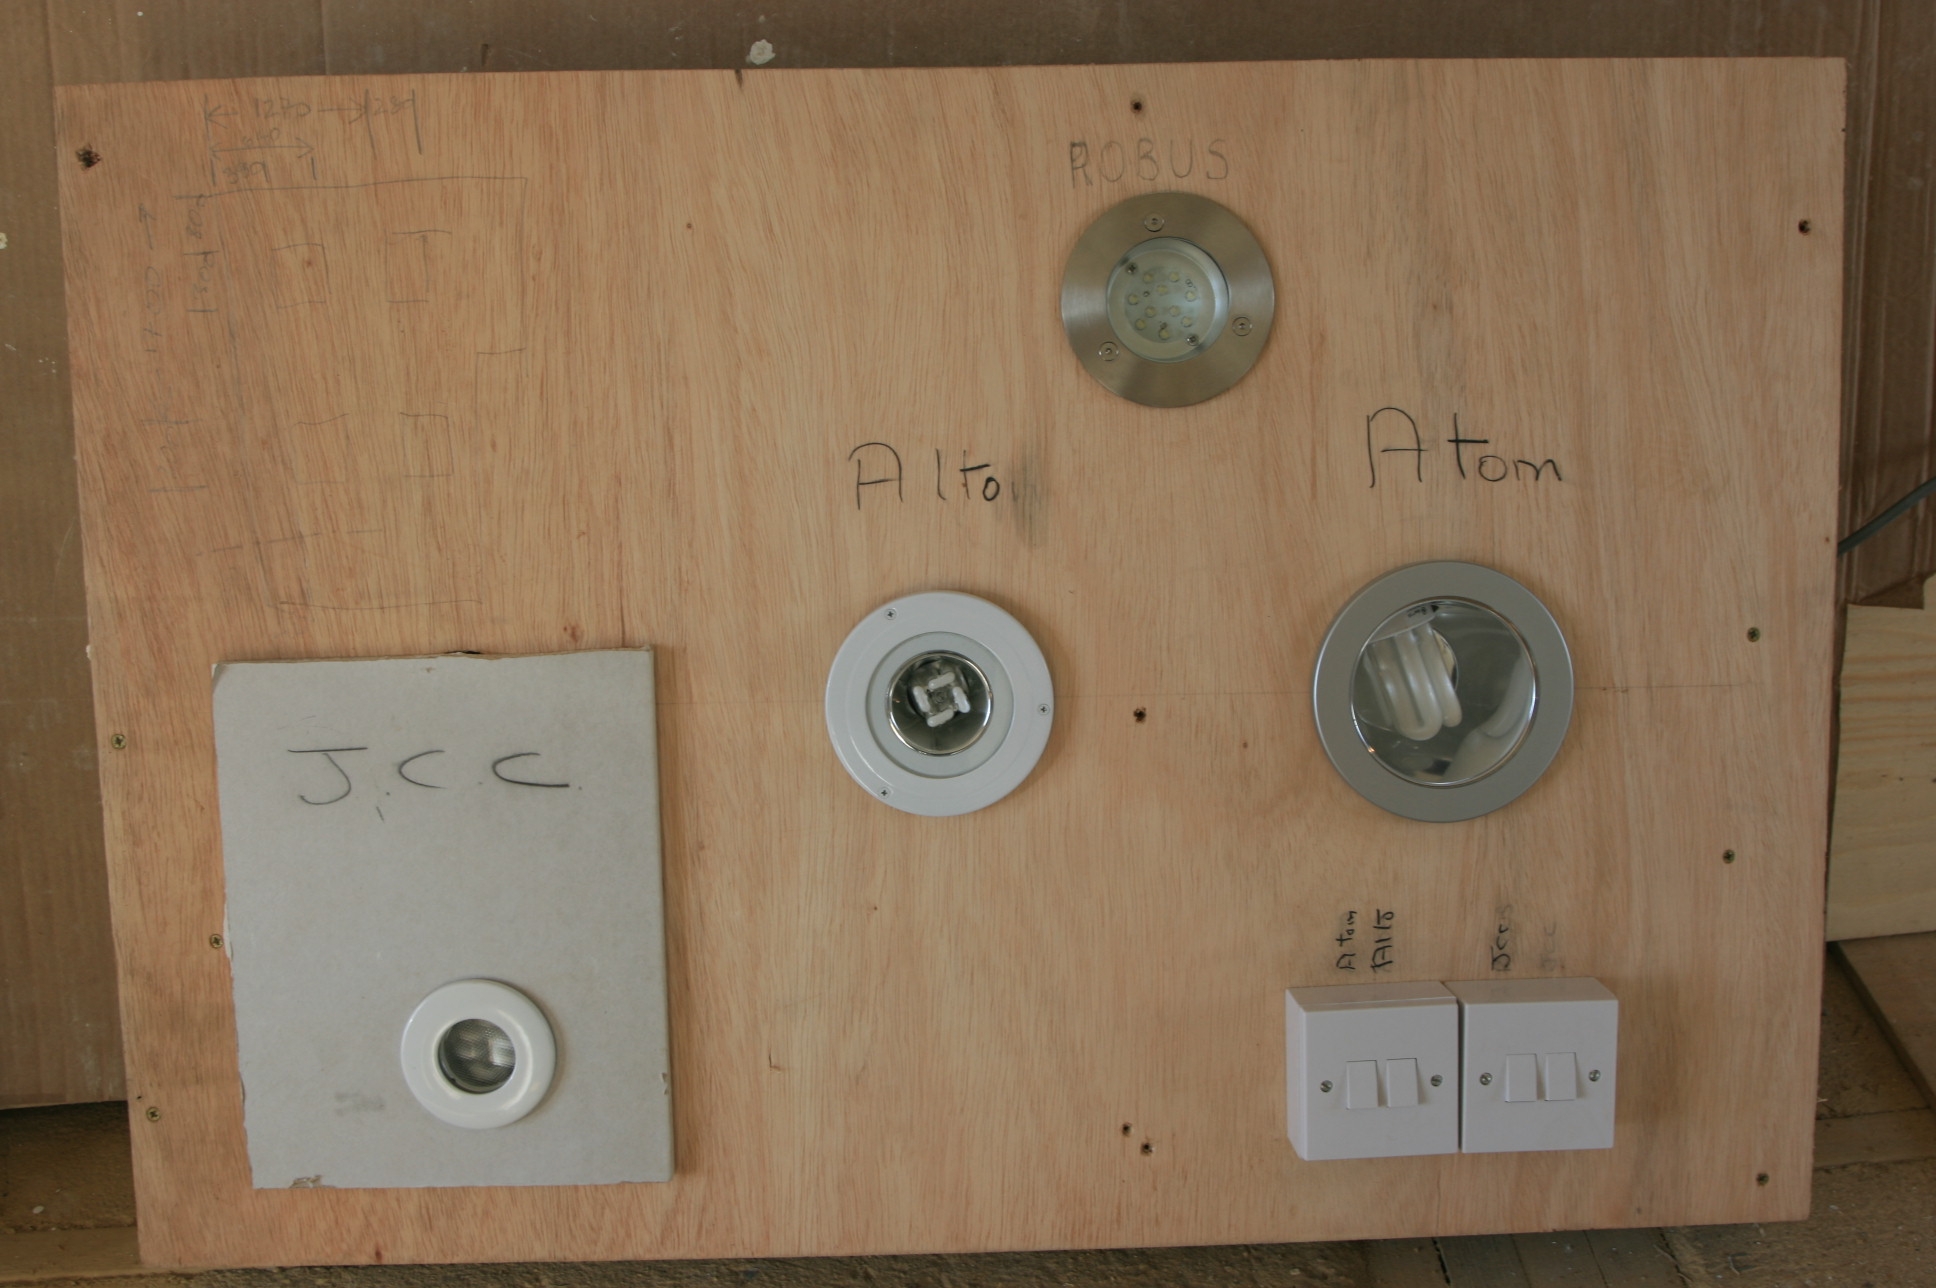 In order to establish what lighting option we wanted in the bathrooms, our freindly electrician rigged up a board with three low energy and one led type of light suitable for using in damp environments.
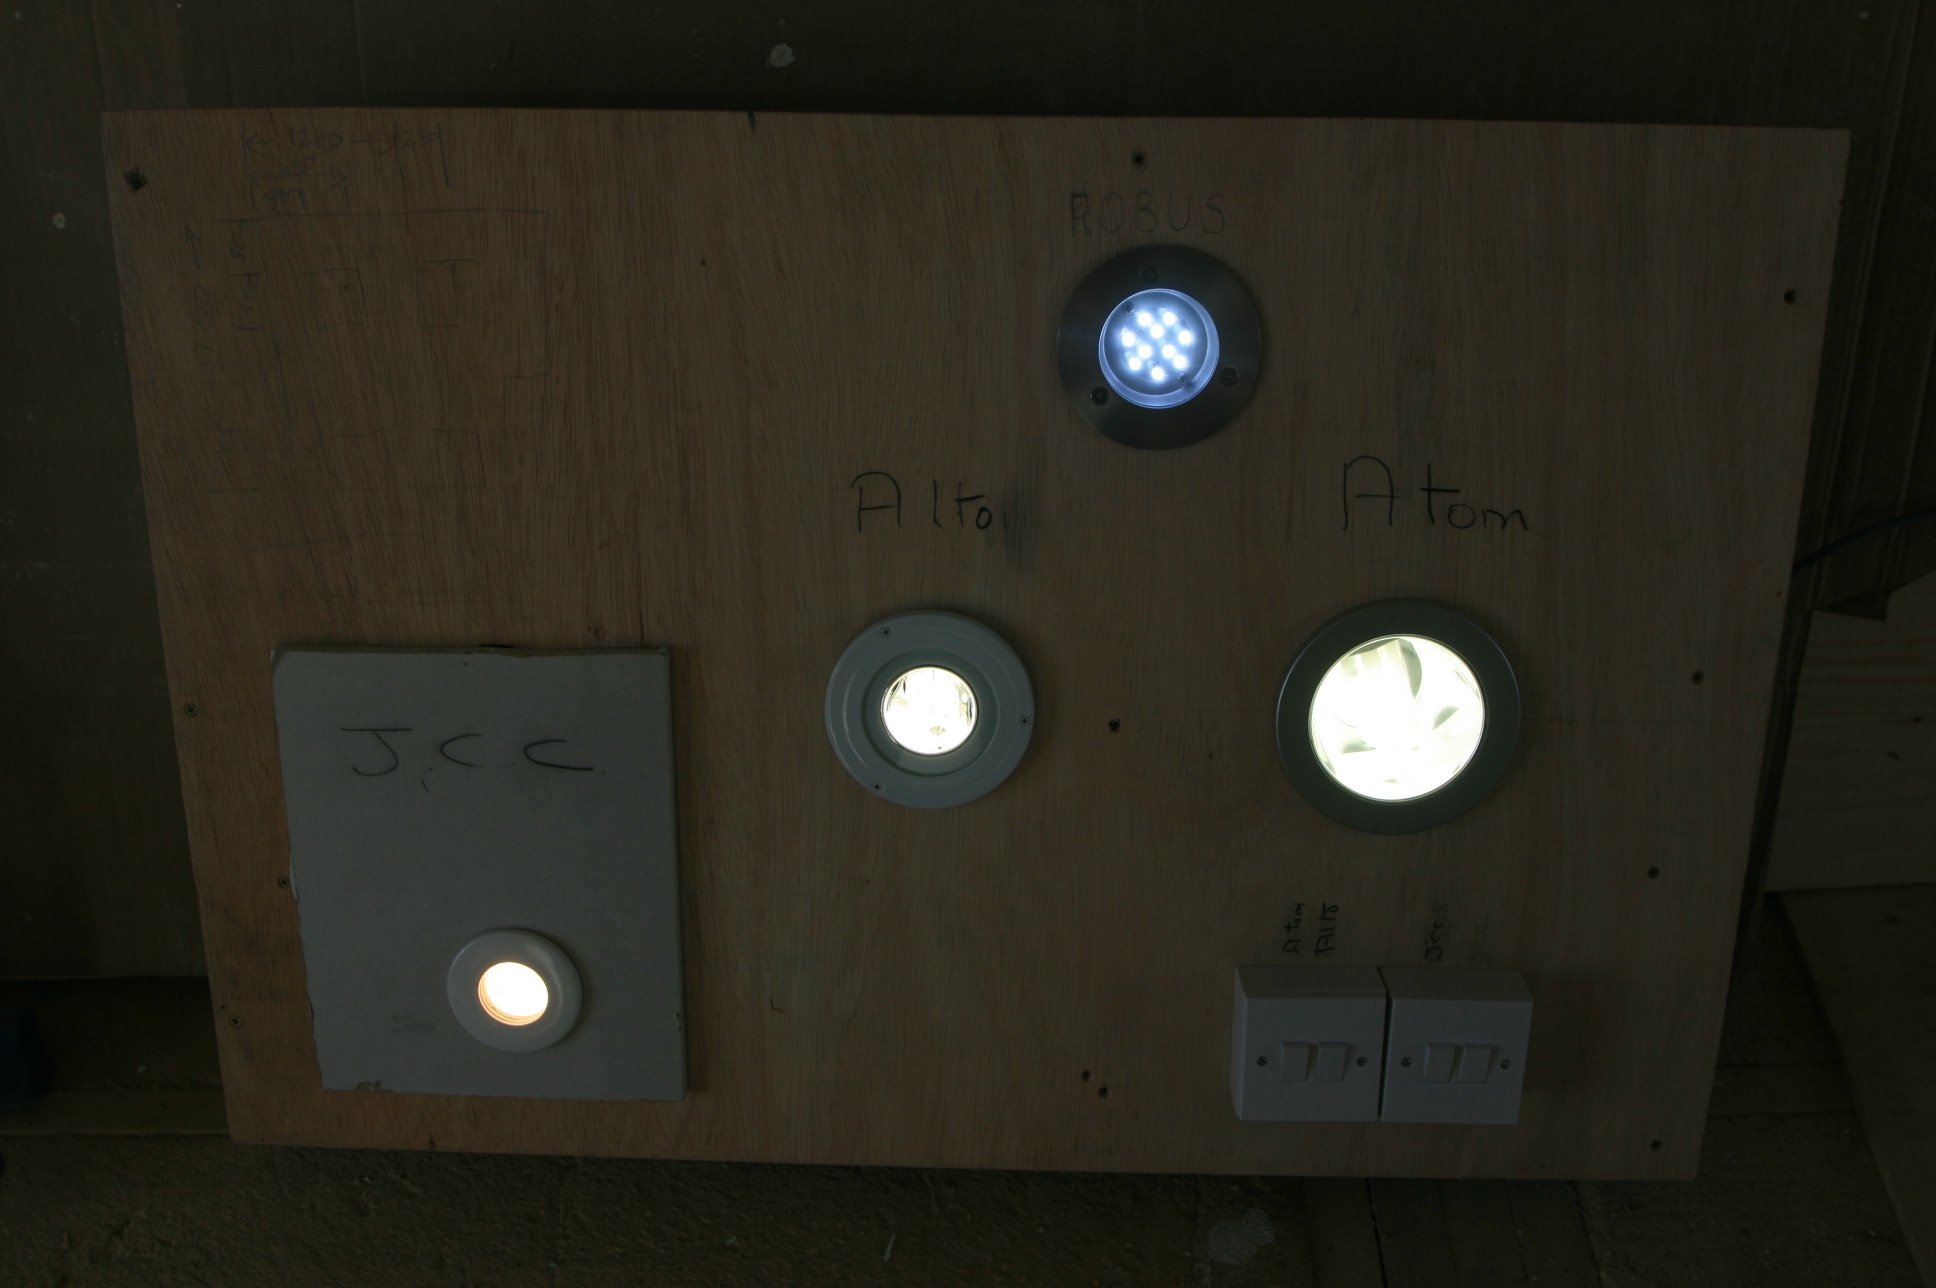 This was very helpful as it avoided that popular mistake of buying by appearance. We were able to put the test board up in a bathroom in the dark, and then select each light individually to see how much light it gave. There was a clear winner and we will put some information about this on the blog soon.
Nov
10
2008
Floor preparation for tiling the log house floors
Published by in General
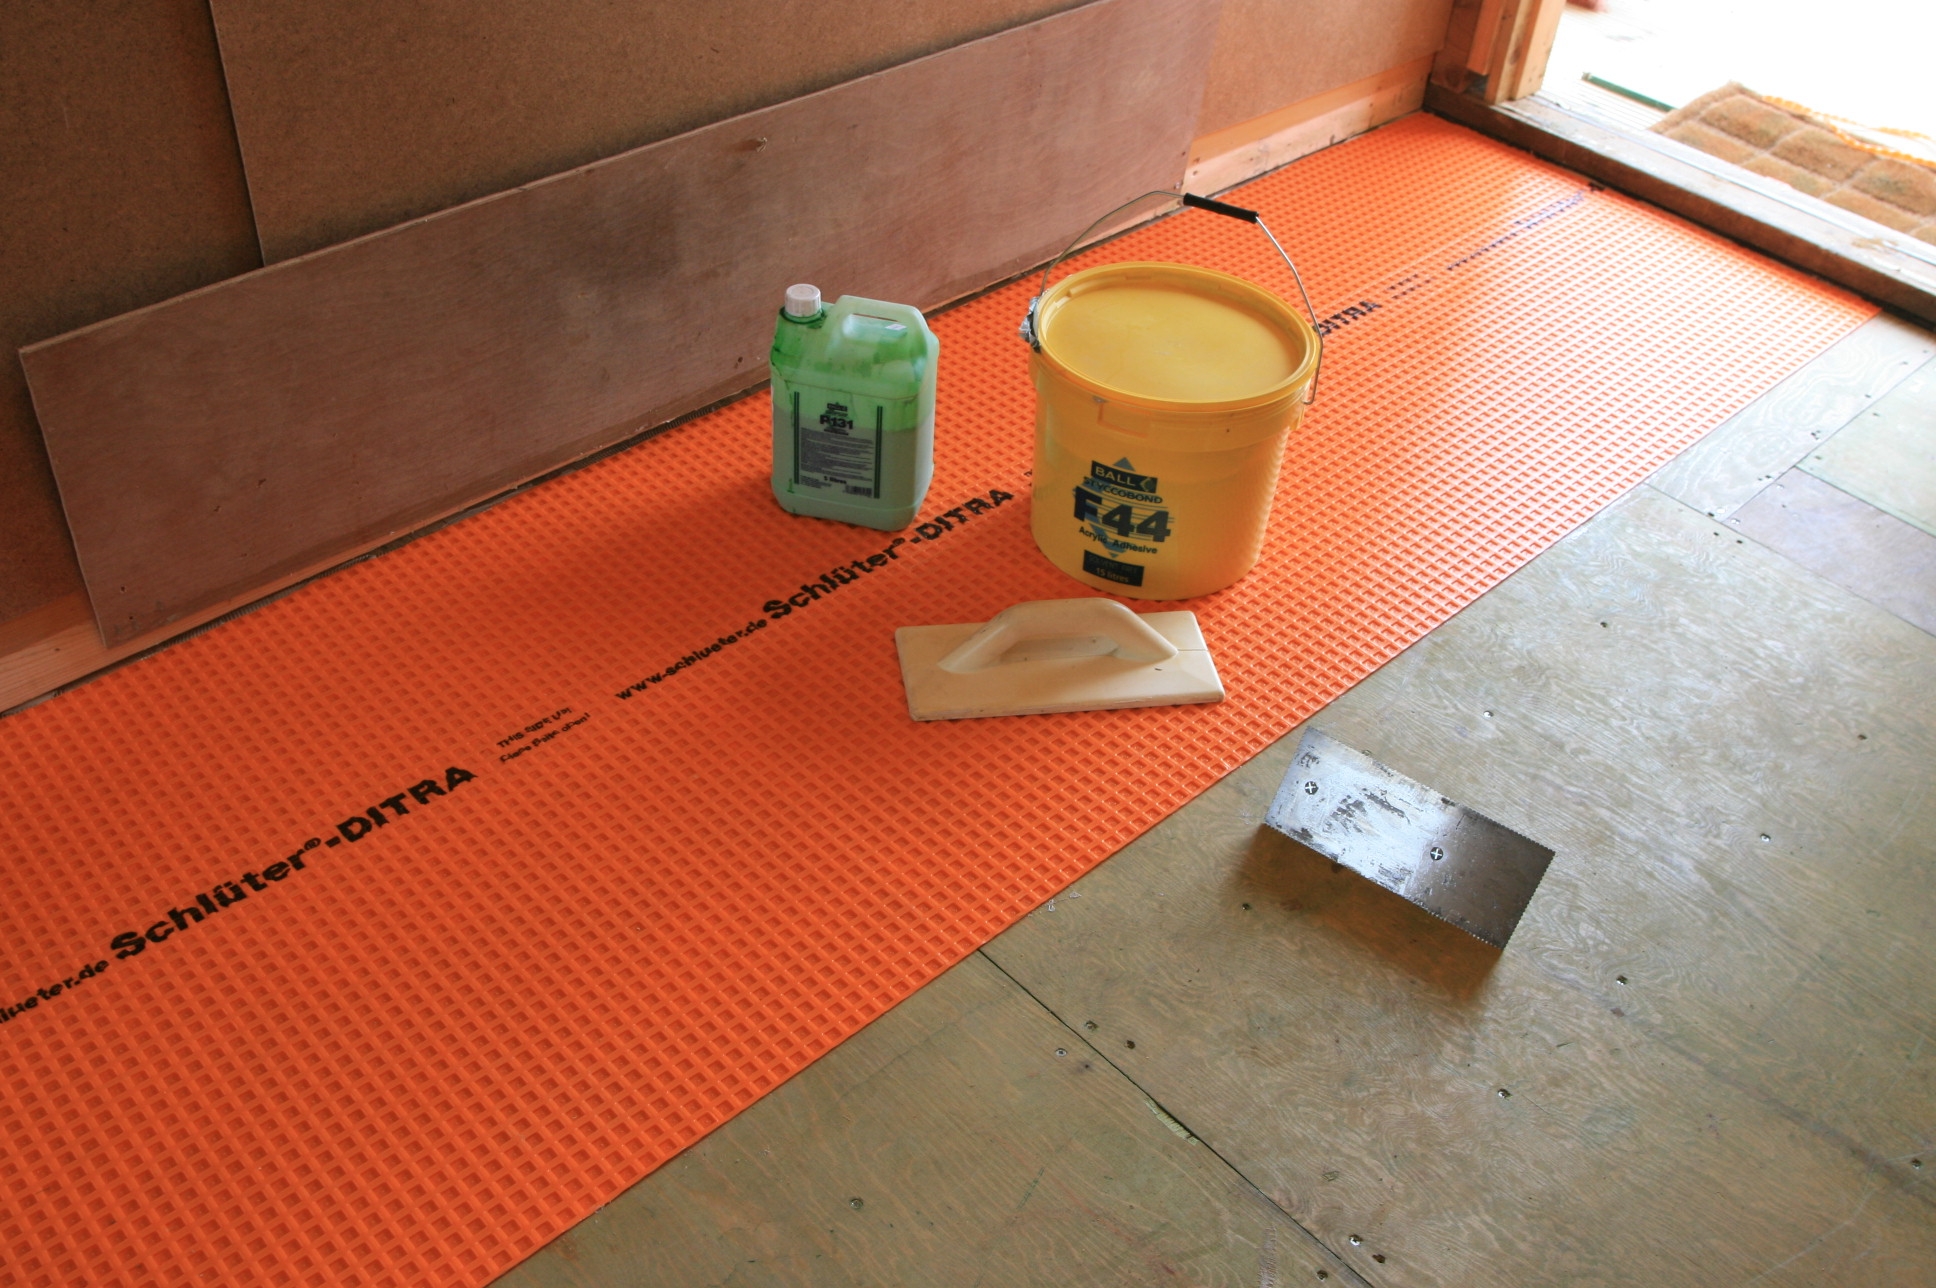 Where we are tiling floors we have put down 18mm thick ply sheeting across the joists and then we put down Schuluter Ditra matting. We used Balls F44 glue with their P131 primer for porous surfaces such as wood. You also need to use a special trowel with serated edges to spread the glue.
This needs a day to go off and we are ready for tiling. More to come soon!