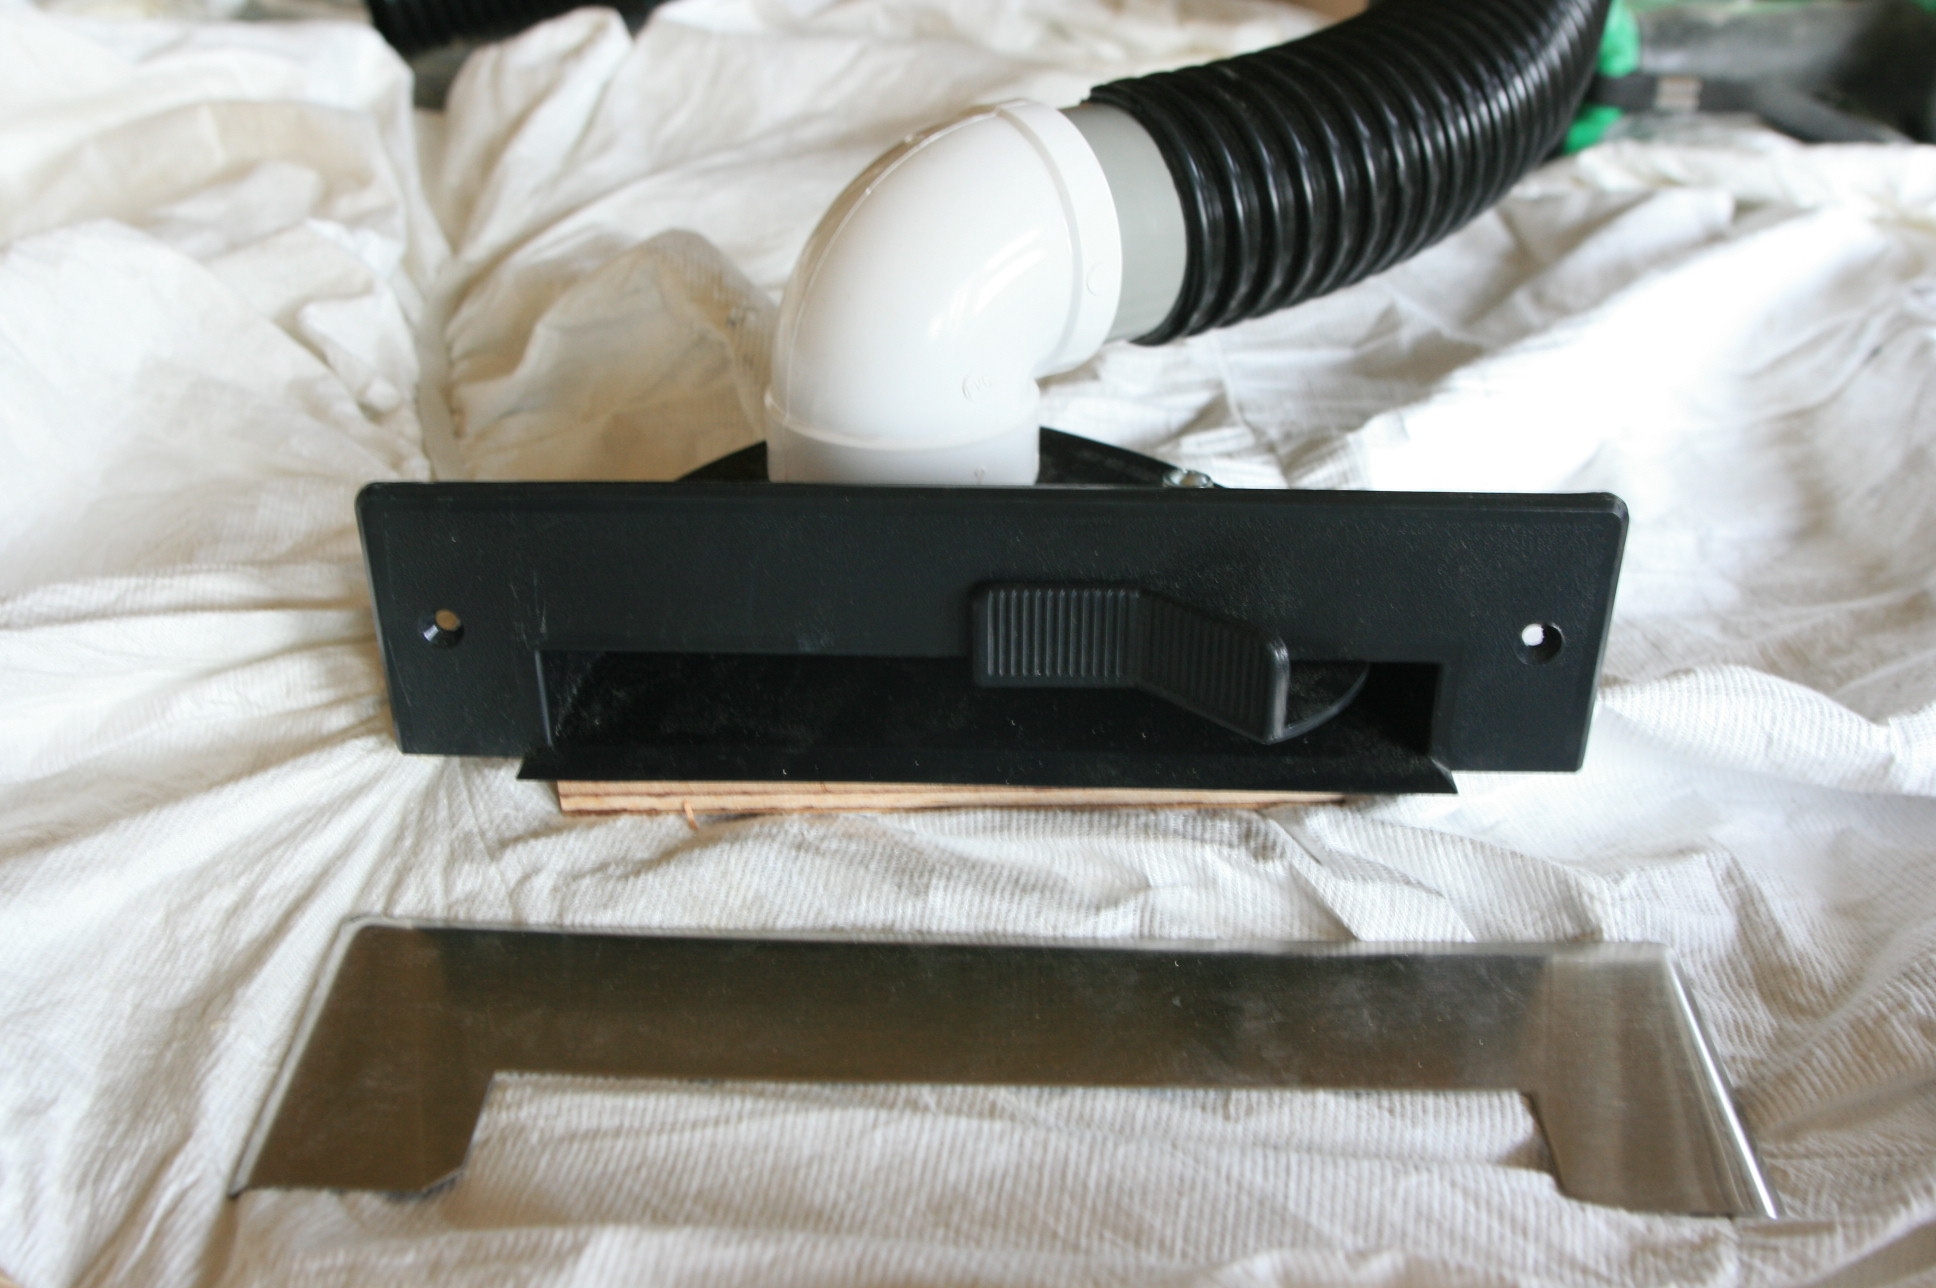
 As well as having sockets to plug a normal vacuum hose into, the system has the option of a “dust pan” This is a fitting that goes into the plinth of a kitchen unit for example and has a stainless steel trim over it. The black switch on the front can be pushed with your shoe and any dirt or dust you have swept up with a brush gets sucked away. A great idea!
Archive for the ‘Central Vacuum System’ Category
Sep
6
2008
Central Vacuum System “Dust Pan”
Published by in Central Vacuum System
Sep
5
2008
Heat Recovery and Central Vacuum returns
Published by in Central Vacuum System, Heat Recovery System
Tim Bartlett from CVC Systems takes back a box of odds and sods! 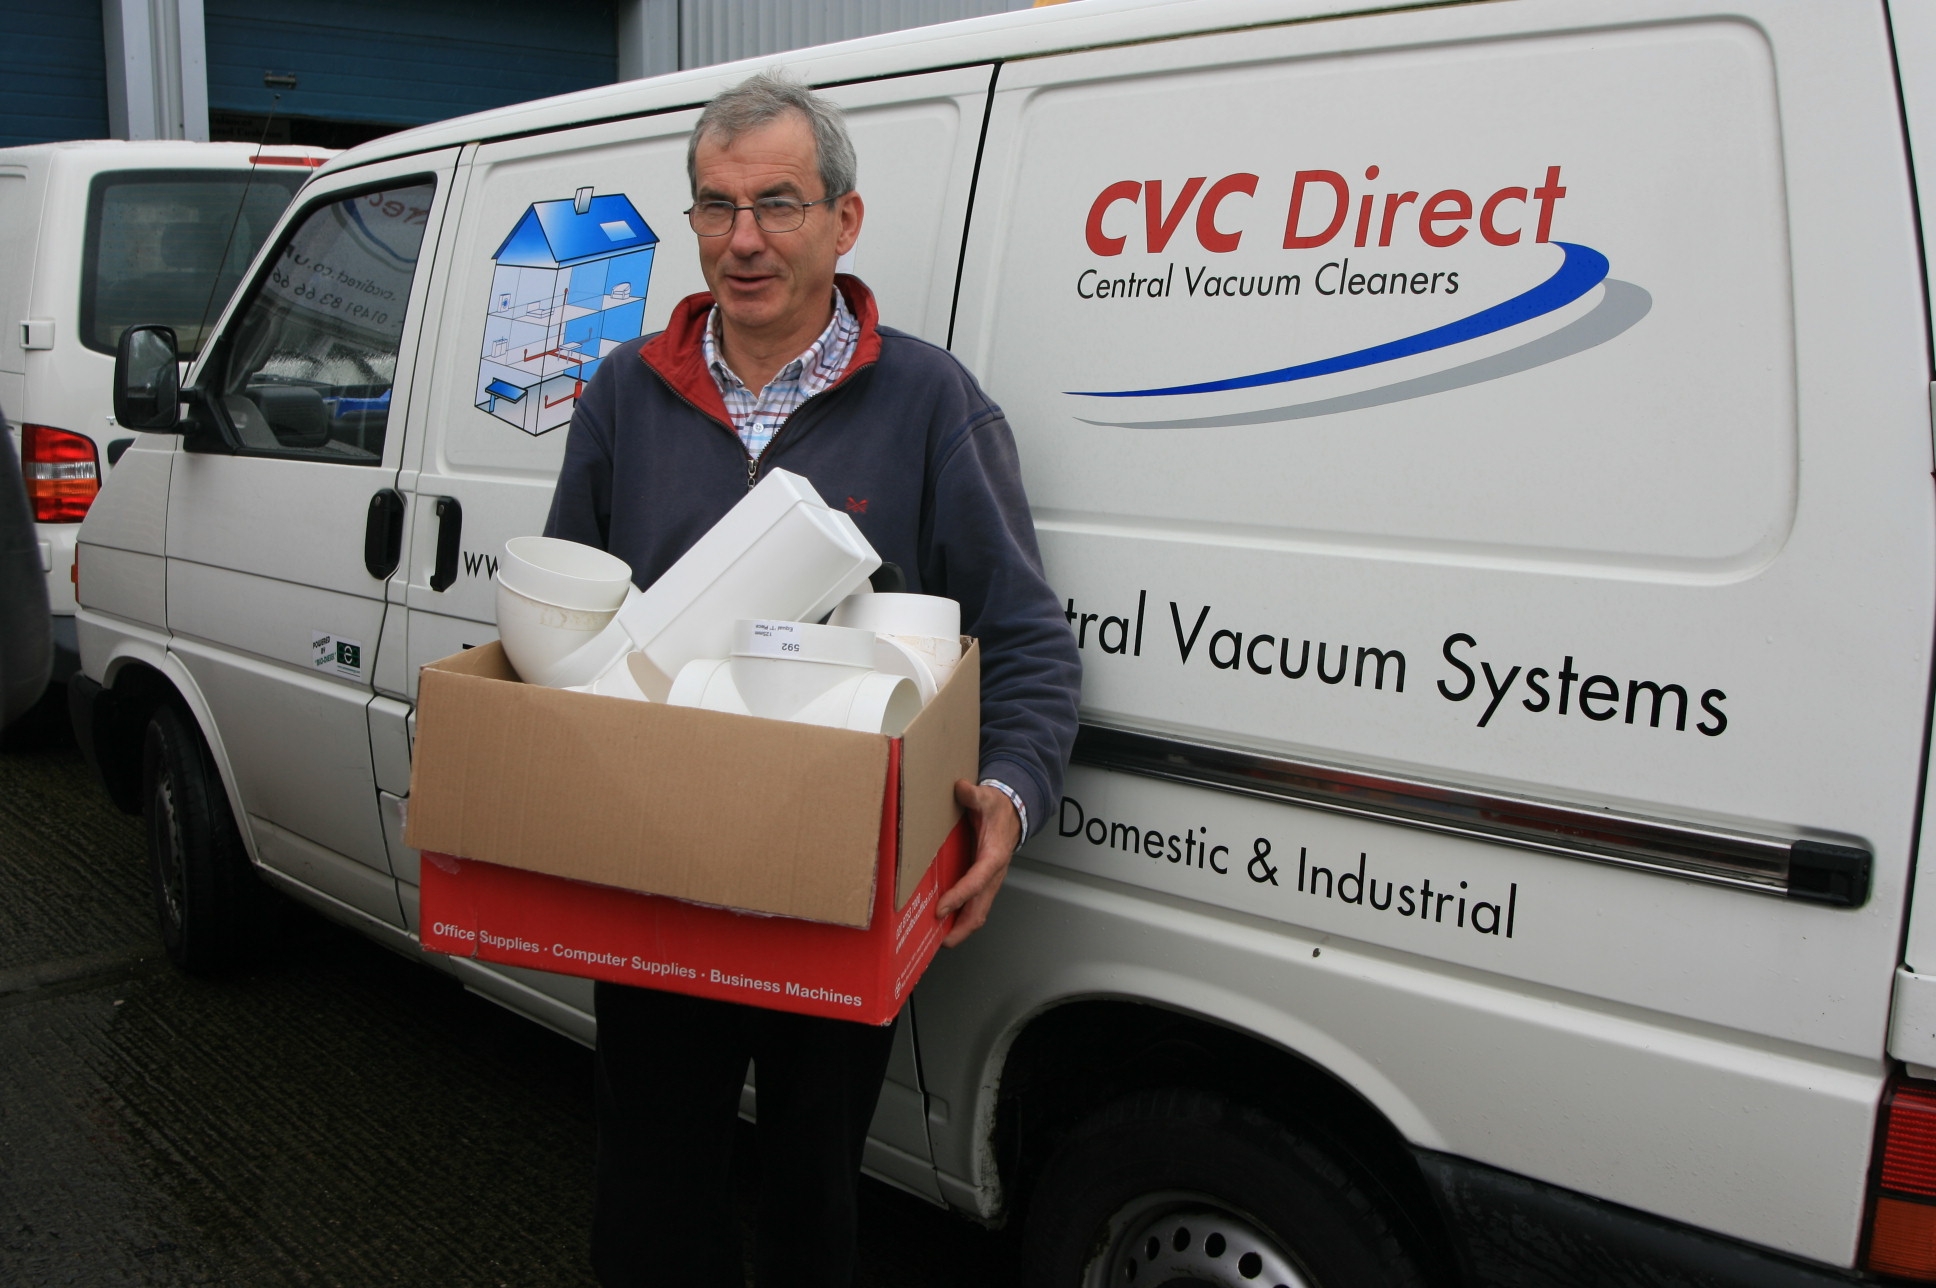 When you are working in three dimensions with pipework for the heat recovery and central vacuum systems it is difficult to anticipate all the bits and pieces you might need, how much, what sort etc.
So it was great to be able to work with CVC and take unused parts back for credit as we got to the end of the job. This saves lots of unused plastic items sitting around unused which is good for the environment as less has to be made for the next customer!
Also as we go along we discovered new fittings that solved problems we discovered which we swoped for some of the returned bits and you can see some of them next week. If you are excited by pipework problems, this is the blog to watch!
Sep
4
2008
Central Vacuum System developements
Published by in Central Vacuum System
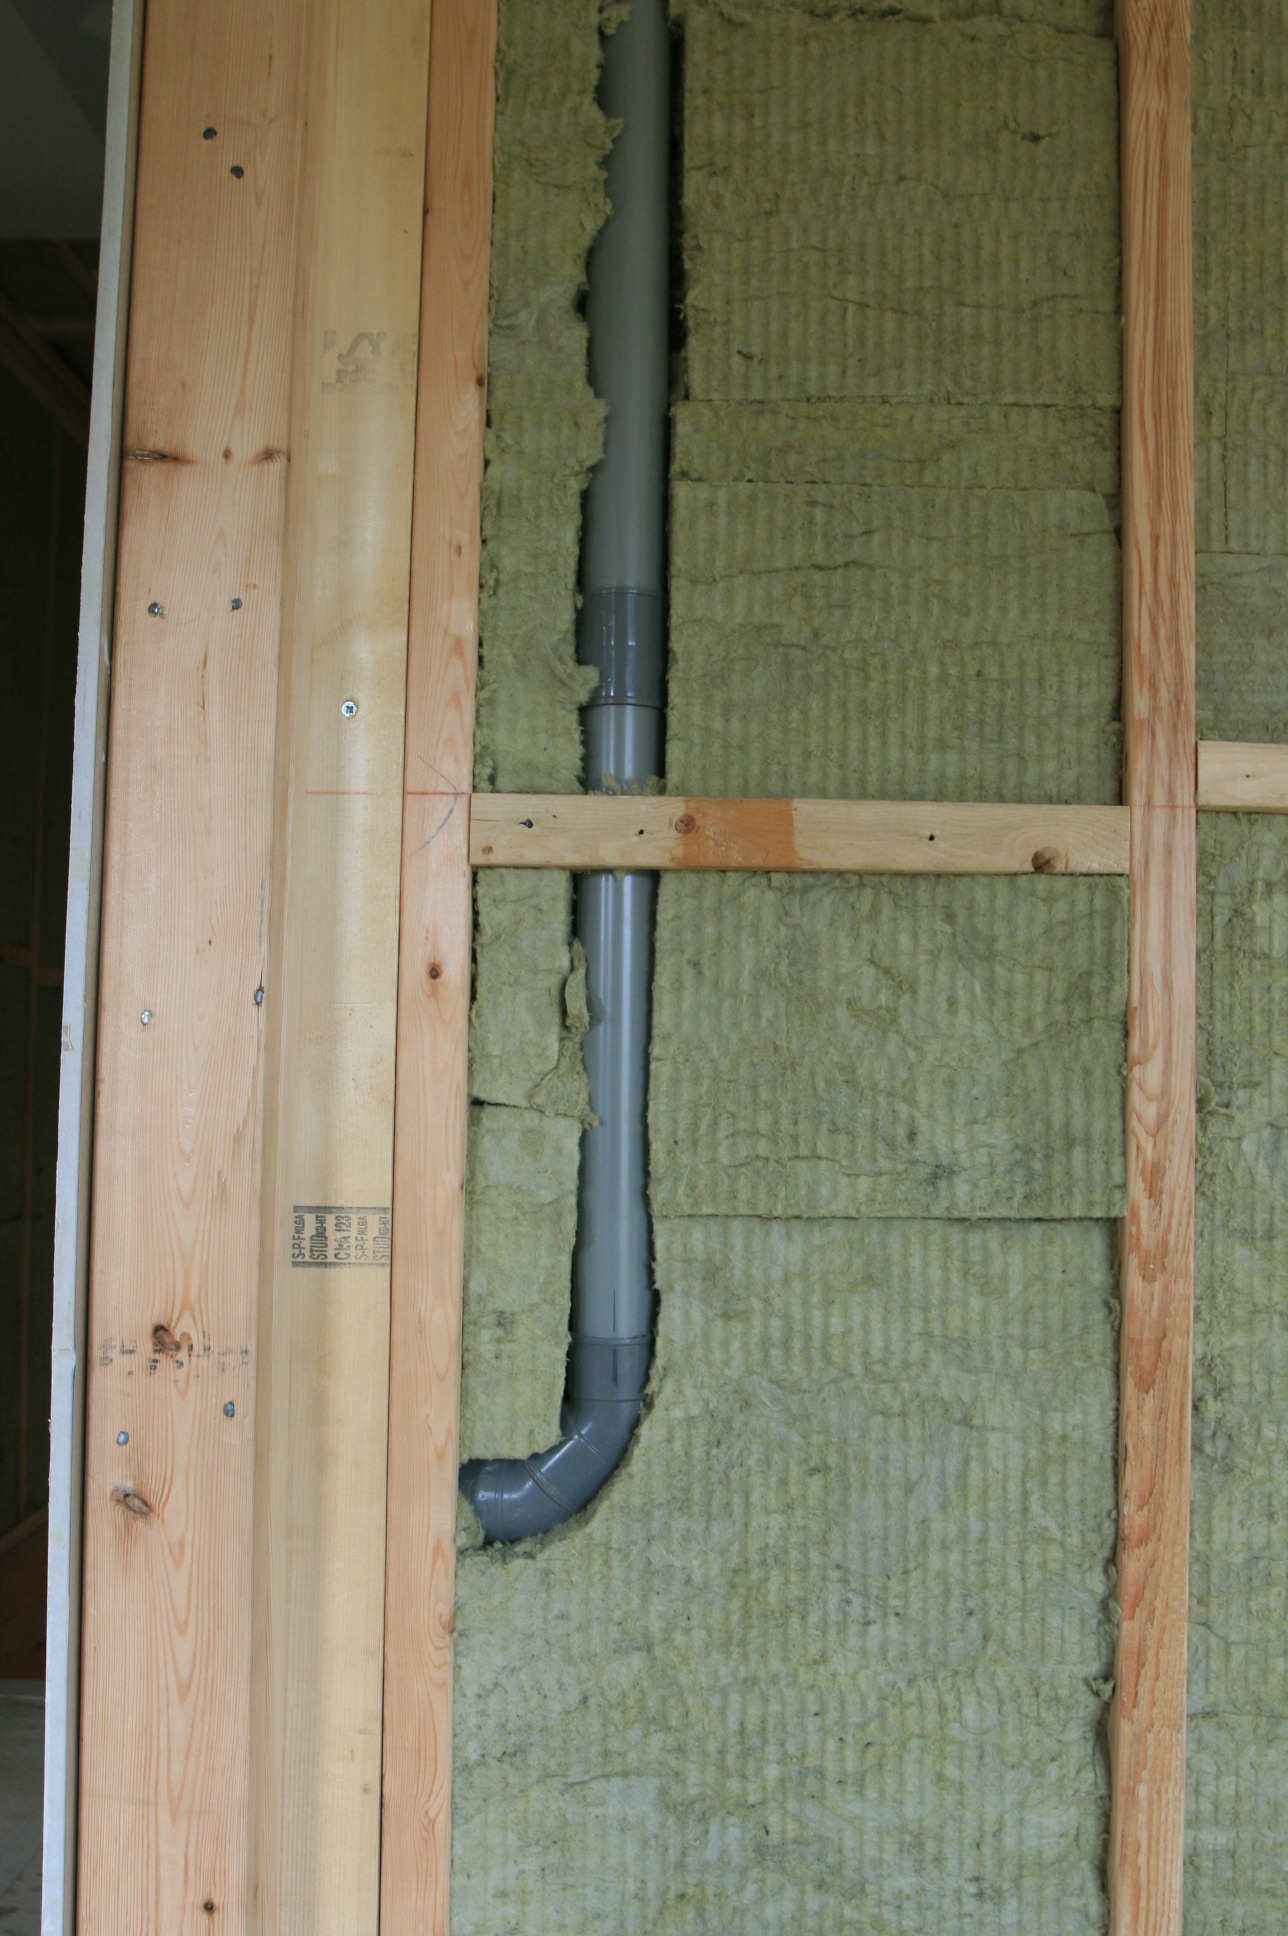 As we work through “first fix” the central vacuum pipe work is installed, all the joints are glued with solvent glue and then the sound insulation in the walls is worked around the pipework.
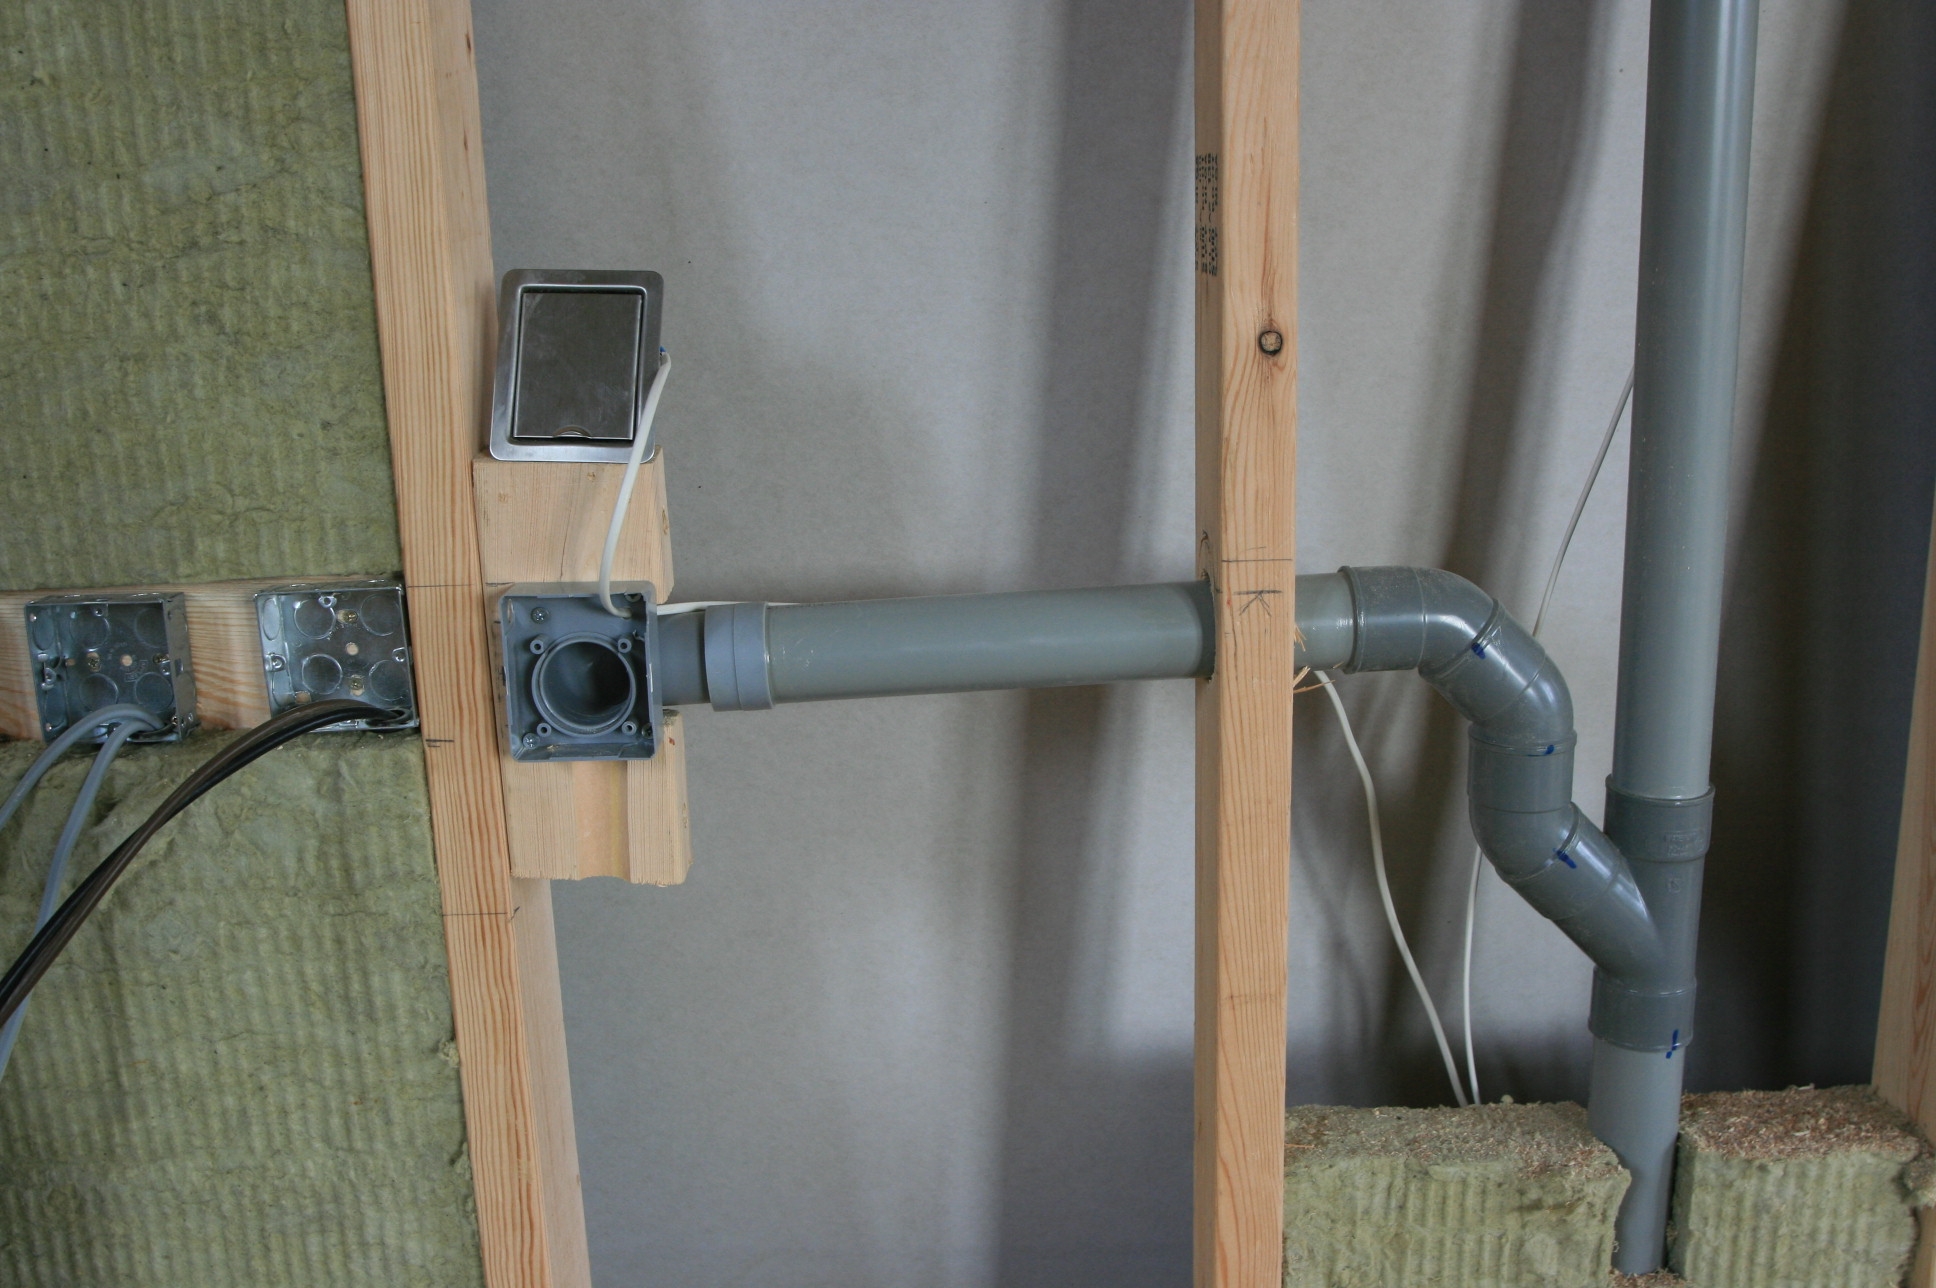 With the pipes in place and glued up, wiring for the vacuum system (12 volt) is put in place attached to the face plates and with these pushed into the grey socket the system can be tested for leaks. Pushing the purpose made vacuum hose into the opened face plate on the grey socket switches the vacuum unit on (by the 12 volt wire) and with all the other sockets closed, you can go round and check by hand for any leaks (joints you forgot to glue) etc.
The wiring to each socket should be checked individually by going round and putting the vacuum hose into each socket one at a time and all of this needs doing while mistakes can be rectified before walls are “closed up” with the second side of plasterboard or other wall covering.
Aug
16
2008
Central Vacuum pipe work installation
Published by in Central Vacuum System
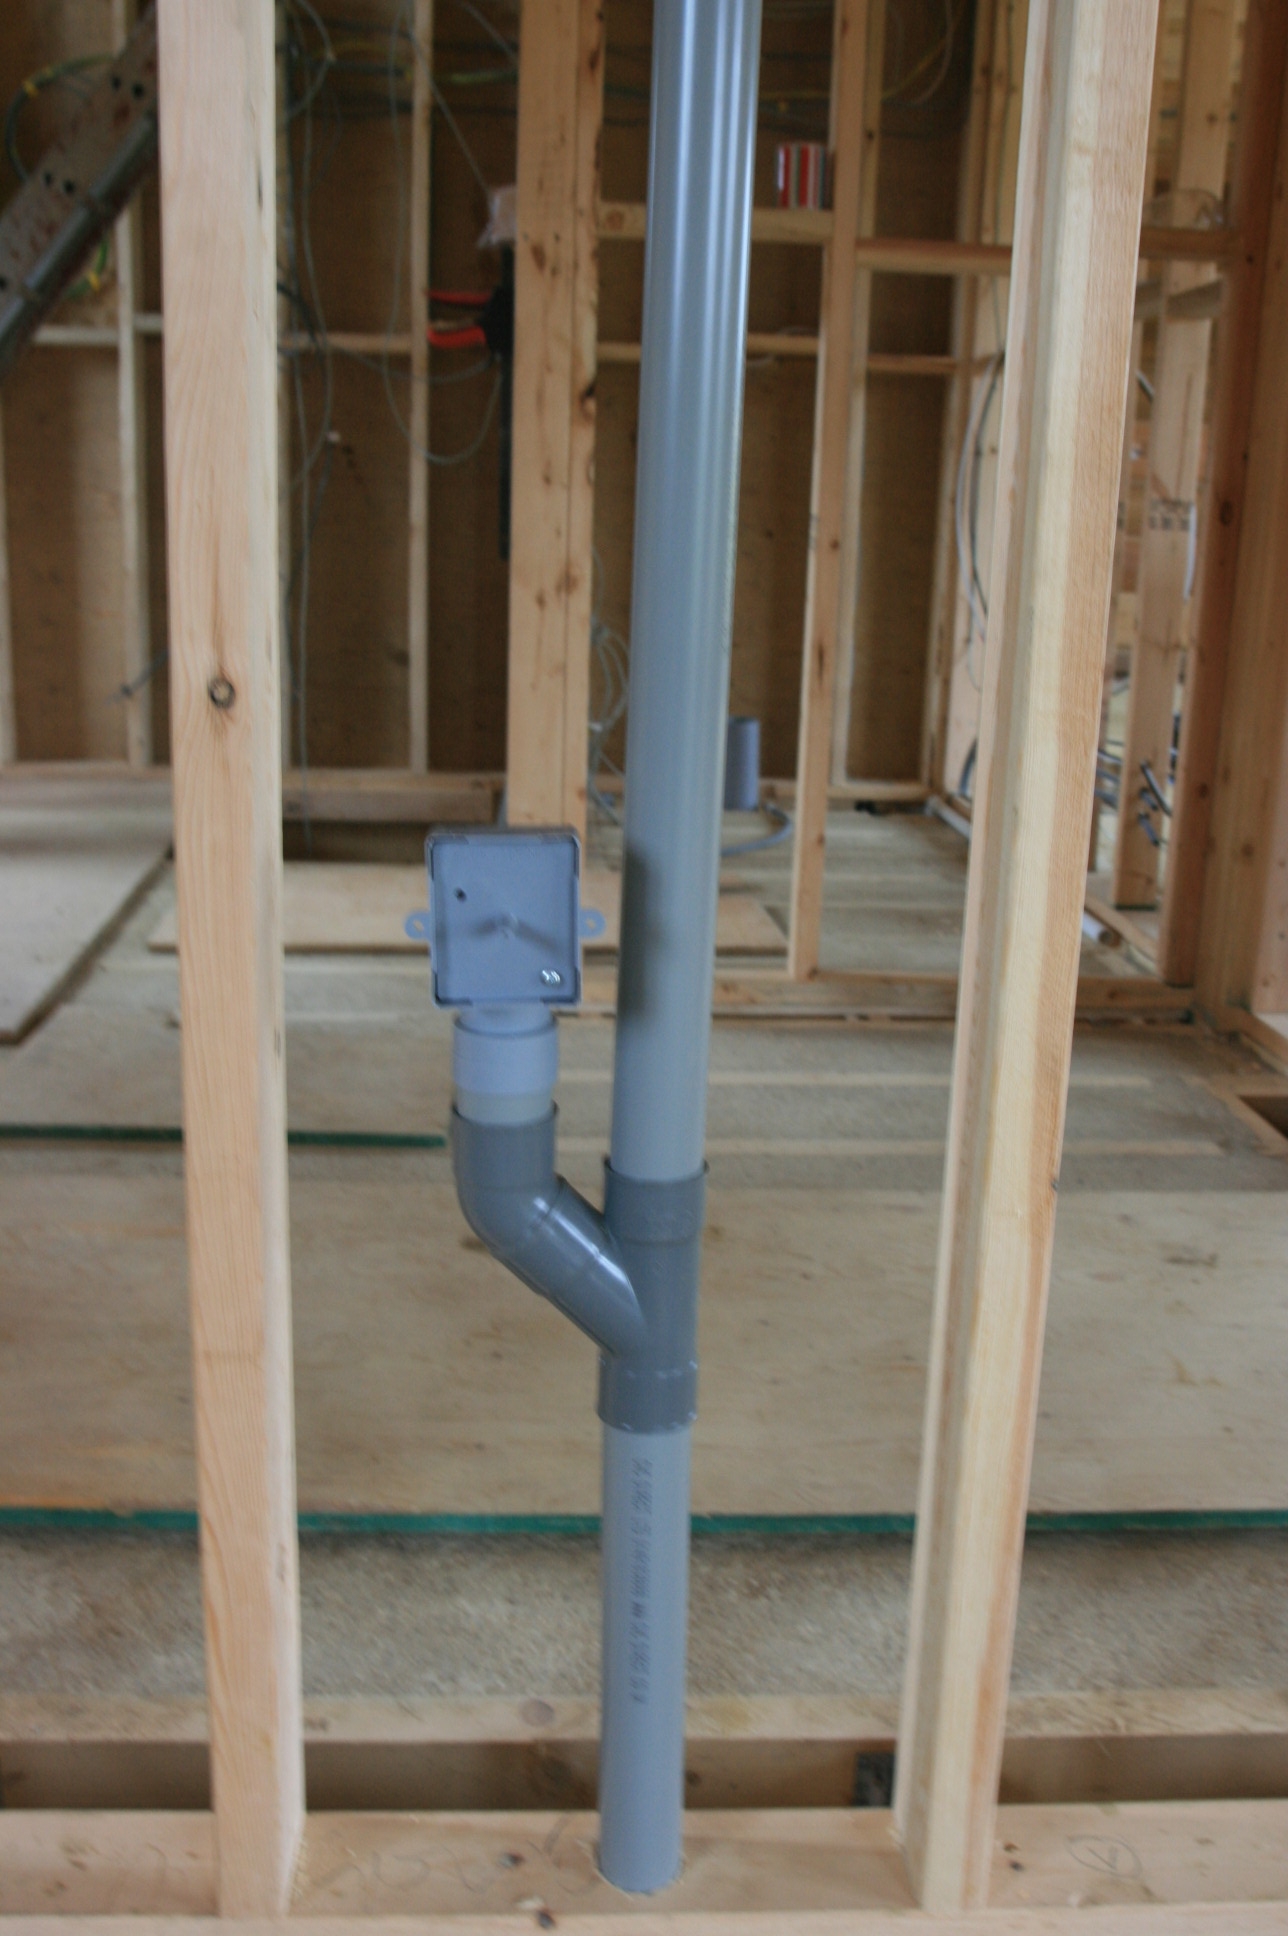 Sitting between the 400mm stuc centres is the 2″ vacuum pipe, here fitted with a branch and a wall socket back box. It’s similar to putting in an electrical wall socket and indeed the vacuum socket is set at the same height for ease of use and asthetics.
Aug
16
2008
Central Vacuum System
Published by in Central Vacuum System
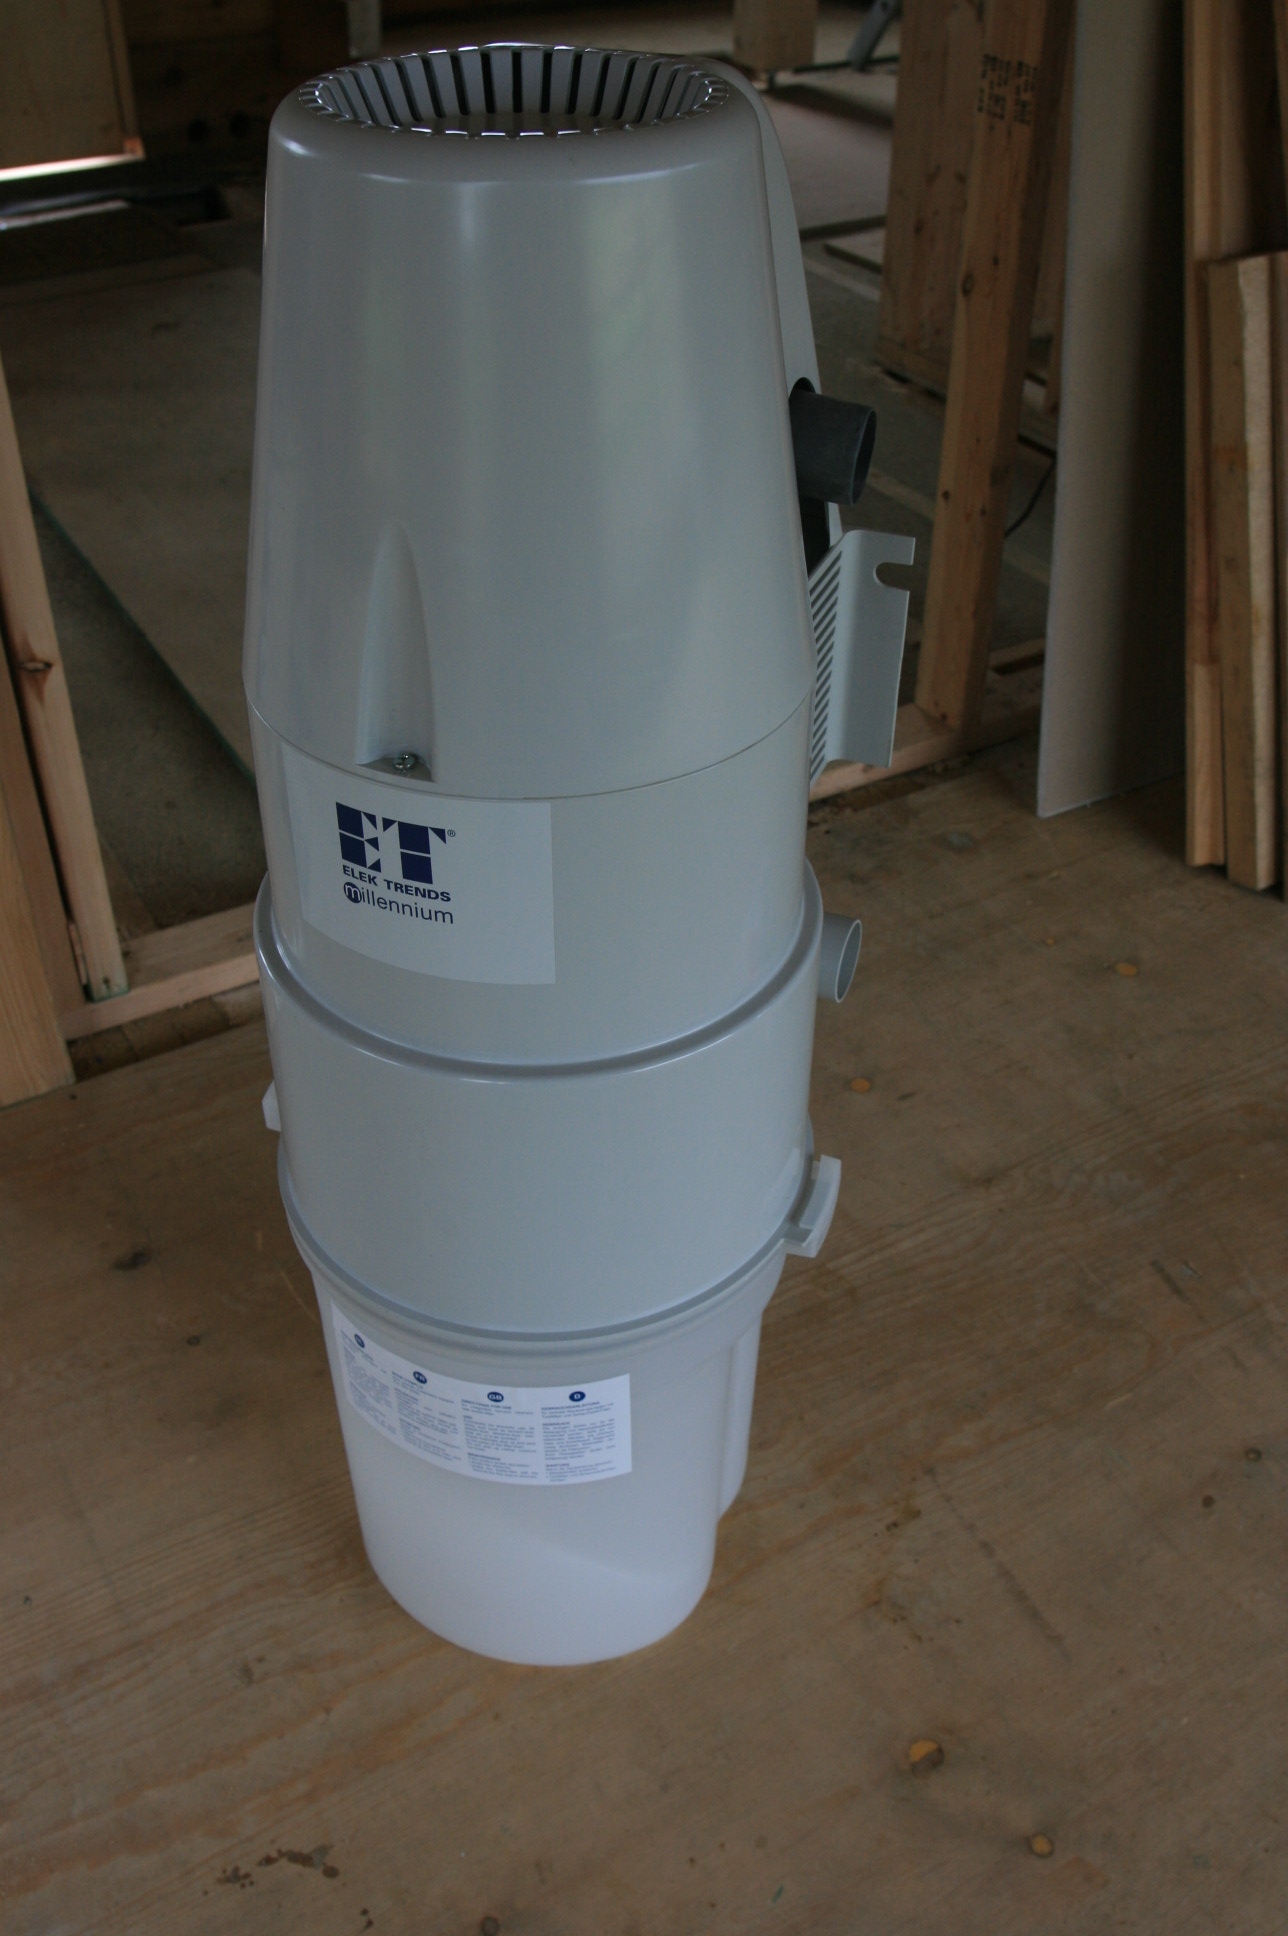 We’ve been intending to fit this since the early house designs were drawn up. We saw it in a friends self build in Cornwall and could see the advantages. A 5 metre length of hose is all you need to carry around when cleaning the house. 5 or 6 “sockets” enable you to plug the hose into the sockets, which are linked via piping through the house to this unit which will live in the utility room. Pushing the hose in the socket automatically switches the unit on and it vents it’s exhaust to the outside of the house. We will be having engineered floors throughout most of the house with the exception of the tiled “wet” areas and a duct that fits into the plinth of the kitchen units will be ideal to just brush the floor, touch the duct and the dust is sucked away, without even getting the flexible hose out.