Published by in General, Rainwater Harvesting
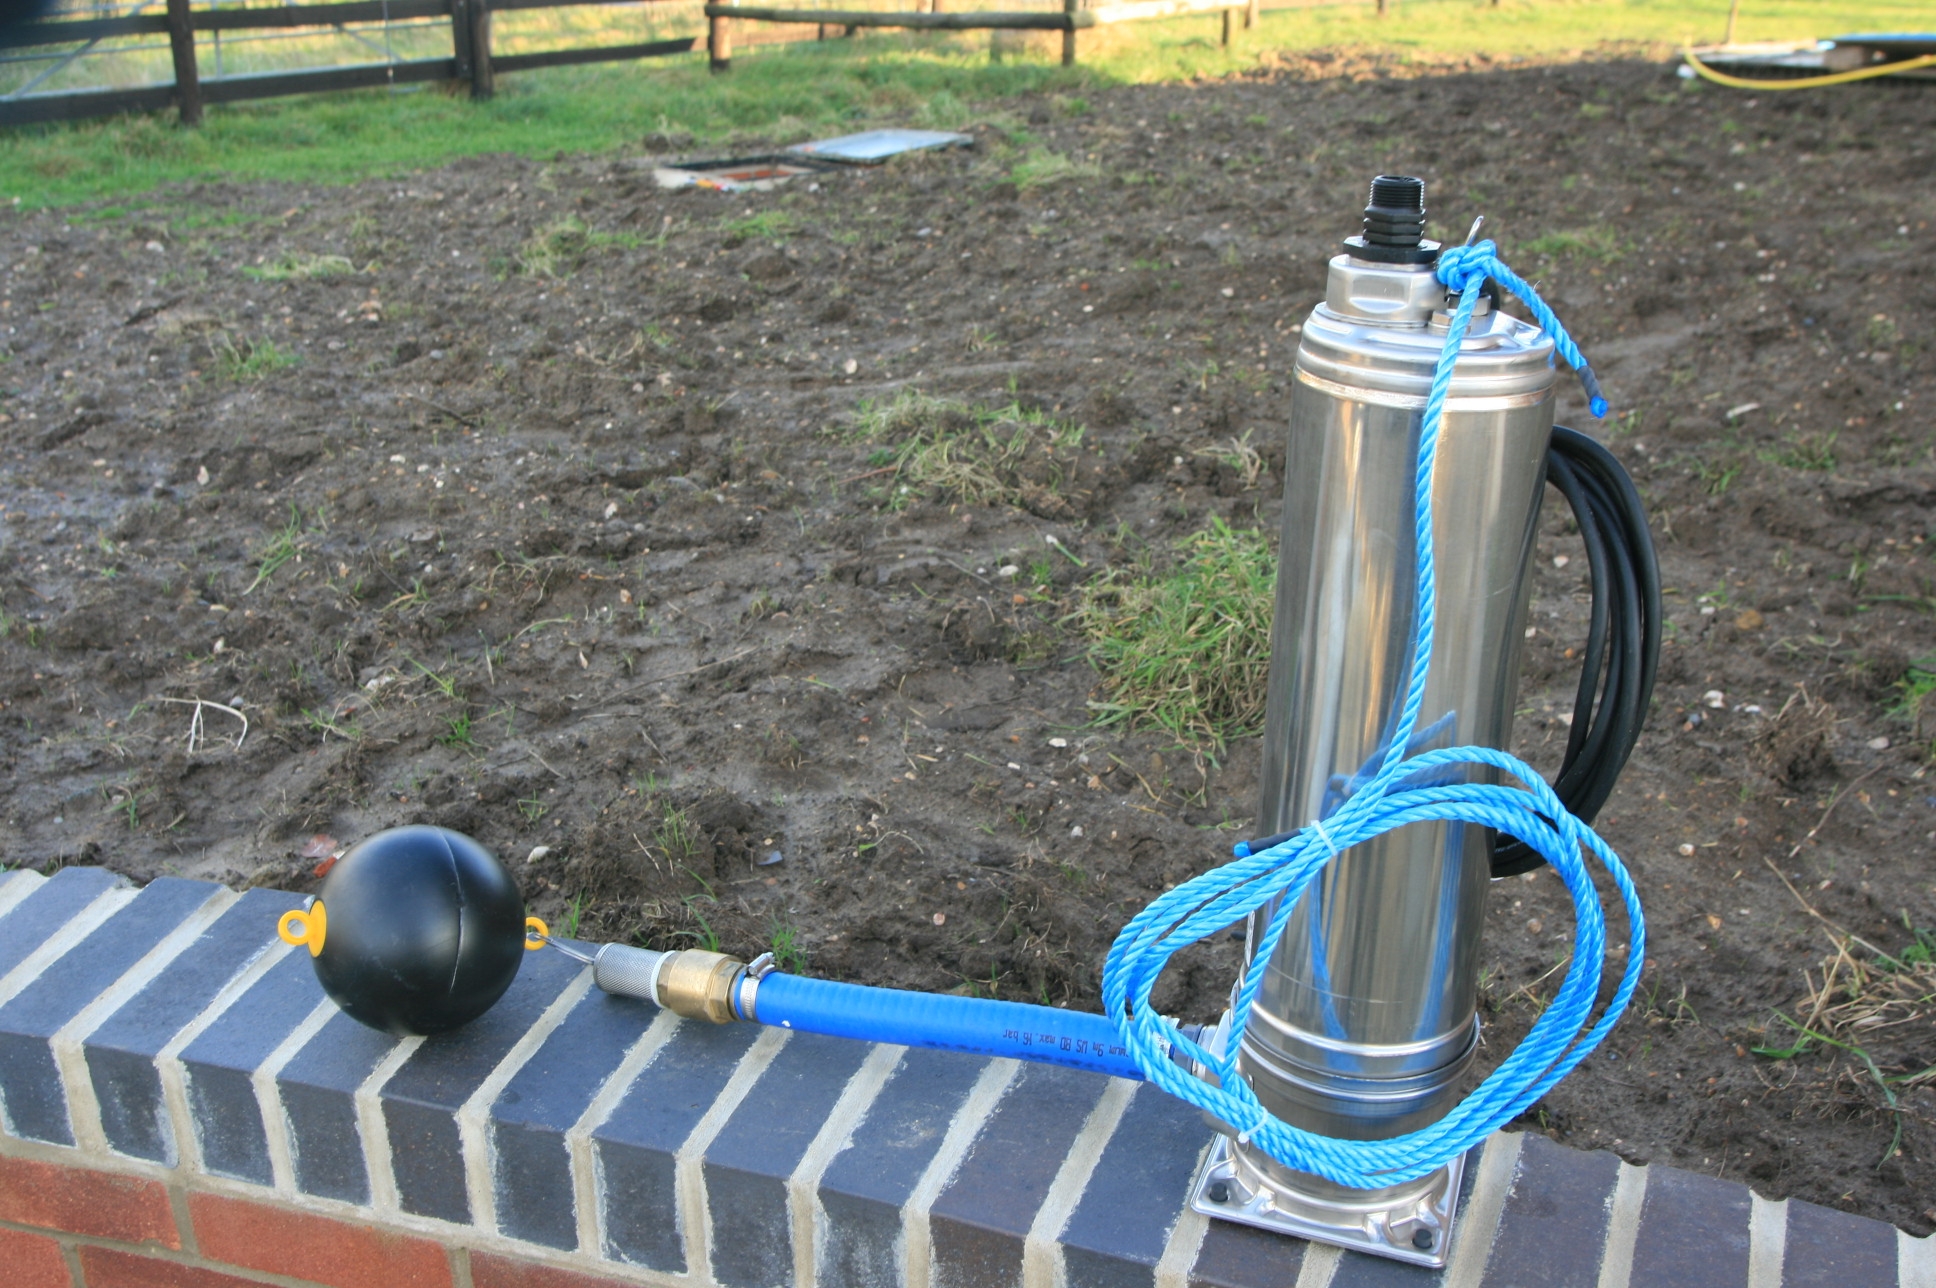
 With the toilet cisterns now connected up we need to fill the header tank in the roof space with rain water. The installation instructions for the rain water harvesting system say to leave the pump out until you are ready to install it. IIn the background you can see the cover is off the manhole into the tank. The pump assembly is ready with its float to keep the gauze mesh pick up point off the bottom of the tank and the blue cord to lower it into the tank (and retrieve it later if servicing is required!)
Published by in General, Sedum Roofing
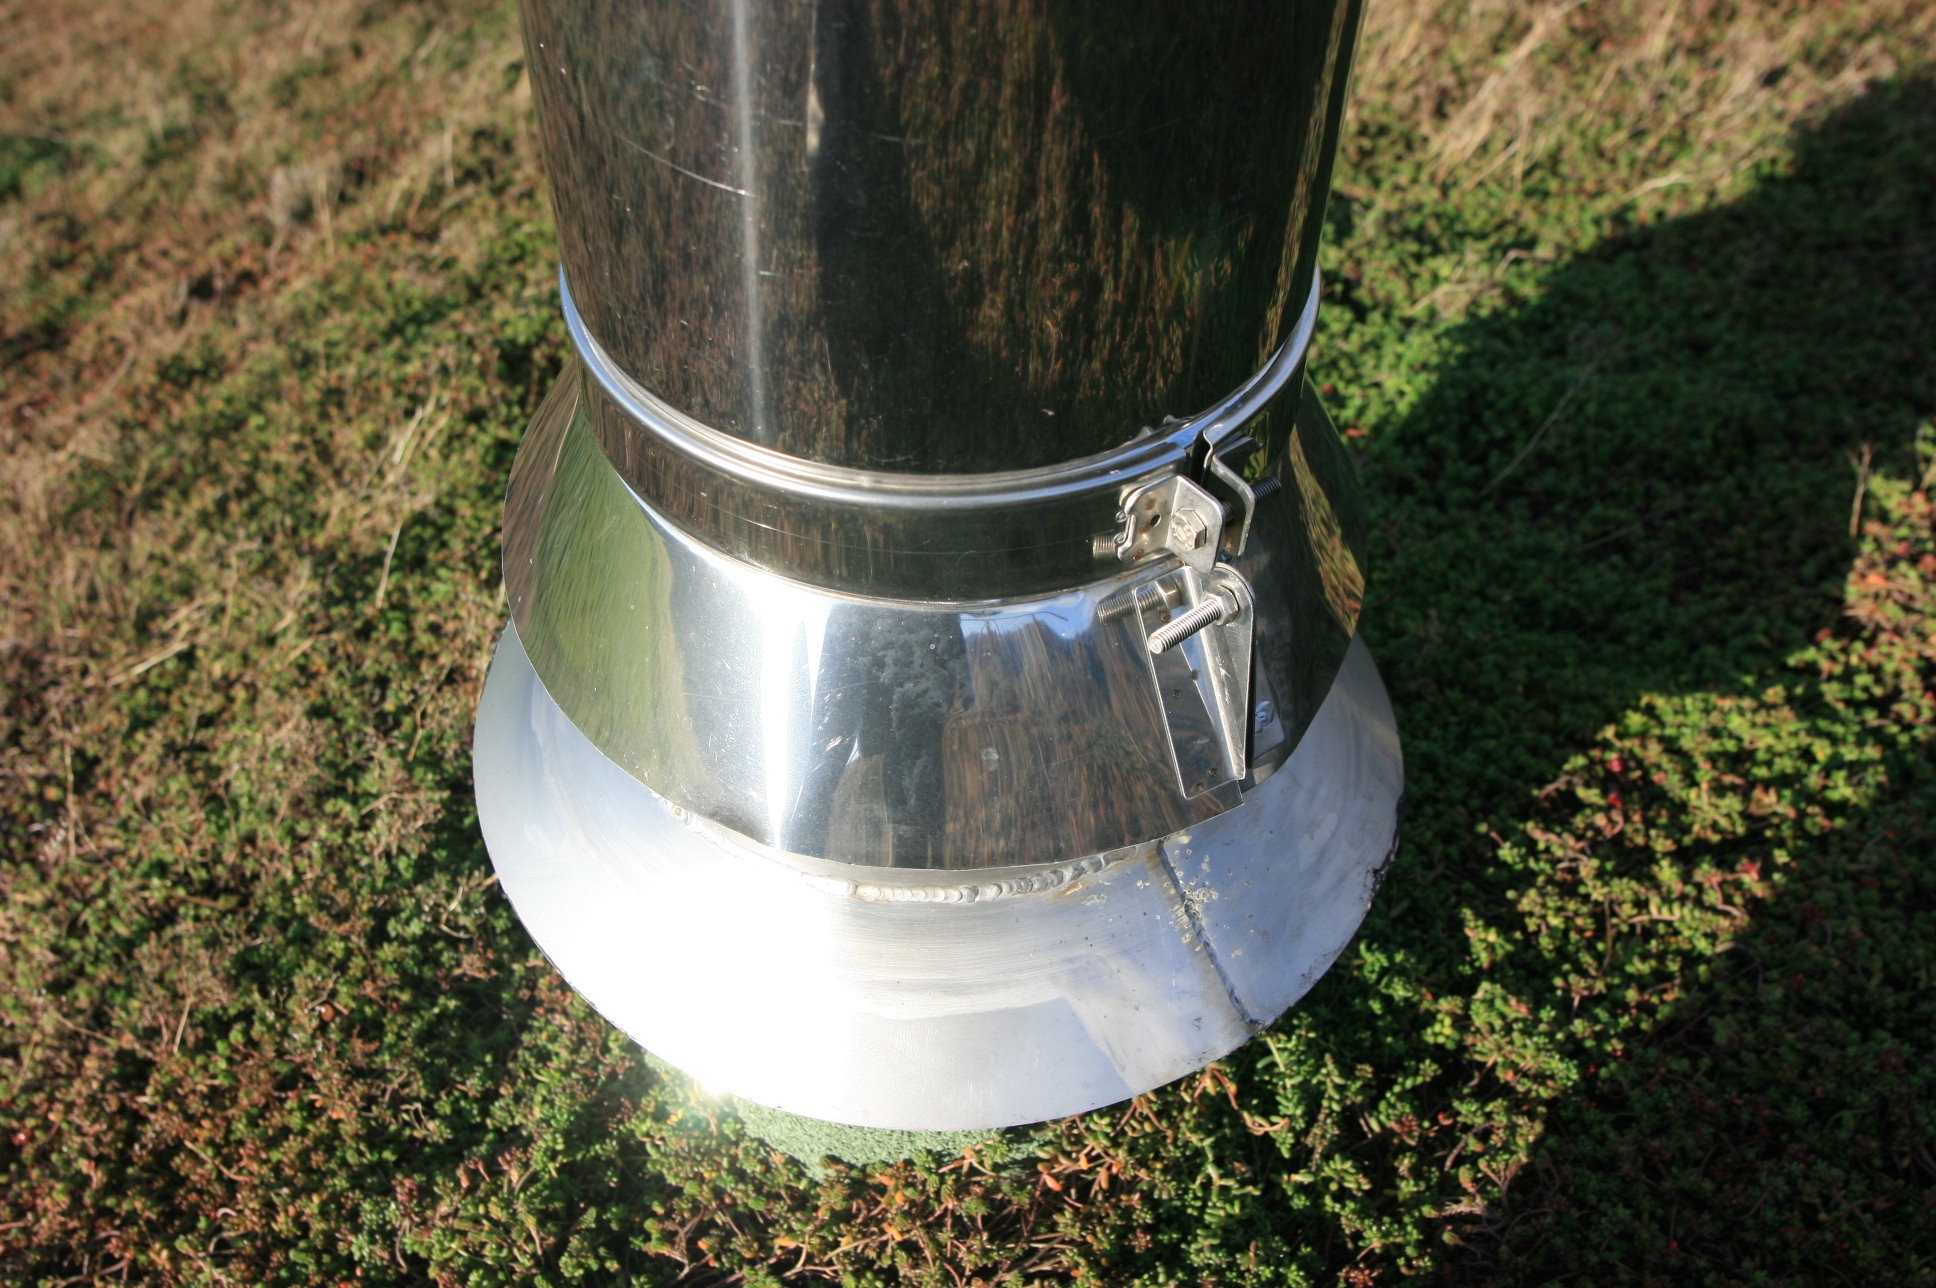
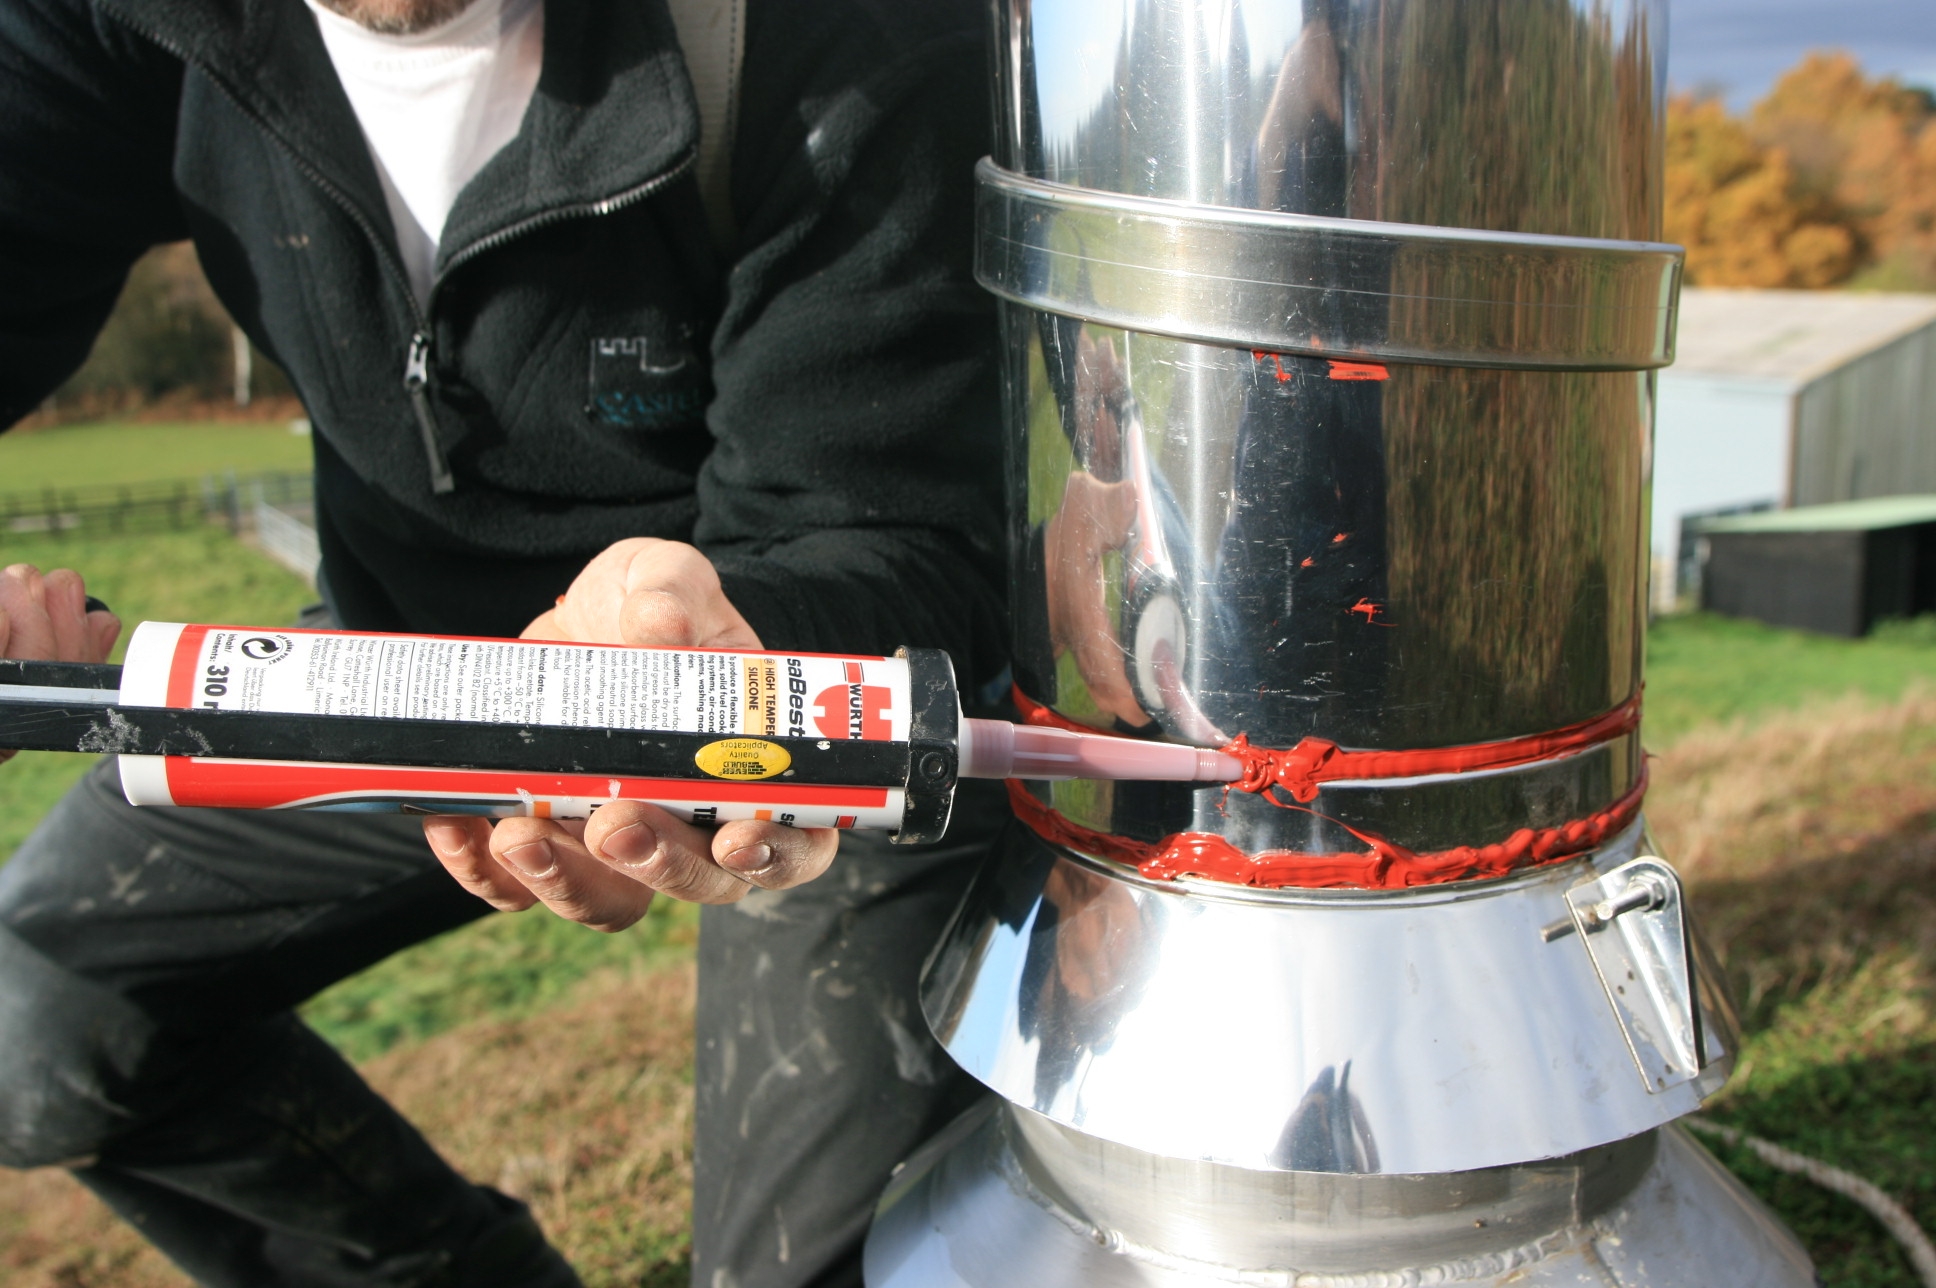
We have suffered from a small amount of water creeping in the chimney flue. It ran down the outside of the flue pipe, suggesting there was some sealing issue with the rain collar supplied with the flue.
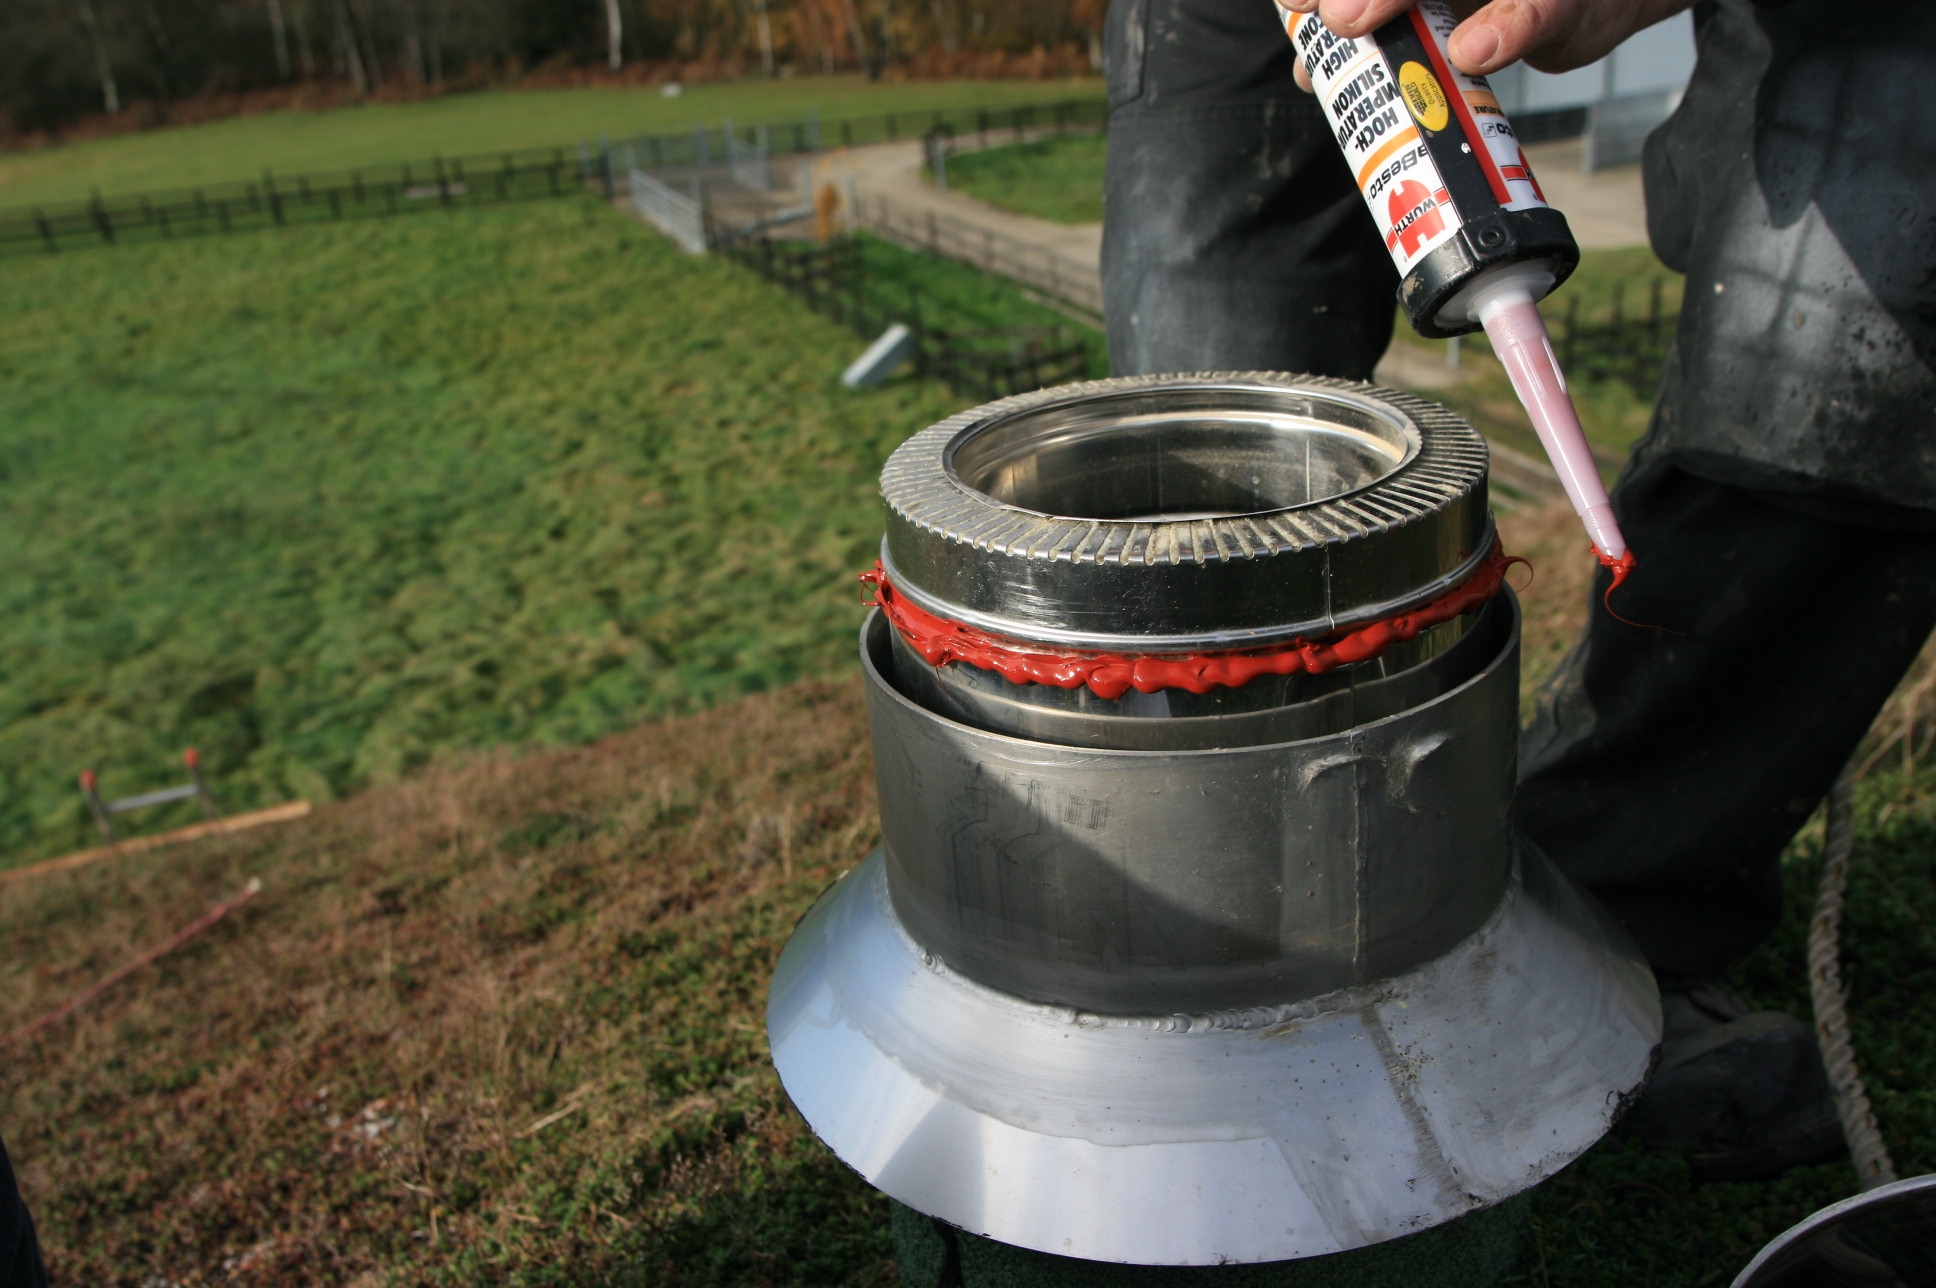
 What we weren’t aware of when we fitted the flue was that the collar needs high temperature silicone to ensure a totally watertight seal. So it was up onto the sedum roof and off with the collar and out with the silicon gun.
 As we had a whole tube of sealant and did not want to go up again, we put the high temperature silicon on the obvious places and the less obvious places to make sure we did not have to get the ladders out and up on the roof again in a hurry.
 Hopefully the next time it rains we will find the job has worked!
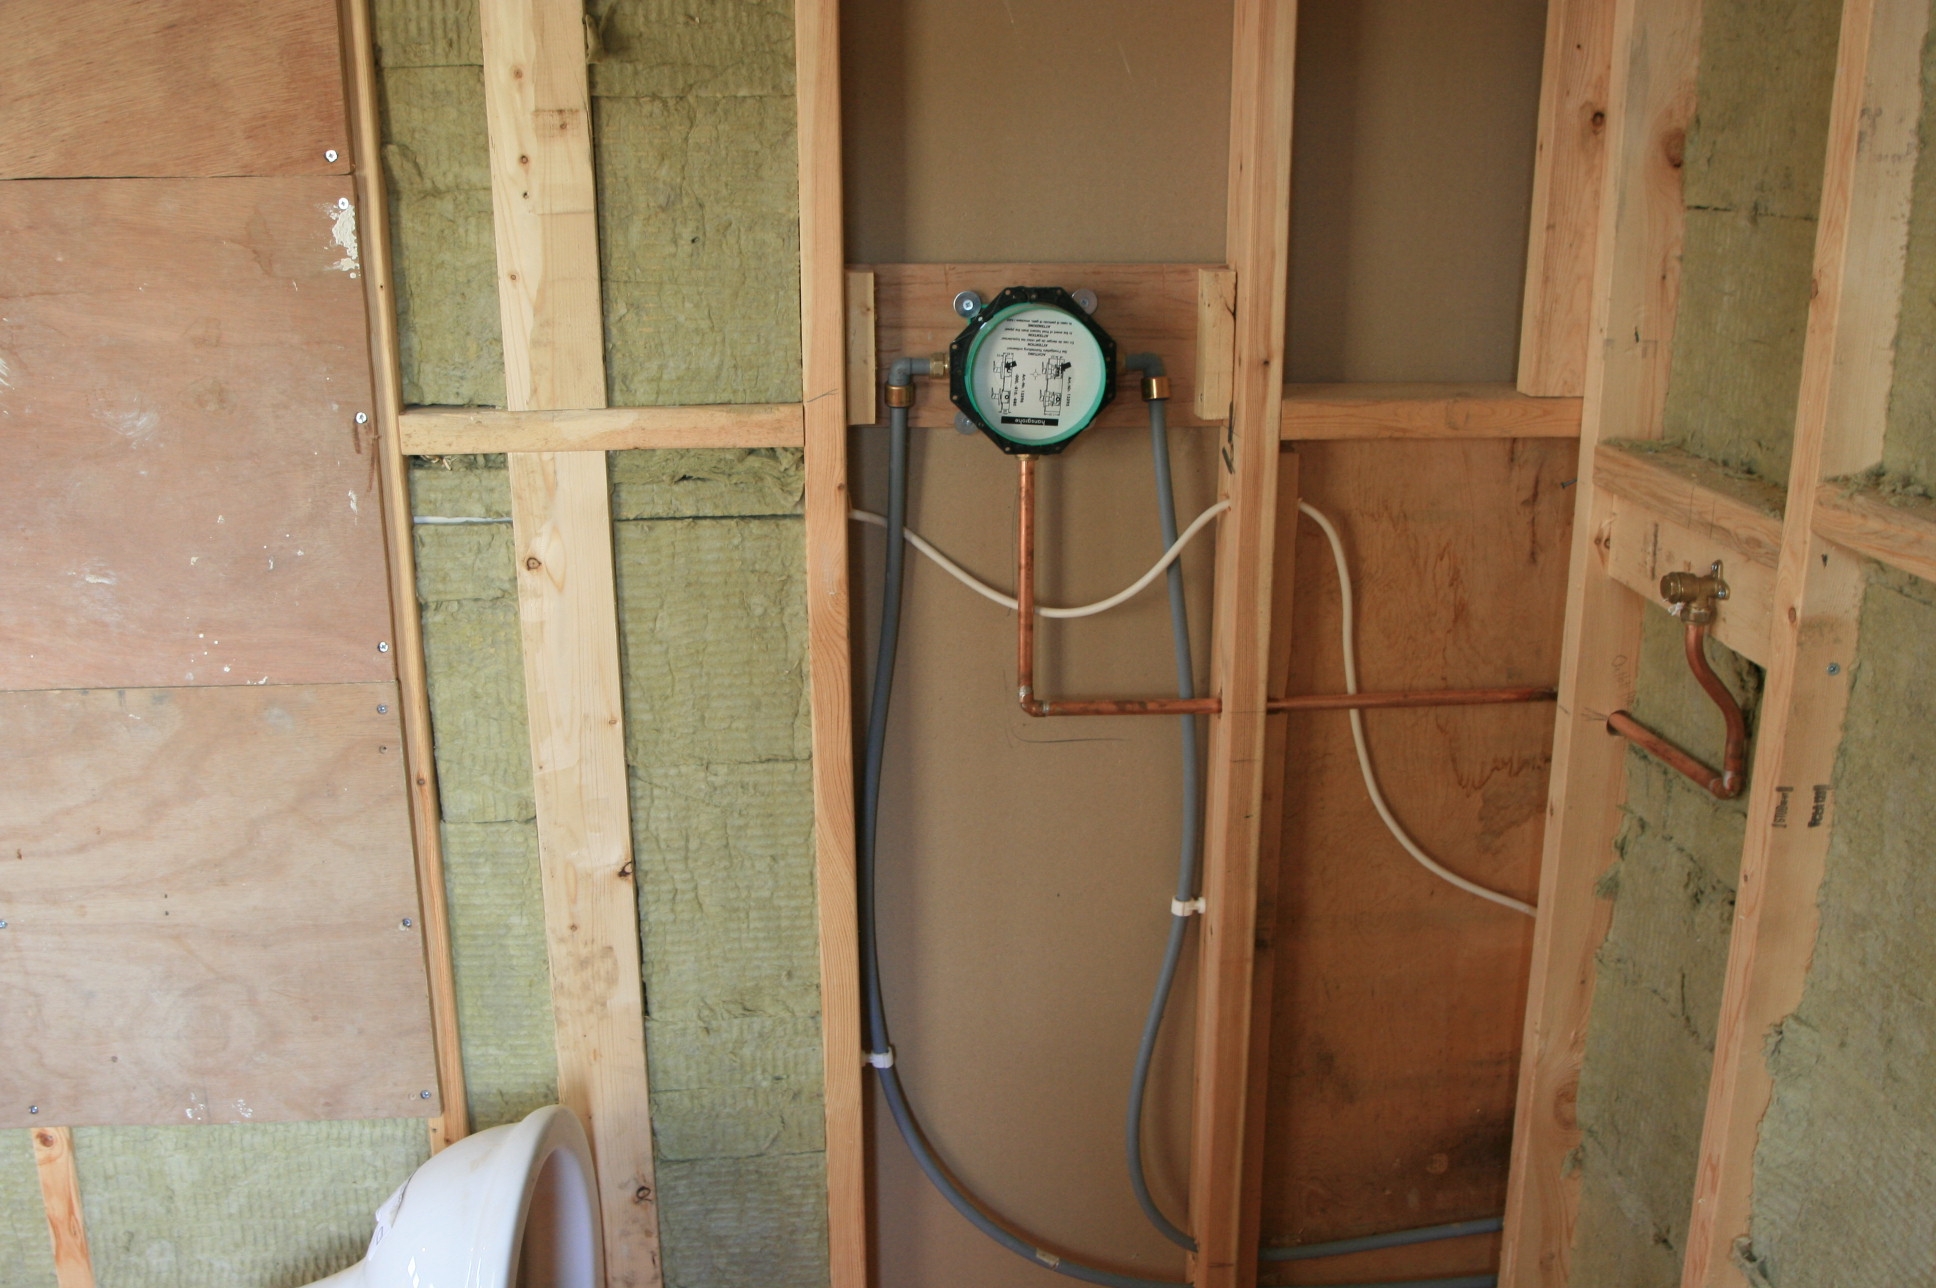 Now we have plumbed up and pressure tested the Hans Grohe I boxes we can put the 3/4″ ply on the walls of the bathrooms. This first one is the front view of the I box for the shower, so has the hot and cold coming in, and the mixed output to the shower coming out of the bottom (in copper) going to the shower outlet.
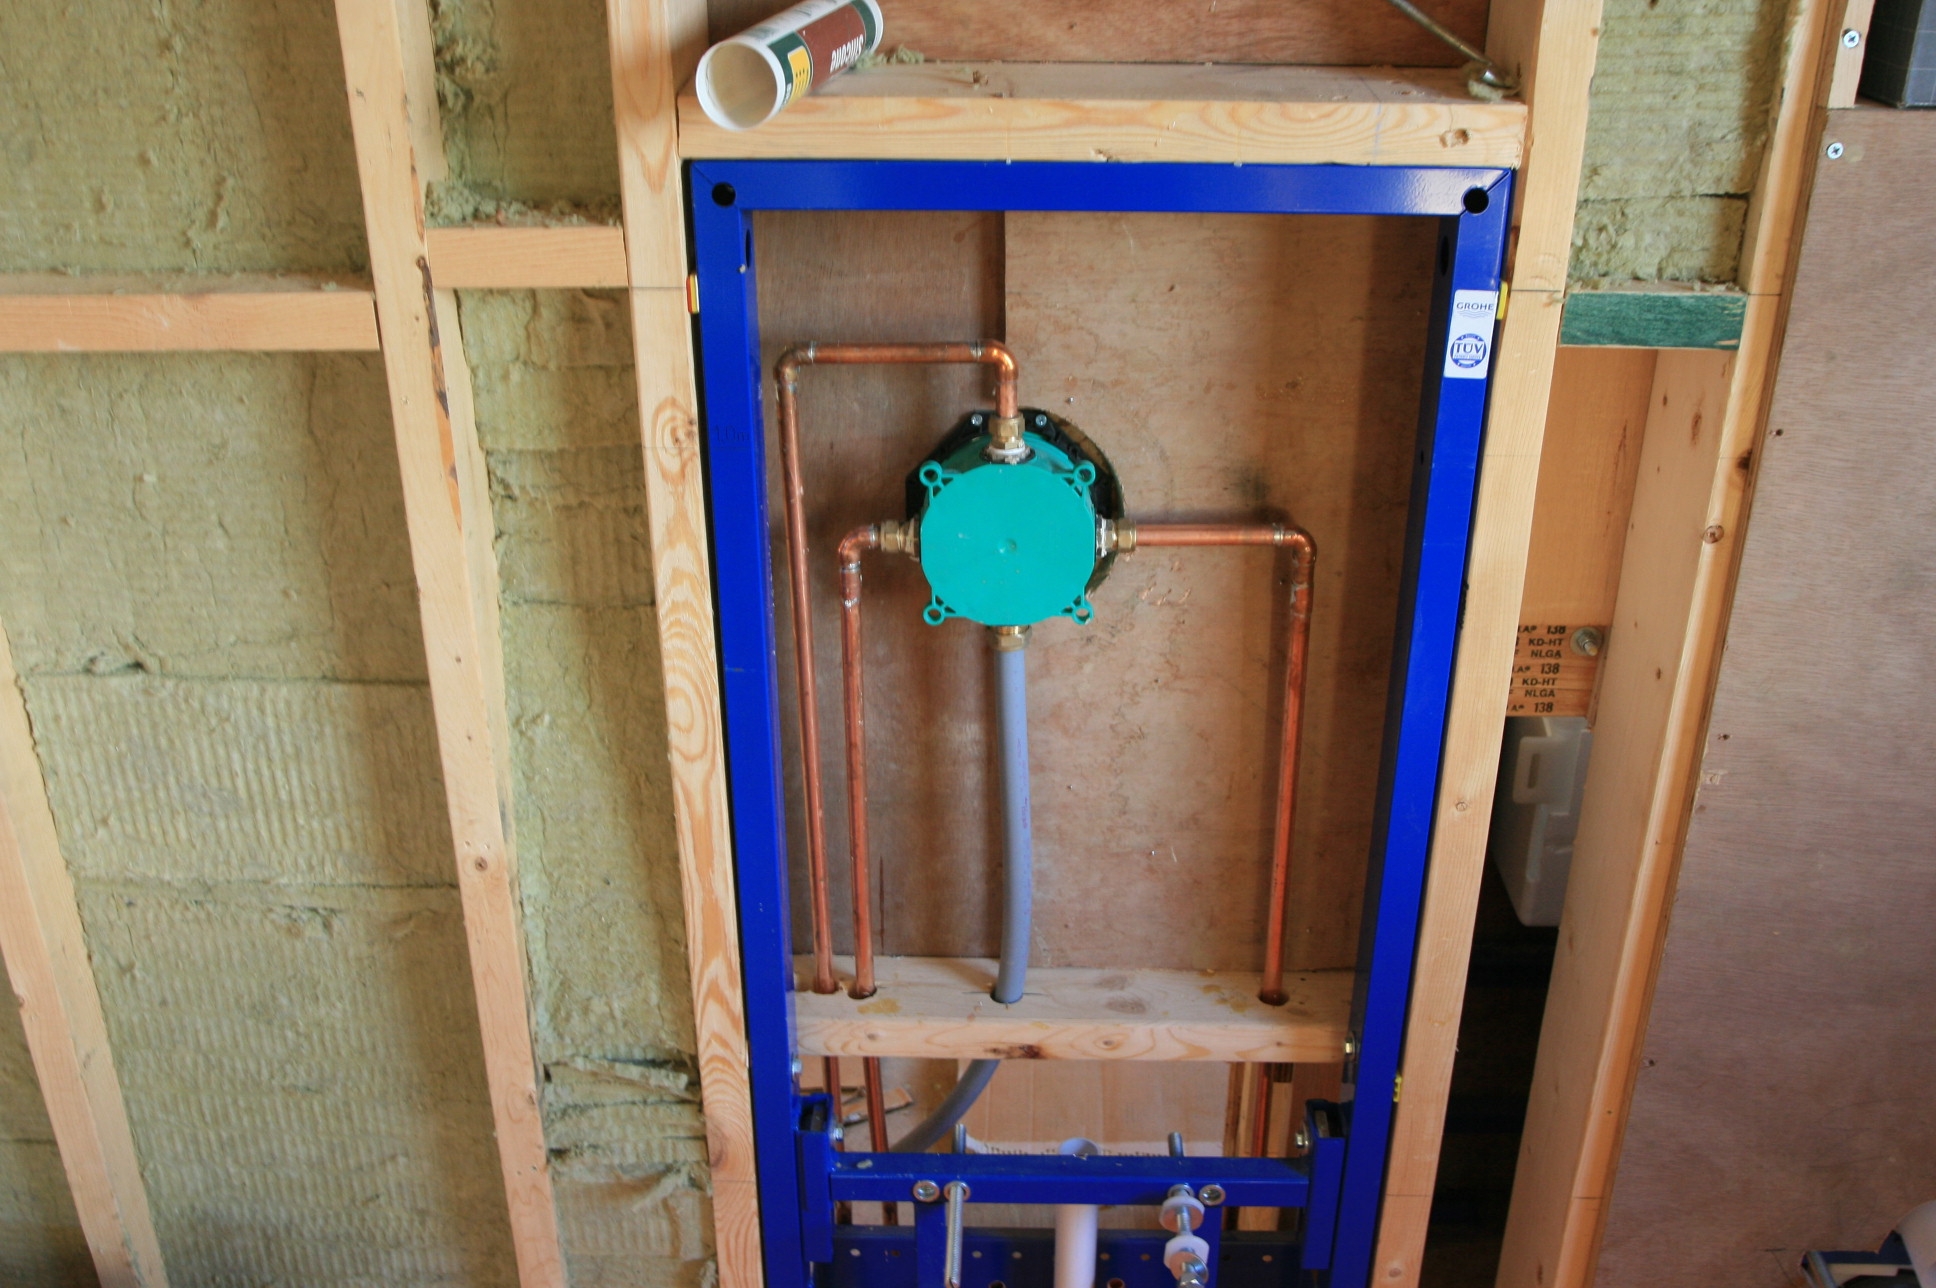 This shot is looking at the back of the mixer for the bathroom with a shower and a bath, so again the hot and cold come in from the left and right, and the output to the bath filler and the shower are at the top and bottom. However with the block design of the I box, it actually does not matter which way the pipes come into the block.